
Preparing homemade meals for your baby is a rewarding journey that allows you to control exactly what goes into their food. By making your own purees and mashes, you ensure that your little one receives fresh, nutrient-dense ingredients without any added salt, sugar, preservatives, or artificial thickeners. However, finding the time and energy to steam, chop, and blend meals daily can be challenging for busy parents. A dedicated baby food maker simplifies this transition, combining multiple cooking steps into a single, efficient appliance.
Among the various options available to parents in Singapore, the philips baby food maker range stands out as a highly popular and reliable choice. These appliances are designed to streamline the weaning process, allowing you to steam and blend ingredients in the same container. This not only saves valuable preparation time but also significantly reduces the number of dishes you need to wash. However, with multiple models on the market, ranging from basic 2-in-1 designs to advanced 4-in-1 multi-functional systems, it is essential to understand which model best fits your family’s lifestyle, kitchen space, and baby’s developmental needs.
To make an informed decision, you must evaluate how each model aligns with the specific weaning milestones your baby will cross over their first year. Your choice should also consider practical household factors, such as how much time you can dedicate to meal prep, whether you prefer batch cooking for the week, and the physical constraints of your kitchen countertop. This guide provides a detailed breakdown of the Philips Avent baby food maker options, helping you select the perfect appliance to support your baby’s nutrition journey.
Products mentioned in this guide
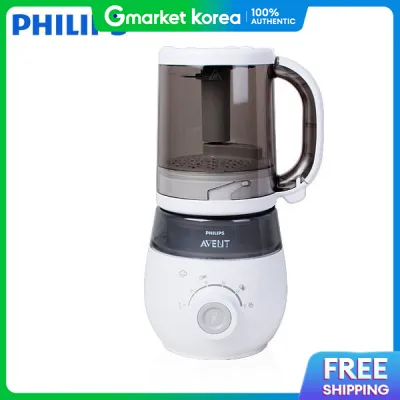
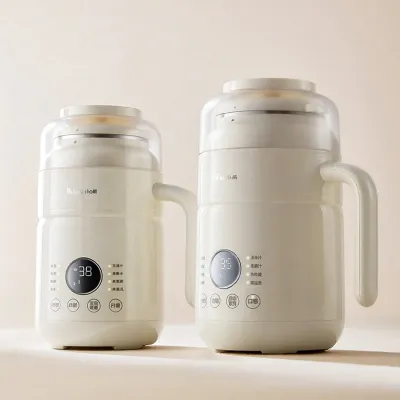
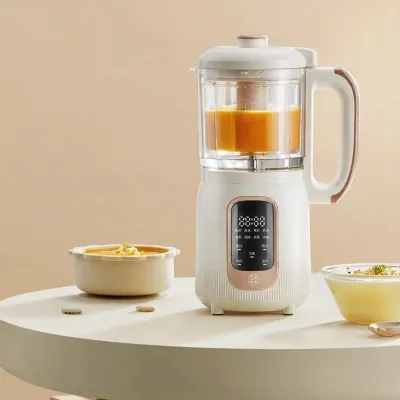
Prices are valid at publication and may change. Please refer to the product page for the latest price.
Quick Guide: Choosing by Your Baby's Weaning Stage
Selecting the right philips baby food maker depends heavily on your baby’s current weaning stage and your planned approach to meal preparation. At approximately six months of age, most infants begin their transition to solid foods, starting with single-ingredient, ultra-smooth purees. For this initial stage, a basic 2-in-1 model that focuses primarily on steaming and blending is highly efficient. This design allows you to steam fresh vegetables or fruits, flip the jar upside down, and blend them into a silky consistency. It is an excellent option for caregivers who prefer making fresh, small-batch meals every day or every other day, ensuring the baby always eats freshly prepared food.
As your baby grows and enters stage two (typically seven to nine months) and stage three (ten months and beyond), their feeding requirements become more complex. They transition from completely smooth purees to thicker mashes with soft lumps, and eventually to soft, chunky finger foods. To support this progression, advanced 4-in-1 models offer significant advantages. In addition to steaming and blending, these advanced units feature built-in defrosting and reheating functions. This multi-functionality is particularly beneficial for busy households in Singapore where parents prefer to batch cook meals on weekends, freeze them in individual portions, and safely reheat them as needed throughout the week.
Ultimately, the ideal model for your home is determined by your daily schedule, kitchen space, and weaning strategy. If you have a dedicated caregiver or helper at home who can easily prepare fresh meals daily, a basic 2-in-1 model offers exceptional value and simplicity. However, if you are a working parent balancing a busy schedule, the automated alerts, hands-free cooking cycles, and reheating capabilities of an advanced 4-in-1 model can save valuable time and effort. By matching the appliance’s features to your lifestyle, you can establish a stress-free and efficient feeding routine that adapts as your baby grows.
Core Comparison Dimensions for Philips Baby Food Makers
To choose the best model for your household, it is important to look beyond basic product names and compare the specific operational features of each appliance. Evaluating these key dimensions ensures that the machine you select will integrate smoothly into your daily routine and meet your long-term feeding goals.

Capacity and Batch Cooking
The physical capacity of the blending jar is one of the most critical factors to consider. Standard models typically offer jar capacities ranging from 800ml to 1000ml. While a difference of 200ml may seem minor, it has a significant impact on your meal preparation strategy. An 800ml jar is perfectly suited for preparing two to three small meals at a time, making it ideal for parents who prefer daily or short-term meal prep.
On the other hand, a larger 1000ml jar allows you to steam and blend up to four or five portions in a single cycle. This is a major advantage if you plan to practice batch cooking, where you prepare a week’s worth of meals in one go and store them in the freezer. In Singapore, where modern apartment kitchens often have limited counter and cabinet space, you must balance the benefits of a larger jar with the physical footprint of the machine. Always verify the manufacturer’s official specifications for the exact usable capacity for both steaming and blending, as these volumes can differ within the same model.
Functionality (2-in-1 vs. 4-in-1)
The choice between a 2-in-1 and a 4-in-1 model determines how hands-on you must be during the cooking process. A basic 2-in-1 model operates on a manual flip-and-blend system. You fill the water tank, place your chopped ingredients into the jar, and start the steam cycle. Once the steaming is complete, you must manually lift the jar, turn it upside down, lock it back onto the motor base, and hold down the blend button until the food reaches the desired consistency.
An advanced 4-in-1 model automates much of this process and introduces additional preparation modes. These models typically feature integrated timers with clear audible alerts, so you do not have to monitor the steaming process constantly. Furthermore, the inclusion of dedicated defrosting and reheating functions allows you to warm up pre-frozen homemade meals safely within the machine. This eliminates the need to use a microwave, which can heat unevenly and create dangerous hot spots in your baby’s food, or a stovetop double-boiler, which requires constant supervision and extra cleanup.
Ease of Cleaning and Maintenance
Because you will use your baby food maker daily, ease of cleaning is paramount for maintaining high hygiene standards. Most models feature dishwasher-safe jars, lids, and blade assemblies, which can save considerable time. However, even if you use a dishwasher, you will often find yourself rinsing and washing parts by hand between meals.
When comparing models, pay close attention to the design of the blade assembly. Look for units where the blades can be easily detached from the jar, allowing you to thoroughly clean the underside where food residue can easily become trapped. The design of the water tank is equally important. Heating water repeatedly leads to mineral buildup, known as limescale. A water tank with a wide opening allows for easy visual inspection, physical wiping, and hassle-free descaling, which is essential for preventing mold and maintaining the heating element’s efficiency, especially in Singapore’s humid climate.
Footprint and Storage
Countertop space is highly valued in Singaporean households, particularly in HDB flats and compact apartments. A bulky, heavy appliance can quickly clutter your workspace and make meal prep feel disorganized. Before purchasing, check the physical dimensions of each model to ensure it fits comfortably on your counter without blocking other essential appliances.
Some models are designed with a vertical, slim profile that occupies minimal counter real estate, while others have a wider base to accommodate advanced electronic control panels. If you do not intend to keep the machine on your countertop permanently, consider how easily it can be stored. Models with integrated cord storage and modular, stackable components are much easier to pack away into standard kitchen cabinets and retrieve when needed, making your daily routine far more efficient.
Matching Features to Your Baby's Developmental Stages
As your baby grows, their nutritional needs and oral motor skills change rapidly. A high-quality baby food maker should be versatile enough to adapt to these changing requirements, supporting your child through every stage of their weaning journey.
Stage 1: Smooth Purees (Around 6 Months)
At the beginning of the weaning journey, around six months of age, your baby’s digestive system is still developing. Their very first solid foods must be completely smooth, silky purees with absolutely no lumps. This texture is crucial for helping your baby learn how to swallow solid food safely and comfortably. Gentle steaming is the ideal preparation method during this stage because it cooks ingredients like carrots, sweet potatoes, apples, and pears while preserving their natural nutrients.
The unique design of the Philips Avent system ensures that the nutrient-rich cooking juices are retained inside the jar during the steaming process. When you flip the jar to blend, these juices are mixed back into the puree, ensuring your baby receives all the water-soluble vitamins and minerals. The powerful blending motor and sharp blades are engineered to pulverize even fibrous vegetables and tough skins, delivering a perfectly consistent, lump-free texture that reduces the risk of gagging and encourages easy digestion.
Stage 2: Mashed and Textured Foods (7 to 9 Months)
Once your baby has mastered smooth purees, typically between seven and nine months, it is time to transition them to textured foods. This stage is essential for developing their jaw muscles, oral motor skills, and speech coordination. Instead of blending food into a completely smooth liquid, you must begin introducing soft, manageable lumps that encourage your baby to practice chewing.
To achieve this texture, you need precise control over the blending process. Models that feature a pulse function or allow you to control the blending duration manually are highly beneficial here. Instead of holding the blend button down continuously, you can apply short, controlled pulses while visually monitoring the consistency through the transparent jar. This allows you to stop blending when the food reaches a finely chopped or mashed texture. For example, you can steam salmon and broccoli together, then pulse them briefly to create a textured mash that still contains small, soft pieces that are safe for your baby to chew.
Stage 3: Chunky Meals and Family Foods (10 Months and Beyond)
By ten months of age and older, many babies are ready to transition to chunky meals, soft finger foods, and baby-led weaning (BLW). At this stage, your baby is learning to feed themselves and explore different food shapes and textures. While you may no longer need the blending function as frequently, the steaming capability of your baby food maker remains incredibly useful.
You can use the steaming basket to cook soft vegetable sticks, such as pumpkin, butternut squash, or carrot batons, as well as small pieces of fish or chicken. Steaming cooks these finger foods to the perfect level of softness—where they can be easily mashed between your baby’s gums or fingers—without losing valuable nutrients to boiling water. Additionally, if you have batch-cooked and frozen textured meals, the reheating function of an advanced model allows you to quickly and safely warm up pre-prepared chunky meals, making mealtime highly efficient as your baby transitions to eating modified versions of your family’s daily meals.
Safety, Hygiene, and Daily Usability
When preparing food for an infant, safety and hygiene are paramount. Operating a steam-based kitchen appliance requires strict adherence to standard safety protocols to protect both the caregiver and the baby, while regular maintenance is essential to ensure the longevity and cleanliness of the machine.
Material Verification
Because baby food makers use high-temperature steam to cook ingredients, you must ensure that all plastic parts that come into contact with food or water are completely safe. High temperatures can cause low-quality plastics to leach harmful chemicals into the food. Before making a purchase, always verify that the specific model is certified BPA-free and constructed from food-grade materials. This information can be confirmed by checking the product packaging, the official user manual, or the manufacturer’s authorized website. To ensure compliance with local safety standards, it is highly recommended to purchase your appliance from authorized local retailers in Singapore rather than unverified parallel importers.
Safe Handling Practices
Operating a steam-based appliance requires careful handling to prevent accidental burns. During the steaming cycle, extremely hot steam is released through designated vents, which are typically located on the lid or the back of the machine. Always position the appliance on a flat, stable surface out of reach of children, and ensure the steam vents are pointed away from walls, cabinets, and your face.
When cleaning the appliance, handle the blade assembly with extreme care. The blades are exceptionally sharp and should always be held by the central plastic spindle, never by the metal edges. Look for models equipped with built-in safety lock systems that prevent the motor from starting if the jar or lid is not securely locked into place. Additionally, an automatic shut-off feature is a critical safety component; it automatically turns off the heating element when the water tank runs dry, preventing overheating and potential damage to the appliance.
Hygiene and Descaling
Maintaining a clean water tank is vital for your baby’s health and the machine’s performance. Over time, heating water causes mineral deposits, known as limescale, to accumulate on the heating element. If left uncleaned, this buildup can reduce heating efficiency, cause unpleasant odors, and create a damp environment where mold can grow.
To prevent this, you must descale the water tank regularly. A standard, food-safe method involves filling the water tank with a solution of white vinegar or citric acid mixed with water, allowing it to sit for a few hours to dissolve the mineral deposits, and then rinsing the tank thoroughly with clean water. Because different models use different materials and heating elements, always consult your specific model’s manufacturer instructions for the exact dilution ratios, wait times, and descaling frequency. Never use harsh chemical descalers or bleach, as these can leave toxic residues that could contaminate your baby’s food.
Decision Framework: Which Model Should You Buy?
To finalize your decision, it is helpful to use a structured framework that matches your specific household needs, kitchen space, and budget to the most suitable Philips Avent model.
Choose a Basic 2-in-1 Model If:
- Counter Space is Limited: You live in a compact HDB flat or apartment and need an appliance with a small physical footprint that is easy to store in standard kitchen cabinets.
- You Prefer Fresh, Daily Prep: You enjoy preparing small, fresh portions of food for your baby every day and do not need to batch cook or store large quantities in the freezer.
- You Value Simplicity: You prefer a straightforward, highly reliable machine with fewer electronic components and do not mind manually flipping the jar and holding the blend button.
Choose an Advanced 4-in-1 Model If:
- You Plan to Batch Cook: You want to save time by preparing large quantities of baby food on the weekend, freezing them in individual portions, and storing them for the week ahead.
- You Need Defrosting and Reheating: You want the convenience of safely defrosting and reheating frozen homemade meals directly in the same appliance, eliminating the need for microwave warming.
- You Value Hands-Free Convenience: You have a busy schedule and want automated timers, clear sound alerts, and hands-free cooking cycles that allow you to attend to your baby while the food cooks.
Important Verifications Before Purchase
Before completing your purchase, always perform these final checks:
- Power Compatibility: Verify that the appliance is configured for Singapore's electrical standards (230V, 50Hz) and comes with a standard Type G three-pin plug. Avoid using travel adapters with high-wattage heating appliances.
- Included Accessories: Check the product description to see what accessories are included in the box. Some advanced models include storage pots, spatulas, or recipe books, which add significant value to your purchase.
- Warranty and Support: Confirm that the seller provides a valid manufacturer's warranty recognized by authorized service centers in Singapore. This ensures you can easily access customer support, repairs, or replacement parts if needed.
Frequently Asked Questions (FAQ)
Can I use a standard kitchen blender instead of a dedicated baby food maker?
While you can technically prepare baby food using standard kitchen appliances, a dedicated baby food maker offers several distinct advantages, particularly during the early stages of weaning. Preparing baby food with standard equipment typically involves a multi-step process: steaming or boiling the ingredients in a pot on the stovetop, transferring the hot food into a separate countertop blender, and then washing multiple pots, steaming baskets, and blender jars. An integrated baby food maker allows you to steam and blend in a single jar, which significantly reduces preparation time, minimizes kitchen clutter, and cuts down on the amount of washing up required after every meal.
Furthermore, dedicated baby food makers are specifically engineered to handle very small portions of food. During the first few weeks of weaning, your baby may only consume one or two tablespoons of puree per meal. Standard household blenders often struggle to process such small quantities because the food gets pushed to the sides of the large blending jar, away from the blades. To make a standard blender work, you often have to add a large amount of water, which dilutes the nutritional density and natural flavor of the food. A dedicated baby food maker’s compact jar and specialized blade design ensure that even tiny portions are blended to an ultra-smooth consistency without unnecessary dilution, ensuring your baby gets the maximum nutrition from every single bite.

Community discussion
Share your experience or ask a question. Comments are reviewed before publication.