
The right drinking cup for your child depends on their physical milestones, oral motor skills, and hand-eye coordination rather than age alone. Transitioning from a bottle is a gradual process where children move from sucking reflexes to mature swallowing patterns. By matching the cup’s design—whether a sippy, straw, 360°, or open cup—to your child’s current developmental stage, you can support their oral health and motor skills while minimizing mealtime frustration.
Signs Your Child Is Ready to Transition from a Bottle
Recognising when your child is ready to transition from a bottle involves watching for key physical and behavioral milestones. One of the primary indicators is the ability to sit upright independently with good head control. This physical stability is crucial for safe swallowing and helps prevent choking when introducing new drinking mechanisms.
Another clear sign is the development of basic hand-to-mouth coordination. If your child can grasp toys and bring them directly to their mouth, they likely possess the motor skills needed to hold and guide a training cup. You might also notice them reaching for your own glass or mimicking the way you drink during family meals, showing a cognitive interest in adult drinking habits.
Products mentioned in this guide
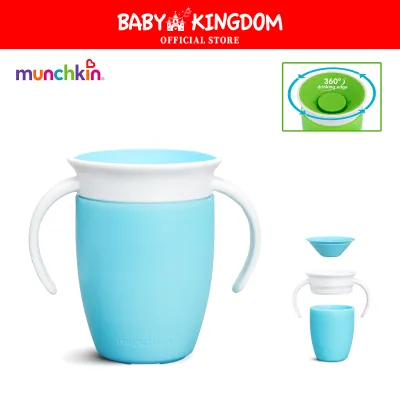
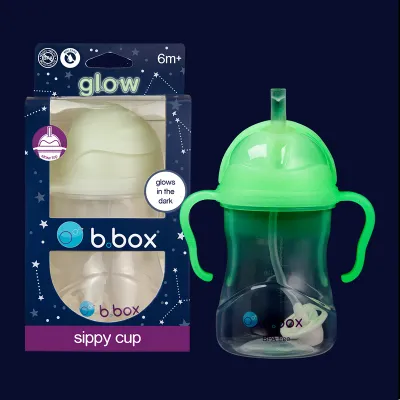
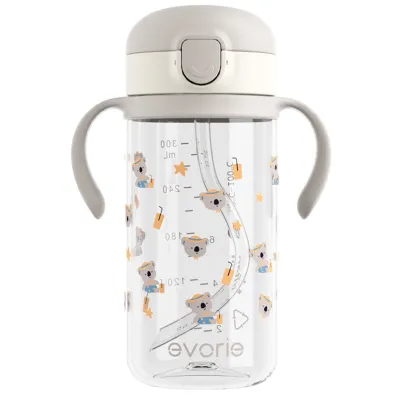
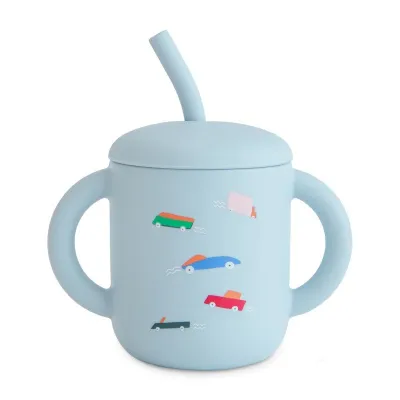
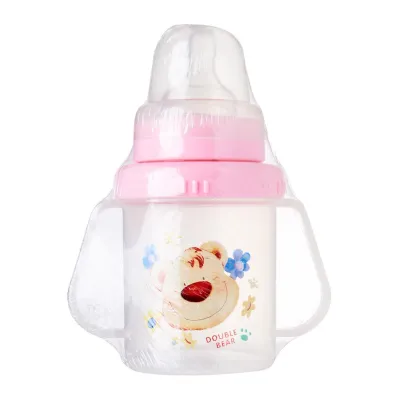
Prices are valid at publication and may change. Please refer to the product page for the latest price.
Additionally, observe how your child handles solid foods. If they can swallow smooth, semi-solid purees or soft foods without reflexively pushing them out with their tongue, their oral motor control is maturing. This transition in tongue movement is a strong indicator that they are ready to practice drinking from something other than a bottle nipple.
Matching Cup Types to Developmental Skills
Choosing the right cup requires looking closely at your child’s current oral motor skills and hand strength. Different cup designs target specific developmental milestones, helping your child transition from the simple suckling reflex used with bottles to the complex lip, tongue, and jaw movements needed for open cups.

Sippy Cups with Hard or Soft Spouts
Sippy cups with spouts are often the first step parents consider when moving away from bottles. These cups are highly effective for early transitions because they require basic suction skills that are already familiar to your child, while offering excellent spill control to keep your home tidy. The spout provides a familiar shape that fits easily into a young child’s mouth.
When selecting a spout cup, it is essential to verify the manufacturer’s age guidelines and inspect the spout material. Soft silicone spouts are gentle on sensitive gums, making them suitable for younger babies, while hard plastic spouts offer more durability as teeth emerge. Always check the product packaging to ensure the materials align with your child’s age bracket.
Keep a close eye on how your child interacts with the spout. If you notice them constantly biting or chewing on the spout rather than sipping from it, this may indicate that their biting reflex is dominant or that they are ready to upgrade to a different cup style. Continuous biting can also wear down soft materials, creating potential safety hazards.
Straw Cups
Straw cups are highly recommended by pediatric specialists because they promote advanced oral motor skills. Unlike spouts, drinking from a straw requires your child to develop a strong lip seal and active tongue retraction. This action strengthens the muscles in the lips, cheeks, and tongue, which are essential for speech development and mature swallowing patterns.
Before introducing a straw cup, observe whether your child can draw liquid up through the straw without simply chewing on the tip. Some children may initially struggle to understand the concept of suction without tilting the cup. Weighted straw designs can help by ensuring the straw remains in the liquid even when the cup is tilted.
It is also important to check the straw’s valve mechanism. Many spill-proof straw cups feature a built-in valve that requires a bite-and-sip action to release liquid. Ensure this mechanism matches your child’s suction strength; if the valve is too tight, your child may become frustrated and refuse to use the cup.
360° Training Cups
The 360-degree training cup is designed to mimic the experience of drinking from a regular open cup while preventing spills. It features a circular rim with a silicone valve that seals automatically when your child stops drinking. This design encourages a mature swallowing pattern, as your child must sip from the edge rather than suck on a spout or straw.
To use a 360° cup successfully, your child must understand how to apply gentle lip pressure to the silicone valve to release the liquid. This requires a combination of lip strength and coordination. It is an excellent intermediate step for toddlers who are eager to drink like adults but still prone to tipping their cups over.
However, some children may experience frustration if they cannot immediately figure out the bite-and-sip mechanism required by the valve. If you notice your child struggling or becoming upset during meals, it may be best to temporarily switch back to a straw cup or offer guided practice with an open cup until their coordination improves.
Open Trainer Cups
Open trainer cups represent the final stage of the cup transition process. Drinking from an open cup requires refined hand-eye coordination, precise jaw stability, and the ability to judge how much to tilt the cup without spilling. Introducing this cup early, even in small increments during bath time or supervised meals, helps build confidence.
When shopping for an open trainer cup, look for designs specifically tailored for small hands. Cups with small, ergonomic double handles allow for a secure, two-handed grip, while those with weighted bases help prevent accidental tipping on the table. Slanted rims can also make it easier for toddlers to drink without tilting their heads back too far.
As your child learns to navigate an open cup, expect minor spills to be a natural part of the learning process. Using small amounts of water—just a few sips at a time—can keep messes manageable while giving your child the freedom to practice their pouring and sipping skills independently.
Signs It Is Time to Upgrade the Current Cup
As your child grows, their drinking needs and physical capabilities will change, meaning their current cup may eventually hinder their progress. One clear sign that it is time to upgrade is when you observe your child constantly chewing, biting, or tearing at the silicone spout or straw. This behavior often indicates that they are teething or have outgrown the sucking mechanism of that specific cup.
Another indicator is frustration during drinking sessions. If your child takes an excessively long time to finish a small amount of liquid, or if they pull away from the cup crying, the flow rate may be too slow for their developing suction strength. Conversely, if they cough or sputter, the flow might be too fast, suggesting they need a cup with a more controllable valve.
Finally, monitor the cup for frequent leaks or structural wear. If the valve or seal is no longer functioning correctly, liquid may escape easily, defeating the purpose of a spill-proof design. Worn-out seals can also harbor bacteria, making it essential to replace the cup or upgrade to a more advanced model that matches their current skills.
Safety, Hygiene, and Maintenance Checks
Maintaining a strict safety and hygiene routine is vital when managing your child’s drinking cups. Because these cups often feature complex parts like valves, straws, and seals, they require regular inspection. Take a moment before each wash to check silicone components for micro-tears, warping, or detached pieces, as damaged parts can become choking hazards or lose their spill-proof functionality.
Mold buildup is a common issue in toddler cups, particularly within hidden valves and straw channels. To prevent this, always follow the manufacturer’s specific disassembly and cleaning instructions. Completely disassemble all parts—including removing silicone rings and valves—after every use, and wash them thoroughly using small, specialized cleaning brushes designed for straws and tight crevices.
Before purchasing or cleaning any cup, check the product labels for material safety and care guidelines. Verify if the cup is dishwasher-safe and note whether it should be placed on the top rack only to prevent heat damage. Ensuring the materials are free from harmful chemicals and can withstand your preferred sterilization method will keep your child’s drinking experience safe and healthy.
Frequently Asked Questions (FAQ)
When should I completely stop using a bottle?
Most pediatricians recommend starting the transition away from bottles around six months of age, with the goal of weaning completely by 12 to 18 months. Prolonged bottle use can impact dental alignment and oral development. Observe your child’s readiness signs, such as sitting upright and showing interest in cups, and consult your pediatrician or family dentist for personalized advice tailored to your child’s specific growth.
Can I skip the sippy cup and go straight to a straw or open cup?
Yes, you can absolutely skip the traditional sippy cup. Many developmental experts recommend moving directly from a bottle to a straw cup or an open trainer cup. Because every child develops at their own pace, the transition depends entirely on their individual oral motor skills and comfort level rather than a strict, mandatory sequence of cup types.
How do I clean the hidden valves in 360° and straw cups?
To clean hidden valves effectively, always refer to the manufacturer’s manual for proper disassembly steps. Remove all silicone valves, straws, and gaskets completely. Use a dedicated, fine-bristled straw brush with warm, soapy water to scrub inside the narrow passages. Allow all components to air dry completely in a well-ventilated area before reassembling them to prevent moisture retention and mold growth.

Community discussion
Share your experience or ask a question. Comments are reviewed before publication.