
Trimming a newborn’s nails can feel incredibly daunting for new parents. Their tiny fingers are constantly moving, and their nails are paper-thin, making the task feel like a high-stakes operation. To make this process safe and stress-free, selecting the correct grooming tool is essential. Pigeon offers specialized baby nail scissors designed for different developmental stages, primarily categorized into newborn (0 to 3 months) and older infant (3 months and beyond) models. Choosing the right model depends entirely on your baby’s current age, nail thickness, and physical activity levels. By matching the tool’s blade length and handle design to your baby’s growth stage, you can safely maintain their hygiene and prevent accidental scratches.
Quick Guide: Which Pigeon Scissors Model Fits Your Baby?
Selecting the right grooming tool requires understanding how your baby’s physical development dictates the design of their nail care products. Pigeon baby nail scissors are engineered with specific age brackets in mind, which are clearly indicated on the product packaging.
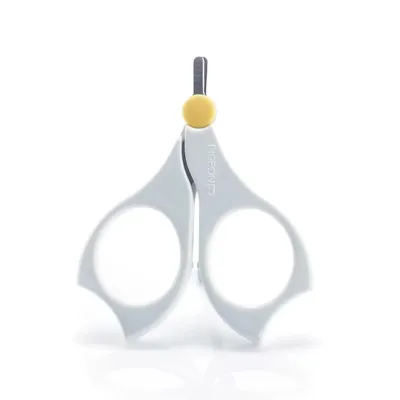
For babies from birth up to approximately three months of age, the newborn model is the appropriate choice. This version features exceptionally short, thin blades that allow caregivers to make precise, micro-cuts on soft, paper-thin nails. The handle loops are compact, offering a snug fit for the caregiver’s fingers to maximize stability and control during delicate trimming sessions.
Products mentioned in this guide
![[Kawaii Kiddy] Pigeon Newborn Baby Nail Scissors & Nail Clipper (NB - 9m+)](https://img.lazcdn.com/g/p/75970d3011c4d2d0270fb46299ee31cb.png_400x400q80.png_.webp)
Prices are valid at publication and may change. Please refer to the product page for the latest price.
As your baby reaches three months and older, their nails begin to harden and grow more rapidly, and their fingers become larger. At this stage, transitioning to the older infant model is recommended. This model features slightly longer, thicker blades that can cleanly cut through stronger nail plates without bending them. The handle loops are also slightly larger to accommodate comfortable gripping as the baby becomes more active.
When shopping, verify the age indicators on the packaging, such as “0m+” for newborns or “3m+” for older infants. Never use older infant or adult scissors on a newborn. The longer blades and wider tips of advanced models increase the risk of catching delicate skin, potentially causing painful nicks.
Understanding the Differences: Newborn vs. Older Infant Nail Scissors
To appreciate why specialized scissors are necessary, it helps to look at the anatomical differences between a newborn’s nails and those of an older infant. At birth, a baby’s nails are incredibly soft, pliable, and almost fused to the surrounding skin. They are so thin that they can easily tear or bend if subjected to the blunt force of standard clippers. Because the nail bed is exceptionally short, the margin of error when trimming is virtually non-existent.

As the weeks progress and your baby enters the three-month mark, their physiology changes. The nails gradually harden, becoming more defined and separate from the underlying skin. They also begin to grow at a much faster rate, requiring more frequent maintenance. At the same time, the baby’s physical mobility increases. While a newborn’s movements are largely governed by involuntary reflexes, an older infant begins to reach, grasp, and wiggle with greater strength and purpose.
These developmental shifts directly influence the ergonomics of the scissors. Newborn scissors prioritize absolute precision over cutting power. The blades are kept extremely short so that the caregiver can see exactly where the metal meets the nail, minimizing blind spots. The compact handle loops ensure that the scissors do not slip or wobble in your hand.
Conversely, older infant scissors are designed to handle tougher nail material and a more active baby. If you attempt to use newborn scissors on a three-month-old, you may find that the ultra-thin blades bend or slide off the hardened nail instead of cutting it cleanly. This can cause the nail to tear or split, leaving sharp edges that can scratch the baby’s face. Furthermore, if the caregiver’s fingers are cramped in handles that are too small, their control is compromised, increasing the likelihood of an accidental pinch or slip if the baby suddenly jerks their hand.
Evaluating Pigeon Scissors for Newborns (0–3 Months)
When selecting a pair of scissors for a newborn, parents must look for specific design elements that guarantee maximum safety and control. The defining feature of the newborn model is its ultra-short, delicate blade set. These blades are typically crafted from high-quality stainless steel to ensure durability and hygiene, but they are scaled down to match the miniature proportions of a newborn’s fingertips.
The tips of these blades are completely rounded. This safety feature ensures that even if the baby makes a sudden, unexpected movement, the blunt tip will not puncture or scratch the skin. The overall length of the blade is kept to a minimum, allowing you to make tiny, controlled snips rather than long, sweeping cuts.
Before making a purchase, always inspect the packaging to verify the “Newborn” or “0m+” label. This ensures you are not accidentally purchasing a model intended for older babies. Once you unbox the scissors, perform a quick quality and safety check before using them on your child:
- Blade Alignment: Close the scissors slowly to ensure the blades meet evenly along their entire length without any gaps, sticking, or overlapping.
- Tip Smoothness: Run your finger gently over the rounded tips to confirm there are no sharp edges, burrs, or manufacturing defects on the plastic or metal parts.
- Handle Tension: Open and close the scissors several times. The movement should be smooth and offer a slight, consistent resistance. If the handles are too loose, the blades may wobble; if they are too tight, you will lose the delicate tactile feedback needed for precise trimming.
- Finger Fit: Place your thumb and index or middle finger into the loops. They should feel secure and stable, allowing you to operate the scissors with minimal hand fatigue.
Evaluating Pigeon Scissors for Older Infants (3+ Months)
As your baby transitions out of the newborn phase, their grooming needs evolve, requiring a tool that matches their stronger nail structure and increased physical activity. The older infant model, typically labeled for use from three months and beyond (“3m+”), introduces several key design modifications.
The blades on these scissors are slightly longer and thicker than those on the newborn version. This added structural strength is necessary to cut through the hardened keratin of older infant nails cleanly, preventing the nail from bending or tearing during the cut. Despite the increased length, the tips remain carefully rounded to protect against accidental pokes.
The handles are also redesigned to accommodate the changing dynamics of caregiving. They are slightly larger, providing a more comfortable and ergonomic grip for parents. This is particularly important because older infants are much more active, often requiring the caregiver to hold the baby’s hand firmly while maneuvering the scissors with the other. A secure, comfortable grip prevents hand cramps and ensures steady control.
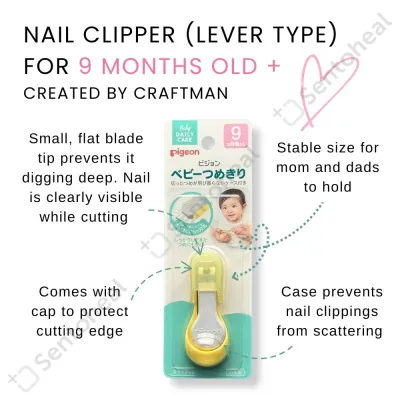
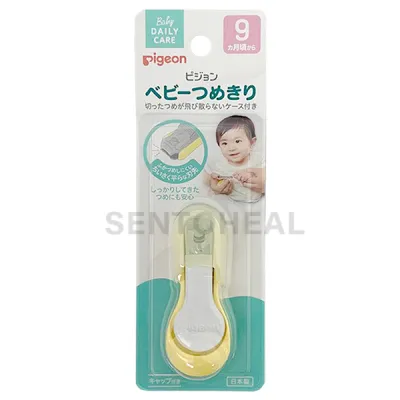
Additionally, many older infant models include a protective plastic cap to shield the blades from dust and prevent curious older babies from touching the edges.
Parents should look for specific transition signals to know when it is time to retire the newborn scissors:
- Ineffective Cutting: The newborn blades begin to slide over or bend the baby's nails rather than slicing through them cleanly.
- Multiple Snips Required: You find yourself needing to make several small cuts on a single nail because the blade is too short to cover the wider nail surface.
- Caregiver Discomfort: Your fingers feel cramped or restricted in the small newborn handle loops, reducing your overall control.
- Baby's Growth: The baby's nails have visibly thickened and grown wider, matching the scale of the older infant tool.
Always check the specific age or month recommendations printed on the packaging of the older infant model to confirm it is the correct step-up variant for your child’s current developmental stage.
How to Safely Trim Your Baby's Nails at Each Stage
Trimming your baby’s nails requires patience, preparation, and the right technique. Regardless of which model you use, establishing a calm environment and a systematic approach will minimize risks and make the experience positive for both you and your baby.
Optimal Timing and Positioning The best time to trim a baby’s nails is when they are calm or asleep. For newborns, trimming during sleep is highly effective as their hands are relaxed. Alternatively, trimming after a bath is ideal because warm water softens the nails. For older, active infants, try trimming during a quiet feeding session or while reading a story. Always work in a well-lit room to avoid accidental nicks, and hold the baby’s hand securely but gently.
Correct Cutting Technique When trimming fingernails, always follow the natural curve of the finger. This prevents sharp corners from forming, which can catch on clothing or scratch the baby’s skin. Gently press the finger pad away from the nail edge before making a cut; this creates a safe clearance zone between the blade and the delicate skin underneath.
For toenails, the technique is different. Always cut straight across rather than rounding the edges. Cutting the corners of toenails too short can cause the nail to grow into the surrounding skin, leading to painful ingrown toenails. Keep the cuts short but leave a tiny sliver of the white nail visible to avoid cutting too close to the sensitive nail bed.
Clear Stop Conditions and First Aid Never force a trimming session. If your baby becomes fussy, starts crying, or wiggles excessively, stop immediately. It is far better to leave the job half-done and return to it later than to risk an injury.
In the event of an accidental skin nick, remain calm. Minor bleeding is common and usually looks worse than it is. Follow these immediate first-aid steps:
- Apply Pressure: Hold a clean tissue or sterile gauze firmly against the cut for a few minutes until the bleeding stops.
- Avoid Adhesives: Do not apply adhesive plasters, liquid bandages, or harsh chemical antiseptics to your baby's fingers. Babies frequently put their hands in their mouths, presenting a serious choking hazard if a plaster comes loose, or a chemical ingestion risk.
- Monitor for Infection: Keep the area clean and dry. Monitor the finger over the next few days for signs of infection, such as increased redness, swelling, warmth, or pus.
- Consult a Professional: If the bleeding does not stop after several minutes of continuous, gentle pressure, or if you notice any signs of infection later, consult a pediatrician or qualified healthcare professional immediately.
Cleaning and Maintaining Your Baby Nail Scissors
Proper maintenance of your baby nail scissors is essential to ensure they remain hygienic, sharp, and safe for long-term use. Because these tools come into close contact with your baby’s skin, keeping them clean prevents the transfer of bacteria and reduces the risk of infection.
After every use, wipe the blades thoroughly with an alcohol pad or a designated sanitizing wipe. This removes any residual skin oils, moisture, or tiny nail fragments. Avoid washing the scissors directly under running water, as prolonged exposure to moisture can lead to rust, even on stainless steel blades. If the scissors do get wet, dry them immediately and completely with a clean, lint-free cloth.
Once the blades are clean and dry, always slide the protective cap back over the scissors. This cap protects the delicate blades from becoming dull or misaligned if they bump against other items in your grooming kit. Finally, store the scissors in a secure, dry place that is completely out of reach of children. As babies grow into toddlers, their curiosity increases, and grooming tools must be kept safely locked away or stored on high shelves.
Frequently Asked Questions (FAQ)
Can I use nail clippers instead of scissors for my newborn?
For newborns, baby nail scissors are generally preferred over clippers. Scissors offer superior visibility because the thin blades do not block your view of the tiny nail bed, allowing you to see exactly where you are cutting. They also provide greater control, allowing you to make precise, micro-adjustments on paper-thin nails that might otherwise bend or tear under the blunt pressure of a clipper. As your baby grows and their nails harden, baby nail clippers can become a viable alternative. Many parents transition to clippers once the child is older and more cooperative, depending on personal comfort and hand coordination.
What should I do if I accidentally nick my baby's skin while trimming?
If you accidentally nick your baby’s skin, immediately apply gentle, firm pressure to the cut using a clean tissue or sterile gauze to stop the bleeding. Avoid using adhesive plasters or liquid bandages on your baby’s hands, as these pose a significant choking hazard if the baby sucks on their fingers and the bandage comes loose. Do not apply harsh antiseptics without medical advice. If the bleeding does not stop after a few minutes of steady pressure, or if the wound shows signs of infection—such as redness, swelling, or discharge—in the following days, seek professional medical attention promptly.

Community discussion
Share your experience or ask a question. Comments are reviewed before publication.