
Yes, baby bottles must be washed differently depending on whether they are made of glass, plastic, or silicone. Each material has distinct physical properties, heat tolerances, and surface textures that dictate how they should be handled, scrubbed, and sanitized. Glass is highly durable and scratch-resistant but prone to thermal shock and physical breakage. Plastic is lightweight and shatterproof but easily scratched, which creates microscopic hiding places for bacteria. Silicone is flexible and heat-tolerant but naturally attracts milk fats and absorbs stubborn odors.
Establishing a proper baby bottle wash routine tailored to these material differences is essential for maintaining infant hygiene. Because a baby’s immune system is still developing, feeding equipment must be thoroughly cleaned to prevent the growth of harmful pathogens. In warm, humid environments like Singapore, where moisture and heat accelerate bacterial and mold growth, understanding these material-specific care requirements is critical for the safety of your child and the longevity of your feeding gear.
Essential Tools and Preparation for a Safe Baby Bottle Wash
Before addressing the specific needs of each bottle material, you must establish a clean, consistent preparation routine. The cleaning process should begin immediately after a feed concludes. Allowing milk to sit in a bottle leads to the drying of milk proteins and fats, which form a stubborn, sticky film that is difficult to remove. Rinsing all bottle parts immediately with cold or lukewarm water prevents these proteins from coagulating and adhering to the inner walls.
Products mentioned in this guide
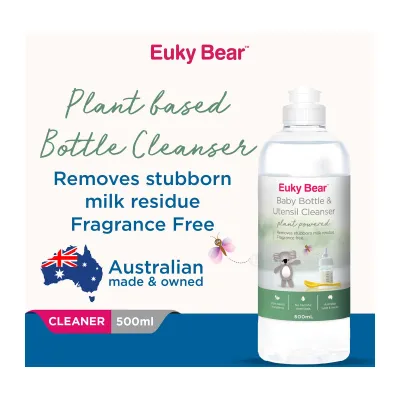
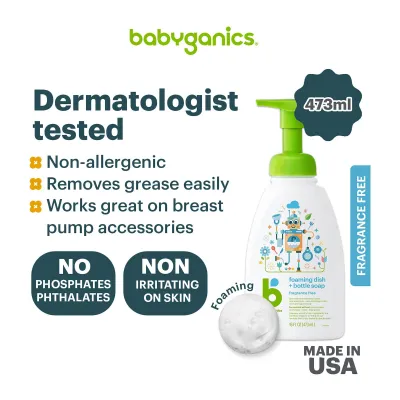
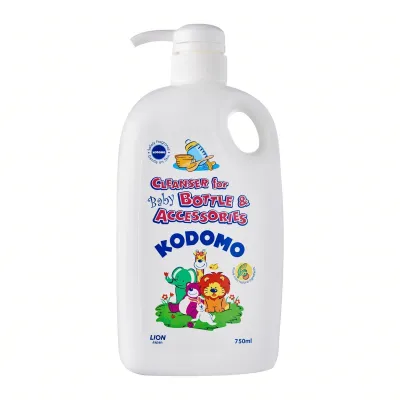
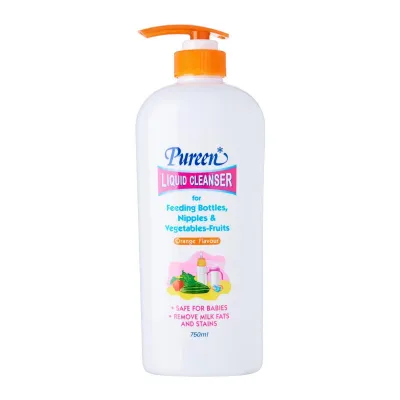
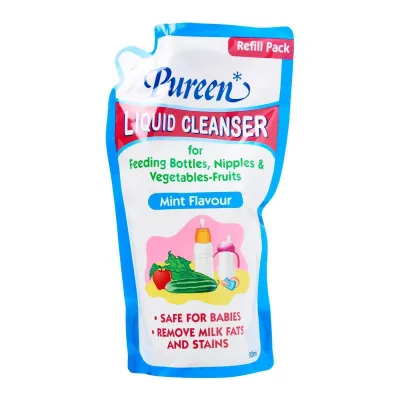
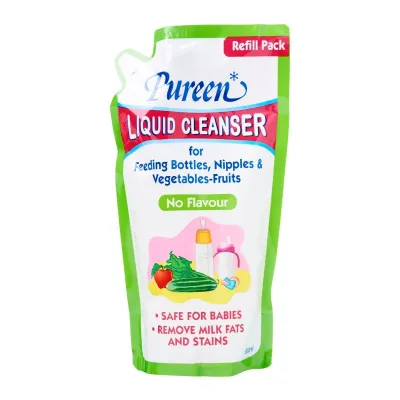
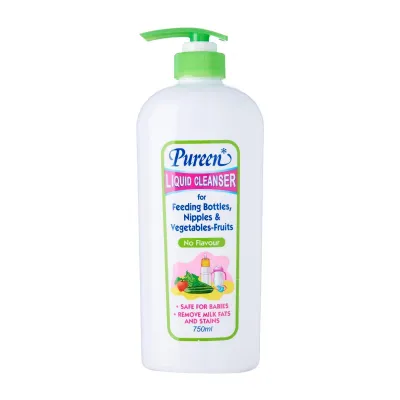
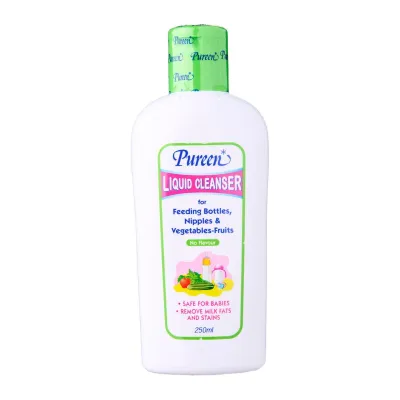
Prices are valid at publication and may change. Please refer to the product page for the latest price.
Complete disassembly is the next non-negotiable step. You must separate every single component of the bottle, including the nipple, collar, ring, cap, and any anti-colic valves or venting tubes. Milk residue frequently pools in the tight joints where these parts connect. If you wash the bottle while it is partially assembled, you leave hidden pockets of milk that will spoil, create sour odors, and harbor bacteria.
To ensure baseline hygiene, never wash baby bottles directly in your kitchen sink. Kitchen sinks are hubs for foodborne bacteria, grease, and chemical residues from household cleaners. Instead, use a dedicated wash basin reserved solely for baby feeding equipment. This basin should be washed and sanitized before and after each use to maintain a sterile cleaning environment.
Selecting the right cleaning agents and tools is equally important. Opt for a mild, fragrance-free baby bottle cleanser formulated with plant-based surfactants. Standard household dish soaps often contain harsh degreasers, artificial dyes, and strong perfumes that can leave a chemical film or lingering scent on the bottle components. For tools, gather a variety of brushes, including a main bottle brush, a smaller nipple brush, and a detail brush for threads and valves. Finally, always verify the manufacturer’s instructions regarding dishwasher compatibility before attempting to wash any bottle parts in a machine.
How to Wash and Care for Glass Baby Bottles
Glass baby bottles are favored by many parents for their purity, durability, and resistance to chemical leaching. Because glass has a hard, non-porous surface, it is highly resistant to scratching. This allows you to use standard bottle brushes with firmer nylon bristles to scrub the interior thoroughly. When washing glass, pay close attention to the bottom curve of the bottle and the inner neck threads, applying firm pressure to remove any dried milk film.

While glass is exceptionally durable against physical wear, it is highly susceptible to physical impact and thermal shock. To minimize the risk of breakage, handle wet, soapy glass bottles with extreme care. It is highly recommended to place a soft silicone or padded rubber mat at the bottom of your wash basin. This provides a protective cushion if a slippery bottle accidentally slips from your hands during the washing process.
Sterilization is straightforward with glass due to its high heat tolerance. Glass bottles can safely undergo boiling, steam sterilization, or UV sterilization. However, you must protect the glass from thermal shock, which occurs when the material experiences a rapid, extreme temperature change. Never transfer a cold glass bottle directly from the refrigerator into boiling water, and do not rinse a hot, freshly sterilized glass bottle under cold tap water. These sudden temperature shifts can cause the glass to crack or shatter.
Routine inspection is critical for safety. Before and after every wash, hold each glass bottle up to the light and inspect it for micro-chips, hairline cracks, or deep scratches. Even a tiny chip can compromise the structural integrity of the bottle, causing it to shatter during assembly, heating, or feeding. If you detect any structural damage, discard the glass bottle immediately to protect your infant from physical injury.
How to Wash and Care for Plastic Baby Bottles
Plastic baby bottles, typically made from Polypropylene (PP), Polyphenylsulfone (PPSU), or Polyethersulfone (PES), are lightweight, highly convenient, and shatterproof. However, plastic is a relatively soft material that scratches easily. When washing plastic bottles, you must never use abrasive cleaning tools such as scouring pads, steel wool, or stiff-bristled nylon brushes. Instead, use only soft-bristled silicone brushes, soft nylon brushes, or dedicated non-scratch sponges. Microscopic scratches on the inner walls of a plastic bottle can trap milk proteins and moisture, creating a breeding ground for bacteria that standard washing cannot reach.
Heat tolerance varies significantly among different types of plastics, making it essential to check the manufacturer’s guidelines. For example, PP bottles generally have a lower heat tolerance (often up to 110°C or 120°C) compared to premium PPSU bottles, which can withstand temperatures up to 180°C. Exposing plastic bottles to temperatures beyond their rated limit can cause warping, structural degradation, or cloudiness. Avoid prolonged boiling or excessive heat during sterilization unless the manufacturer explicitly states it is safe.
Chemical exposure is another factor to consider when maintaining plastic bottles. Avoid using highly alkaline detergents or harsh chemical sterilizing tablets that can accelerate the breakdown of the plastic polymer. When sterilizing, ensure the plastic parts do not touch the bottom or sides of the pot if you are using the boiling water method, as direct contact with the hot metal can melt the plastic.
Over time, plastic bottles will degrade from repeated washing, heating, and usage. You must inspect plastic bottles regularly for signs of wear, including persistent cloudiness, deep scratches, stubborn discoloration, or a sticky or rough texture on the inside. These visual and tactile changes indicate that the plastic polymer is breaking down. To ensure your baby’s safety, replace PP bottles every 3 to 6 months, while high-grade PPSU bottles may last up to 6 to 12 months depending on the manufacturer’s recommendations and the frequency of use.
How to Wash and Care for Silicone Baby Bottles
Silicone baby bottles are popular for their soft, breast-like feel and exceptional durability. However, food-grade silicone has unique physical properties that require specific care. Silicone is naturally hydrophobic but lipophilic, meaning it repels water but easily binds to organic fats. This characteristic often leaves silicone bottles feeling greasy or oily even after a standard wash. To clean silicone effectively, you must use a dedicated baby bottle cleanser designed to break down milk lipids, paired with a soft silicone brush or sponge.
When washing, thoroughly massage the flexible body of the silicone bottle to ensure the soapy water contacts every internal curve. A clean silicone bottle should feel “squeaky” or slightly tacky to the touch. If the surface feels slippery or oily, a layer of milk fat remains, and you must wash the bottle again. Avoid using sharp tools or fingernails to scrape the inside of the bottle, as silicone can tear if punctured.
Because silicone is porous, it easily absorbs food pigments and strong odors, such as sour milk or soap fragrances. If your silicone bottles develop a lingering smell or mild discoloration, you can use safe, manufacturer-approved home remedies to refresh them. Soaking the silicone components in a mixture of warm water and baking soda, or a mild solution of white vinegar and water, can effectively neutralize odors and lift stains. Always rinse the parts meticulously with clean water after soaking to remove any vinegar or baking soda residue.
High-quality silicone is highly heat-resistant and can withstand boiling, steam, and UV sterilization. However, silicone bottles are rarely made entirely of silicone; they almost always feature rigid plastic collars, threaded rings, or plastic bases to maintain their shape and connect the nipple. Always check the brand’s specific care manual before sterilizing. While the silicone body can handle high heat, the integrated plastic components may warp or degrade if exposed to the same temperatures.
Drying, Storage, and Knowing When to Replace
Proper post-wash care is just as critical as the washing process itself. Once all bottle components are thoroughly washed and rinsed, they must be dried completely. In Singapore’s warm and highly humid climate, lingering moisture on feeding equipment is a primary catalyst for mold and bacterial growth.
To dry your baby bottles safely, follow these guidelines:
- Use an elevated drying rack: Place all disassembled parts on a clean, dedicated drying rack that allows air to circulate freely inside and around each component.
- Avoid towel-drying: Never use kitchen towels, dishcloths, or paper towels to dry bottle parts. Towels can easily transfer lint, dust, and household bacteria onto your freshly cleaned bottles.
- Ensure complete dryness: Allow all parts to air-dry completely before reassembling or storing them.
Once every component is bone-dry, reassemble the bottles to prevent dust, pet dander, or pests from settling inside. Store the reassembled bottles in a clean, dry, and closed cabinet or a dedicated storage container. Keep them away from direct sunlight, high heat sources, and areas of high humidity, such as directly next to the kitchen sink or stove.
Knowing when to retire your feeding equipment is essential for maintaining safety. Establish a routine to inspect all parts during your weekly wash.
Replace components immediately if you observe any of the following replacement signals:
- Glass bottles: Any visible chips, cracks, or deep scratches.
- Plastic bottles: Persistent cloudiness, warping, deep scratches, or a sticky texture.
- Silicone bottles: Tears, punctures, extreme discoloration, or persistent odors that do not fade after deep cleaning.
- Nipples and teats: Silicone or latex nipples degrade much faster than bottle bodies due to constant suction, biting, and exposure to heat. Inspect nipples daily by pulling firmly on the bulb. If the nipple is sticky, swollen, cracked, torn, or if the milk flows out too quickly or unevenly, replace it immediately. As a general rule, most manufacturers recommend replacing bottle nipples every 1 to 2 months to ensure optimal safety and flow rate.
Frequently Asked Questions (FAQ)
Can I wash all baby bottles in the dishwasher?
While glass, PPSU, and high-grade silicone are generally dishwasher-safe, you must always verify the specific manufacturer’s label before placing any bottle components in the machine. Some lower-grade plastics can warp or degrade under the high heat of a dishwasher’s wash and dry cycles. If the manufacturer approves dishwasher use, place all small, lightweight parts—such as nipples, collars, valves, and travel caps—into a secured, top-rack dishwasher basket. This prevents them from slipping through the racks and landing on the heating element, which can melt or damage them. Always use a mild, fragrance-free, baby-safe dishwasher detergent, and avoid washing bottles alongside dishes containing strong food pigments, like tomato sauce, to prevent staining.
How do I clean the narrow neck and threads of a baby bottle effectively?
The screw threads around the neck of a baby bottle and the underside of the collar are prime locations for milk residue, saliva, and moisture to accumulate. Because these areas are tight and highly textured, standard wide bottle brushes often glide over them without cleaning them thoroughly. To clean these crevices effectively, use a specialized narrow-neck bottle brush or a small, soft-bristled detail brush dedicated solely to baby bottle cleaning. Apply a small amount of baby bottle cleanser and scrub the threads in a thorough, circular motion. If you leave these tight spaces damp and uncleaned, they can quickly develop black mold or bacterial biofilms, which can contaminate the milk during feeding.
Is it safe to use regular household dish soap for baby bottles?
It is highly recommended to avoid using regular household dish soaps for baby bottles. Standard dish soaps are formulated to strip heavy grease and baked-on food from adult cookware, meaning they often contain strong synthetic fragrances, artificial dyes, and harsh chemical surfactants. These ingredients can leave a thin, stubborn chemical residue or a strong perfume scent on plastic and silicone bottle parts. Because infants have highly sensitive digestive systems and developing immune systems, ingesting these chemical residues can cause digestive irritation, discomfort, or feed rejection. Using a mild, plant-based baby bottle cleanser ensures that the formula rinses away cleanly and completely, leaving no soapy film or artificial scent behind.

Community discussion
Share your experience or ask a question. Comments are reviewed before publication.