
Using a wearable breast pump like the Elvie correctly requires a combination of precise assembly, accurate flange sizing, and responsive setting adjustments. By mastering these steps, new mothers can maintain a comfortable and efficient milk expression routine that fits seamlessly into daily life. Transitioning to a hands-free, wearable pump offers a liberating sense of mobility, but it also introduces a unique learning curve compared to traditional, corded breast pumps.
To get the most out of your device, you must understand how its components interact and how to tailor its operation to your body’s natural lactation cues. Taking the time to learn the correct techniques from the very first session helps prevent common pitfalls such as physical discomfort, low milk yield, or accidental leaks. This comprehensive guide walks you through every stage of using your pump, from initial unboxing to daily maintenance, ensuring a smooth and successful pumping journey.
Preparing Your Elvie Breast Pump for First Use
Before your first pumping session, unbox your device in a clean workspace. Lay out all components and cross-reference them with the manufacturer’s checklist to ensure your package is complete. You should find the main hub, breast shields, milk collection bottles, valves, spouts, seals, and bra adjusters. Verifying that every piece is present and undamaged before you begin prevents unexpected interruptions when you are ready to pump.
Products mentioned in this guide
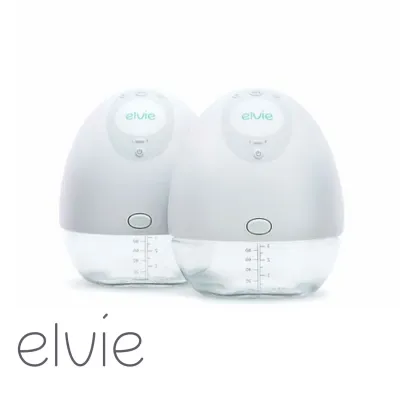
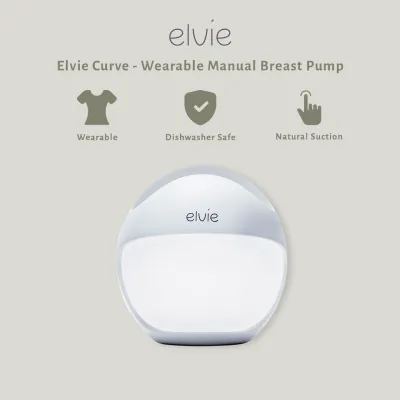
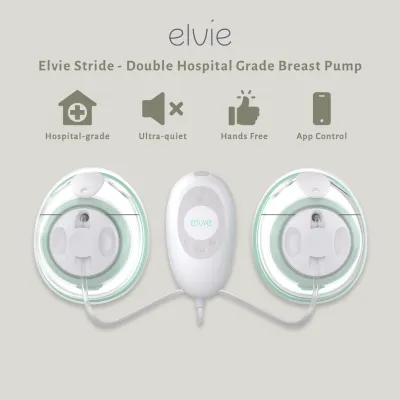
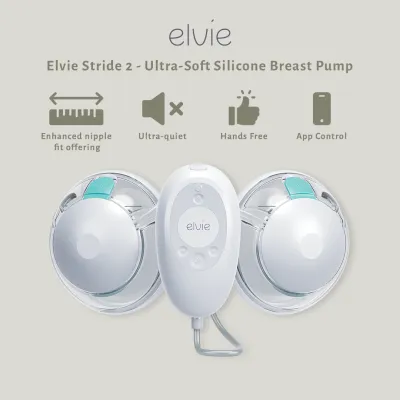
Prices are valid at publication and may change. Please refer to the product page for the latest price.
Next, prepare the electronic hub. Connect it to a power source using the provided charging cable and allow it to charge fully before its initial use. Pay close attention to the battery indicator lights; a solid green light typically indicates a full charge, while amber or red signals that the battery requires attention. Starting with a fully charged battery ensures your session will not be cut short and helps maintain the long-term health of the rechargeable cell.
Once the hub is charged and the washable components are cleaned, begin the assembly. Press the clear breast shield firmly into the hub, ensuring it fits flush without any gaps. Next, attach the rubber seal and the pour spout onto the milk collection bottle, making sure they are seated securely to create a tight barrier. Finally, push the bottle up into the bottom of the hub until you hear a distinct click, confirming the bottle is locked in place.
Finding the Right Fit and Positioning the Flanges
Achieving an optimal fit with your breast shield is the most important factor in ensuring a comfortable and productive pumping experience. To determine your correct size, measure the diameter of the base of your nipple, excluding the surrounding areola, using a ruler or the manufacturer’s sizing tool. Wearable pumps often come with multiple shield sizes, and using a size that is too large or too small can lead to friction, tissue damage, and reduced milk flow.

When positioning the pump, lean slightly forward and place your breast into the shield. Align your nipple so that it sits directly in the center of the flange tunnel, ensuring it does not rub against the sides. Once centered, bring the pump flush against your breast to create a secure, airtight seal. Maintaining this alignment as you secure your bra is crucial, as any shifting can cause painful rubbing during suction cycles.
To keep the pump securely in place, wear a supportive, full-coverage nursing bra. The bra should hold the pump firmly against your breast to maintain the vacuum seal without compressing your breast so tightly that it restricts milk flow. If your bra feels too restrictive, insert one of the included bra adjusters into your bra strap to quickly create the necessary extra space.
A proper fit should feel comfortable, with the nipple moving freely in the tunnel without excessive pulling of the areola. If you experience sharp pain, notice deep red marks, or find that very little milk is expressed despite feeling full, stop the session immediately. These are clear signs of an incorrect fit or poor positioning, requiring you to reassess your flange size or realign the device.
Operating the Pump and Adjusting Settings
To begin, press the power button on the hub to turn the device on. The pump starts automatically in Stimulation mode, which features fast, light suction cycles. This rapid rhythm mimics a baby’s initial shallow sucks to trigger your body’s let-down reflex and encourage milk flow. Allow the pump to run in this mode until you observe milk droplets starting to collect in the bottle.
Once your milk let-down occurs, transition the pump to Expression mode, which features slower, deeper suction cycles designed to draw out milk efficiently. While some models use sensors to detect milk flow and transition automatically, you can also switch modes manually using the controls on the hub or the companion app. Transitioning at the right moment ensures you are working in harmony with your body’s natural reflexes.
As you settle into the expression phase, adjust the suction intensity using the plus and minus buttons to find your personal comfort zone. It is a common misconception that higher suction yields more milk; in reality, excessive suction can cause pain, which triggers stress hormones that actively inhibit let-down. Always prioritize your physical comfort, gradually increasing the suction to a level that feels firm but entirely pain-free.
When your session is complete, use the play/pause button to halt the suction before removing the pump. Once paused, gently break the seal with your finger at the edge of the breast shield before pulling the device away. Hold the power button down to shut the device off completely, keeping the pump upright to prevent any milk from spilling out of the collection bottle’s air vents.
Establishing a Comfortable Pumping Routine
Integrating a wearable pump into your daily life requires a balanced approach that supports your milk supply while respecting your physical recovery. For new mothers looking to build or maintain supply, standard lactation advice suggests pumping or nursing approximately eight to twelve times every twenty-four hours. A typical pumping session should last between fifteen and twenty minutes per breast, which provides sufficient stimulation without overworking your delicate breast tissue.
Creating a calm, low-stress environment is incredibly beneficial for supporting a healthy milk let-down. Because stress and anxiety can physically block the release of oxytocin—the hormone responsible for releasing milk—try to set up a comfortable space where you can relax. Keep a glass of water nearby to stay hydrated, play some soothing music, or look at photos of your baby if you are pumping away from them, as these visual cues can naturally stimulate milk flow.
As you establish your routine, keep a simple log of your daily output and session times to track your progress over time. While tracking is helpful, try not to obsess over minor volume fluctuations from session to session, as milk yield naturally varies throughout the day. If you notice a persistent downward trend in your supply or experience ongoing physical discomfort, do not hesitate to pause your routine and consult a certified lactation consultant or healthcare provider for personalized guidance.
Cleaning and Maintaining Your Pump Parts
Maintaining strict hygiene practices when cleaning your pump parts is essential for protecting your baby’s health and ensuring the longevity of your device. Immediately after every pumping session, disassemble all components that have come into direct contact with breast milk, including the breast shield, valve, spout, and bottle. Never wash or submerge the electronic hub in water; instead, wipe it down with a clean, damp cloth if it becomes soiled, and store it safely away from moisture.
Wash the disassembled, washable parts in warm, soapy water using a mild dish soap and a dedicated cleaning brush. Rinse each part thoroughly under clean, running water to remove all soap residue. If you prefer to use a dishwasher, verify in your user manual which parts are safe for the top rack, and use a gentle cycle to prevent warping or discoloration from high heat.
For newborns, premature infants, or babies with compromised immune systems, daily sanitizing of the pump parts is highly recommended. You can sanitize compatible parts by boiling them in water for five minutes or by using a dedicated microwave steam sterilizer bag, always ensuring the parts are fully submerged or positioned correctly. In humid climates, such as Singapore, pay extra attention to the drying process to prevent the growth of mold or bacteria.
After washing or sanitizing, place all components on a clean, dedicated drying rack or a fresh paper towel in a well-ventilated area. Allow every piece to air-dry completely before reassembling the pump or storing the parts. Once dry, store the components in a clean, dust-free container with a secure lid, keeping them protected from environmental contaminants until your next session.
Frequently Asked Questions (FAQ)
Why is my Elvie breast pump losing suction during a session?
A sudden or gradual loss of suction is usually caused by a minor assembly issue or a compromised seal. First, check that the breast shield is clicked securely into the hub and that the bottle is locked tightly in place. Next, inspect the rubber seal, valve, and pour spout for any tiny tears, debris, or moisture, as even a small drop of water on these parts can disrupt the vacuum. Finally, ensure that the pump is pressed firmly against your breast and that your nursing bra is providing enough support to maintain a continuous, airtight seal.
Can I use the Elvie pump while lying down?
No, you should not use the Elvie breast pump while lying down or leaning back at an extreme angle. The device is engineered to be operated in an upright position to ensure that expressed milk flows directly into the collection bottle. Tilting the pump too far back can cause milk to flow toward the air vents, leading to leaks or potentially entering the electronic hub and causing permanent damage to the motor. Always consult your user manual for the specific angle limits and maintain a comfortable, upright posture during your sessions.

Community discussion
Share your experience or ask a question. Comments are reviewed before publication.