
Setting up a breast pump correctly is the foundation of a comfortable and productive feeding journey. Proper assembly, personalized settings, and consistent maintenance of the Spectra Dual Compact help protect your milk supply, ensure hygiene, and prevent nipple discomfort. This guide walks you through the essential steps to prepare, assemble, operate, and care for your device based on standard lactation practices and manufacturer guidelines. By understanding how to customize the dual-control settings on this specific device, you can tailor your pumping sessions to match your body’s unique needs, ensuring a more efficient and comfortable experience.
Preparing for a Comfortable Pumping Session
Before you begin your pumping session, establishing a clean and organized environment is essential for maintaining hygiene and reducing stress. Start by washing your hands thoroughly with soap and water for at least twenty seconds. Clean the surface where you will place your pump and parts, using a safe disinfectant or a clean paper towel. Having a dedicated, sanitary workspace helps prevent the introduction of unwanted bacteria to your milk collection setup.
Gather all your essential supplies before sitting down so you do not have to interrupt your session. This includes the Spectra Dual Compact main pump unit, fully cleaned and dried collection kits, bottles, caps, and a supportive hands-free pumping bra. In Singapore’s warm and humid climate, staying properly hydrated is particularly important for your overall well-being during lactation. Keep a large glass of water or a healthy snack nearby to make the session as relaxing as possible.
Products mentioned in this guide
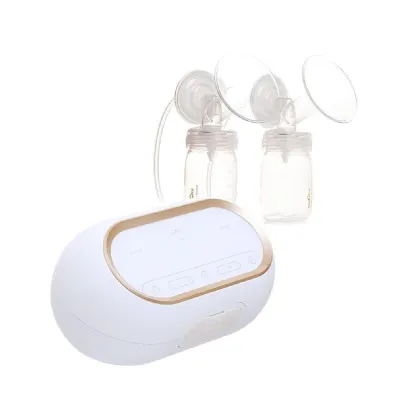

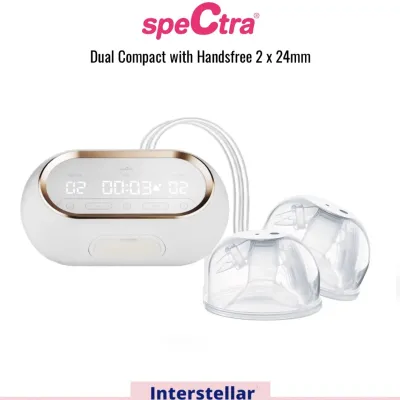
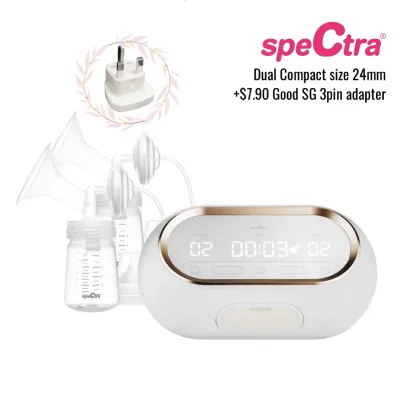

Prices are valid at publication and may change. Please refer to the product page for the latest price.
Verifying your breast shield, or flange, sizing is a critical step that directly impacts both comfort and milk output. An incorrectly sized shield can cause friction, nipple pain, and restricted milk flow. To check the fit, observe your nipple’s movement inside the tunnel during a session. The nipple should move freely without rubbing against the plastic walls, and very little of the surrounding areola should be drawn into the tunnel. If you experience pinching or notice swelling, consult the manufacturer’s fitting guide or a certified lactation consultant to measure your nipple diameter and select the correct size.
Finally, ensure your pump is ready for operation. Check that the built-in rechargeable battery has sufficient charge for the duration of your session, or plug the power adapter into a safe, accessible wall outlet. If you are plugging the device in, position yourself comfortably near the outlet to avoid putting unnecessary tension on the power cord.
Step-by-Step Assembly of the Spectra Dual Compact
Assembling your breast pump correctly is vital for establishing the airtight seal required for proper suction. Before handling any components, verify that all parts are completely dry. Moisture inside the tubing or backflow protectors can damage the pump’s internal motor, compromise suction levels, and encourage mold growth. If you notice any condensation or water droplets in the tubing, set it aside to air-dry completely or replace it before proceeding.

Begin the assembly with the backflow protector, which serves as a physical barrier in this closed-system pump. Insert the silicone membrane into the lower casing of the protector, ensuring the edges fit snugly and securely. Snap the top casing over the membrane until it clicks into place. This component is essential because it prevents breast milk and moisture from traveling up the tubing and entering the pump motor.
Next, attach the silicone duckbill valve to the underside of the breast shield. Push the valve gently but firmly onto the circular stem. Avoid twisting, pulling, or using sharp objects near the delicate silicone tip, as even a microscopic tear or gap in the valve will significantly reduce the pump’s suction power.
Secure the breast shield onto the collection bottle by aligning the threads carefully. Screw the bottle on clockwise until it is firm, taking care not to cross-thread the plastic, which can cause milk leaks during use. Once the bottle is attached, insert the backflow protector’s nozzle into the port on the rear of the breast shield.
Connect the silicone tubing to complete the assembly. Attach one end of the tubing to the remaining nozzle on the backflow protector, and plug the other end into the air ports on the front of the Spectra Dual Compact main unit. If you are only pumping from one breast, ensure the unused air port on the pump is covered securely with the integrated port cap to maintain suction on the active side.
Navigating Modes and Finding Your Ideal Settings
The Spectra Dual Compact features a dual-motor system, which allows you to adjust the suction settings independently for each breast. This is particularly helpful for mothers who experience different levels of sensitivity or milk flow on each side. Understanding how to navigate the device’s interface will help you customize your session for maximum comfort and efficiency.
Always begin your pumping session in the massage mode, which is designed to stimulate your body’s let-down reflex. This mode uses a fast, light, and shallow suction pattern that mimics the rapid sucking a baby does at the start of a feeding session to encourage milk flow. You can identify this mode by the specific indicator light or symbol on the digital display, as outlined in your user manual.
Once your milk begins to drip or flow actively, transition to the expression mode. This mode features a slower, deeper, and more robust suction pattern that mimics the baby’s active swallowing and drawing of milk. To switch modes, press the designated mode button on the control panel.
Adjust the vacuum levels incrementally on each side to find your personal comfort zone. Start at a low setting and gradually increase the suction level one step at a time. Pumping should never cause pain; if you feel sharp pinching, discomfort, or notice your nipple tissue turning white, immediately lower the vacuum setting. The most efficient setting is the highest comfortable level, not the absolute highest setting the machine can produce.
Consult your specific user manual to familiarize yourself with the button layouts, memory features, and default factory settings. The manual provides detailed instructions on how to save your preferred settings and how to read the battery indicator, helping you manage your sessions without unexpected interruptions.
Physical Techniques to Maximize Output and Comfort
While the pump’s settings play a major role in milk removal, your physical positioning and techniques can significantly enhance your comfort and output. Start by ensuring the breast shield is centered correctly over your nipple. Your nipple should sit directly in the middle of the flange tunnel before you turn on the motor. Misalignment can cause the nipple to rub against the plastic walls, leading to swelling, skin irritation, and reduced milk flow.
Incorporate gentle breast massage or manual compression during your pumping session. Using your hands to gently massage the breast tissue from the chest wall toward the nipple can help stimulate the milk ducts and encourage more thorough emptying. Many mothers find that combining gentle warmth, such as a warm compress applied for a few minutes before pumping, with manual compression helps facilitate a quicker let-down.
Your posture and comfort level also influence your body’s ability to release milk. Maintain a relaxed, upright, and well-supported seated position. Slouching or leaning too far forward can restrict your breathing, cause back strain, and interfere with milk flow. Utilizing a compatible hands-free pumping bra can hold the shields securely in place, allowing you to relax your shoulders and arms.
Pay close attention to your body’s physical signals throughout the session. If you experience persistent nipple swelling, skin irritation, or sharp pain that does not resolve when you lower the suction, stop the pump immediately. Consult a qualified lactation consultant or healthcare professional to evaluate your technique, check your breast health, and ensure your equipment is sized correctly.
Essential Cleaning and Maintenance Routines
Maintaining a strict cleaning routine is essential for protecting your infant’s health and ensuring the longevity of your pumping equipment. Disassemble all parts that come into direct contact with breast milk immediately after every use. This includes the breast shields, duckbill valves, collection bottles, and the lower portion of the backflow protectors. Allowing milk to sit on these parts can lead to dried residue that is difficult to clean and can harbor harmful bacteria.
Rinse all disassembled parts under cold running water first to remove residual milk proteins. Next, wash the parts thoroughly in warm, soapy water using a mild dishwashing liquid. Use a dedicated cleaning brush that is reserved solely for your baby’s feeding equipment to avoid cross-contamination. If your user manual explicitly permits dishwasher use for certain components, you may place them on the top rack, but hand washing is often recommended to prevent premature wear.
After washing, rinse the parts thoroughly with clean water to remove any soap residue. Place all components on a dedicated, clean drying rack in a well-ventilated area and allow them to air-dry completely. In Singapore’s humid climate, ensuring adequate airflow around the drying rack is important to prevent moisture from lingering. Avoid using cloth towels to dry the parts, as they can transfer lint and bacteria.
Refer to the manufacturer’s instructions for approved sterilization methods, such as boiling or using a steam sterilizer. Note that the silicone tubing does not require regular washing unless milk or moisture accidentally enters it. If the tubing becomes dirty or shows signs of mold, replace it immediately. Regularly inspect all silicone parts, such as the duckbill valves and backflow membranes, for signs of wear, stretching, or tearing, and replace them according to the manufacturer’s recommended schedule to maintain optimal suction.
Troubleshooting Suction, Leaks, and Discomfort
Encountering operational issues during a pumping session can be frustrating, but most common problems can be resolved with a few simple checks. If you experience weak suction, start by inspecting the duckbill valves. Ensure they are pushed firmly onto the breast shield and are free of tears, warping, or debris. Even a tiny, barely visible tear in the silicone can cause a significant drop in vacuum pressure.
Verify that all tubing connections are secure and that the backflow protectors are tightly assembled. Ensure there is no moisture inside the tubing or the backflow protector membranes, as wet parts will disrupt the vacuum seal.
To prevent milk leaks, keep the collection bottles upright during and immediately after your session. Ensure the breast shield maintains a complete, airtight seal against your skin. If you need to break the suction to remove the shield, slide a clean finger gently under the edge of the flange first rather than pulling it off.
If discomfort persists despite using a low vacuum setting, re-evaluate your flange size or consider applying a thin layer of a safe, food-grade lubricant (such as pure lanolin or coconut oil) to the tunnel of the breast shield, if recommended by a professional.
Stop using the device immediately and contact the manufacturer or a qualified lactation consultant if you hear unusual noises from the pump motor, see error codes on the digital display, or experience persistent pain that does not improve with adjustments.

Community discussion
Share your experience or ask a question. Comments are reviewed before publication.