
To secure a refrigerator door against a curious toddler, a high-quality fridge strap must be installed on a clean, dry surface with precise alignment and adequate curing time. This simple childproofing step prevents toddlers from accessing heavy doors, glass jars, or potentially hazardous food items. By choosing the right strap type, preparing the surface thoroughly, and allowing the adhesive to bond completely, you can create a reliable barrier that withstands daily pulling. While these straps are highly effective, they are designed to complement active caregiver supervision rather than replace it entirely.
Assess Your Refrigerator Surface and Strap Type
Before purchasing or installing a fridge strap, it is essential to evaluate the exterior finish of your appliance. Refrigerator doors come in various materials, including smooth stainless steel, tempered glass, painted metal, and textured plastic. Each of these surfaces interacts differently with adhesives, meaning a strap that bonds instantly to smooth metal might fail on a textured plastic surface. Always check the strap manufacturer’s compatibility list to ensure the adhesive or mounting system is rated for your specific appliance finish.
You must also decide between adhesive-backed mounts and mechanical screw-in mounts. Adhesive-backed options are highly popular because they require no drilling, preserve your appliance’s warranty, and are easy to remove when your child outgrows them. Screw-in mounts offer a highly secure mechanical hold that cannot peel off, but they require drilling into the refrigerator’s outer casing. This drilling carries a risk of damaging internal components, so adhesive mounts are generally the practical starting point for most households.
Products mentioned in this guide
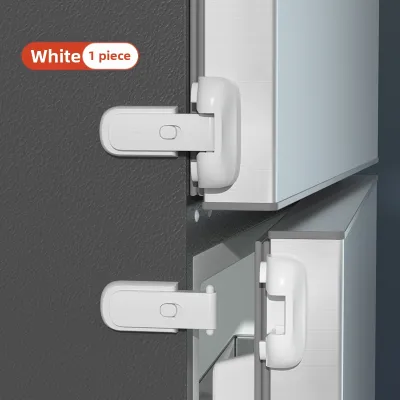
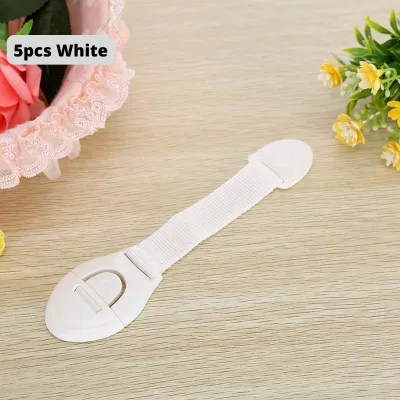
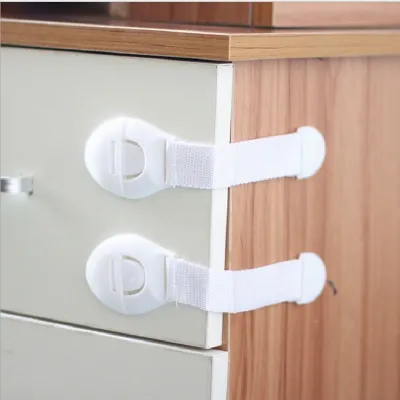
![[SG SELLER] [FREE/GIFT SHIPPING] Child Baby Safety Fabric Strap Lock Cupboard Drawer Cabinet Door Fridge Toilet Bowl](https://img.lazcdn.com/g/ff/kf/Sf6a12e33c1b348659fd4f211cdabe7543.jpg_400x400q80.jpg_.webp)
![[SG SELLER] [FREE SHIPPING] Baby Safety Cupboard Lock Strap Wardrobe Drawer Fridge Locks Child Safe Cabinet Straps Clips](https://img.lazcdn.com/g/p/da967140d882270921141cd24f2861f8.jpg_400x400q80.jpg_.webp)
![[SG SELLER] [FREE SHIPPING] Baby Safety Cupboard Lock Strap Wardrobe Drawer Fridge Locks Child Safe Cabinet Straps Clips](https://img.lazcdn.com/g/p/0a2b05f3dcdb9f0c3129867150145888.jpg_400x400q80.jpg_.webp)
Prices are valid at publication and may change. Please refer to the product page for the latest price.
Finally, verify that the strap length is sufficient for your specific kitchen layout. Measure the distance from the front of the refrigerator door, around the corner, to the adjacent side panel, cabinet, or wall where the second mount will be anchored. The strap must span this gap comfortably without being stretched to its absolute limit, which would put constant, unnecessary tension on the adhesive pads.
Gather the Right Tools and Materials
Having all your tools and materials ready before you begin will ensure a smooth, uninterrupted installation process. A standard fridge strap kit typically includes two mounting anchors, the flexible strap itself, and a locking or buckling mechanism. Some kits also include spare adhesive pads, which are highly useful if you make a mistake during the initial alignment.

In addition to the kit, you will need a few common household items to prepare the surface and mark your placement. Gather some rubbing alcohol (isopropyl alcohol) and a clean, lint-free microfiber cloth to clean the mounting areas. You will also need a measuring tape to check distances and a pencil or washable marker to mark the exact boundaries of the mounts before peeling off the adhesive backing.
Depending on your environment and chosen strap type, a few optional items may be helpful. If your kitchen is particularly cool or drafty, a hairdryer can be used to gently warm the adhesive pads and the refrigerator surface, which helps the adhesive flow and form a stronger bond. If you are installing a screw-in mount, you will need a power drill, the correct size of drill bit, and safety glasses to protect your eyes during the drilling process.
Step-by-Step Guide
Installing a fridge strap is a straightforward task that requires patience and precision rather than specialized technical skills. The entire procedure is divided into three distinct phases: preparing the surface, attaching the mounts, and adjusting the strap tension. Taking your time during each phase will ensure the lock remains firmly attached even when subjected to sudden tugs from an energetic toddler.
While the general steps remain consistent across most brands, always keep your specific product manual nearby during the installation. Different manufacturers specify unique curing times, alignment tolerances, and locking mechanisms that are critical to the strap’s overall performance. Following these brand-specific guidelines closely will help you avoid common installation mistakes and ensure the safety device functions exactly as intended.
Prepare and Clean the Surface
Start by identifying the exact spots on the refrigerator door and the adjacent surface where the mounts will be placed. Pour a small amount of rubbing alcohol onto a clean microfiber cloth and thoroughly wipe these designated areas. This step is crucial because it removes invisible grease, dust, fingerprints, and kitchen oils that naturally accumulate on household appliances over time.
Once you have wiped the areas, allow the surfaces to air-dry completely for several minutes. Trapping even a tiny amount of moisture or residual alcohol beneath an adhesive pad can severely compromise the chemical bond, leading to premature failure when the strap is pulled. Do not use a towel to dry the area, as this can reintroduce lint and dust particles to the clean surface.
Avoid using standard household cleaners, glass sprays, or dish soaps to prepare the surface. These products often contain oils, silicones, or chemical agents that leave behind a microscopic, slippery residue. While the surface may look clean, this residue acts as a barrier that prevents the adhesive from bonding directly to the refrigerator’s finish, causing the mount to peel off easily.
Attach the Strap Mounts
To ensure the strap functions correctly, hold the assembled strap and mounts against the refrigerator in their closed position to test the fit. Use your measuring tape and pencil to mark the outer edges of both mounts, ensuring the strap will run completely straight and horizontal. A twisted or tilted strap will distribute pulling forces unevenly, which can cause one side of the adhesive mount to lift prematurely.
Once you are satisfied with the alignment, peel the protective backing off the first adhesive pad, taking care not to touch the sticky surface with your fingers. Align the mount with your pencil marks and press it firmly onto the refrigerator. Apply steady, hard pressure with your thumb or the palm of your hand for at least thirty seconds, focusing on the edges to ensure complete contact, then repeat the process for the second mount.
If you are using screw-in mounts, consult your refrigerator’s user manual to locate safe drilling zones that avoid internal components. Drill shallow pilot holes with extreme caution, ensuring you do not puncture the appliance’s internal cooling lines, electrical wiring, or insulation layers. Once the pilot holes are drilled, secure the mounts using the screws provided in your kit, taking care not to overtighten them and strip the holes.
Secure and Adjust the Strap
Once the mounts are firmly attached, thread the flexible strap through the locking mechanism or clip it into the anchor points according to the manufacturer’s design. Some straps use a slot-and-key system, while others rely on a side-release buckle or a magnetic key. Familiarize yourself with how the strap connects to the mounts before attempting to adjust the tension.
Adjust the length of the strap so that it remains taut when the refrigerator door is fully closed. The strap should have enough tension to prevent the door from opening even a fraction of a centimeter, which keeps toddlers from squeezing their fingers into the gap. However, avoid pulling the strap so tight that it constantly strains the adhesive mounts, as this continuous tension can cause the adhesive to fail over time.
Engage the childproof lock and verify that it clicks securely into place. Test the locking mechanism several times to ensure it operates smoothly and does not stick. If the lock features a dual-button release or a sliding latch, practice opening it yourself to ensure you can access the refrigerator easily while keeping it completely secure from your child.
Test the Strap Against Toddler Pulling
One of the most critical steps in the installation process is allowing the adhesive to cure fully before subjecting it to any force. Most adhesive pads require a full 24 hours to cure and reach their maximum bonding strength. Leave the strap unlatched or avoid pulling on the door during this initial period, as premature stress can permanently weaken the bond and cause the mount to fall off later.
Once the curing period has passed, gently but firmly tug on the refrigerator door to simulate a toddler’s pulling and yanking. Watch the adhesive mounts closely to see if there is any lifting, peeling, or shifting along the edges. If you notice any movement, press the mount down firmly again and allow it to sit undisturbed for another few hours before testing it again.
Examine the locking mechanism while applying outward pressure to the door. Ensure that the mechanical lock remains firmly closed under tension and that a child cannot easily slide, twist, or press the release mechanism open. Remember to inspect the strap regularly as your child grows, as toddlers quickly develop the strength and coordination to test safety devices more vigorously.
Safe Removal and Maintenance
To maintain the effectiveness of your fridge strap, establish a routine to check the adhesive edges for lifting or the screws for loosening every few weeks. Over time, daily kitchen heat, humidity, and repeated pulling can gradually weaken the installation. If you notice any signs of wear, address them immediately to prevent your toddler from unexpectedly gaining access to the refrigerator.
When your child outgrows the need for a fridge lock, follow the manufacturer’s removal instructions carefully to prevent scratching or damaging your appliance’s finish. For adhesive mounts, use a hairdryer on a low heat setting to soften the adhesive backing. Once the adhesive is warm and pliable, gently slide a piece of dental floss or fishing line behind the mount, using a sawing motion to slice through the softened foam pad.
Clean any residual adhesive using a safe solvent or citrus-based cleaner recommended for your specific refrigerator finish. Avoid using abrasive scrubbing pads or harsh chemicals that could scratch stainless steel or dull painted surfaces. Wipe the area clean with a damp cloth and dry it thoroughly with a microfiber towel to restore the original look of your appliance.
Frequently Asked Questions (FAQ)
Can I install a fridge strap on a stainless steel refrigerator without damaging it?
Yes, you can install an adhesive-backed fridge strap on stainless steel, but you must proceed with caution to avoid staining or scratching the metal. Adhesive strength and removal safety vary significantly depending on the specific brand of strap and the type of stainless steel coating. Before applying any strong adhesive, check your refrigerator manufacturer’s warranty and care guidelines to ensure it does not void the finish protection. It is highly recommended to test a small, inconspicuous area first or apply a temporary protective film if suggested by the strap manufacturer.
What should I do if the adhesive pad keeps failing?
If your adhesive pad fails to stick, the most common causes are textured refrigerator surfaces, cold kitchen temperatures, or invisible grease residues left behind during cleaning. Ensure you have cleaned the area thoroughly with rubbing alcohol and allowed it to dry completely. If the surface is highly textured or matte, standard adhesives may not bond well, and you may need to consult the strap manufacturer for specialized replacement pads or surface primers. Alternatively, if your appliance and living situation allow, switching to a mechanical screw-in bracket can provide a more permanent solution.

Community discussion
Share your experience or ask a question. Comments are reviewed before publication.