
Childproofing a home is a milestone that requires careful planning, especially when toddlers begin exploring their surroundings. Installing a reliable safety lock for door frames, cabinets, and drawers is one of the most effective ways to prevent access to household hazards. However, a safety lock is only as reliable as its installation. If applied incorrectly, even the highest-rated lock can fail under a child’s persistent tugging.
To install these safety devices successfully, you must select the appropriate lock type for each surface, prepare the mounting area meticulously, and strictly follow the manufacturer’s curing guidelines. In Singapore’s warm and humid climate, adhesive performance can vary, making proper surface preparation and curing times even more critical. This step-by-step guide walks you through the entire process, ensuring your home remains secure and your child stays safe.
Preparation: Tools and Surface Checks Before Installation
Before unboxing your new safety locks, gather the essential tools to ensure a clean and precise application. You will need a microfiber cloth, isopropyl alcohol or a mild degreaser, a measuring tape, and a pencil for marking placement. Having these items on hand prevents interruptions during the installation process and ensures that alignments are accurate before adhesives make contact with the surfaces.
Products mentioned in this guide
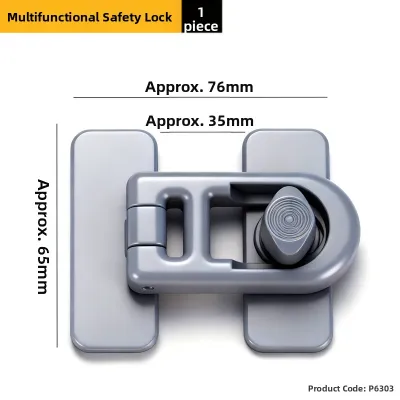
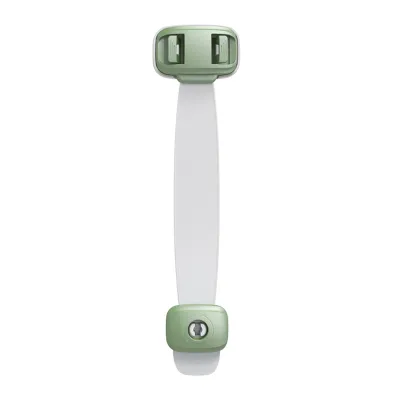
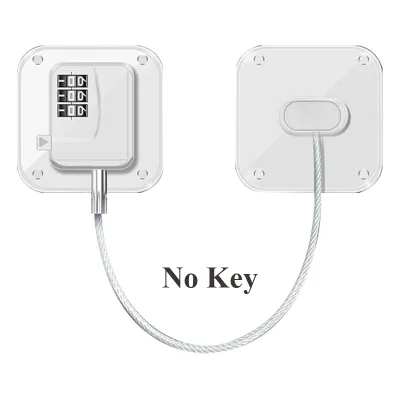
Prices are valid at publication and may change. Please refer to the product page for the latest price.
The most common cause of adhesive lock failure is poor surface preparation. Household surfaces naturally accumulate a thin layer of dust, cooking grease, and moisture, all of which compromise the chemical bond of the adhesive tape. Cleaning the target area thoroughly with isopropyl alcohol removes these microscopic barriers, creating a pristine surface for the adhesive to grip. Avoid using standard household glass cleaners or multi-surface sprays, as they often leave behind a thin residue that prevents optimal bonding.
Next, evaluate the material of your doors and cabinets. Different materials—such as solid wood, laminate, glass, or painted surfaces—interact differently with adhesives and hardware. For instance, heavy-duty adhesives may damage delicate wood veneers or painted finishes upon removal, while textured laminates might require extra pressure to achieve a secure hold. Always cross-reference your specific furniture material with the safety lock manufacturer’s instructions to confirm compatibility before proceeding.
Singapore’s high relative humidity introduces a specific challenge for adhesive-based baby proofing. Moisture in the air can settle on cleaned surfaces, preventing the adhesive from curing correctly. After wiping the surface clean, use a dry, lint-free microfiber cloth to remove any remaining moisture. Allow the area to air-dry for several additional minutes to ensure absolutely no humidity is trapped beneath the adhesive pad.
Always observe safety boundaries during this preparation phase. If your furniture is fragile, antique, or features a delicate lacquer finish, stop and consult the furniture manufacturer before applying any strong adhesives or drilling holes. If the manufacturer warns against adhesive applications, you must explore alternative childproofing methods, such as tension-based locks or free-standing barrier gates, to protect both your child and your valuable household items.
Step-by-Step Installation for Cabinet and Drawer Locks
Cabinets and drawers are prime targets for curious toddlers who love to pull, climb, and explore. Securing these spaces requires selecting the right lock type and installing it with precision. Whether you are using external strap locks or hidden magnetic systems, following a structured installation process ensures the locks remain functional and secure.

Installing Adhesive Strap Locks
Adhesive strap locks are highly versatile devices suitable for corner cabinets, curved surfaces, and double-door units. Begin by planning the exact placement of the lock. Use your measuring tape and pencil to mark where the two adhesive bases will sit, ensuring the flexible strap is taut when the mechanism is locked. If the strap is too loose, the cabinet door may open wide enough for small fingers to get pinched; if it is too tight, the tension may prematurely pull the adhesive away from the surface.
Once you have marked the position, clean and dry both the cabinet surface and the handle base where the adhesive pads will rest. Follow the cleaning protocol by wiping the areas with isopropyl alcohol and drying them completely with a clean microfiber cloth. Double-check that the marked pencil lines are still visible to guide your final placement.
Carefully peel the protective backing off the first adhesive pad, taking care not to touch the sticky surface with your fingers, as skin oils can degrade the adhesive strength. Align the pad with your pencil marks and press it firmly onto the surface. Apply continuous, heavy pressure with your palm or thumb for at least 30 seconds, or for the specific duration recommended by the manufacturer. Repeat this process for the second adhesive pad on the adjacent door or frame.
Once both bases are secured, clip the strap into place but do not subject the lock to any pulling, testing, or tension. The adhesive requires time to build a chemical bond with the cabinet material. Subjecting the lock to stress immediately after installation will cause the adhesive to fail, rendering the device useless. Keep the cabinet closed and unused during this initial bonding phase.
Installing Internal Magnetic Locks
Internal magnetic locks offer a hidden childproofing solution that keeps the aesthetic of your kitchen intact while preventing children from opening drawers. To install these, you must carefully position the lock body on the inside of the cabinet door and the magnetic catch on the cabinet frame. Use the manufacturer’s alignment template or a pencil to mark the exact contact points where the lock latch meets the catch.
You must decide between adhesive mounting and screw mounting based on your household needs and cabinet material. Many magnetic lock kits provide both options. Adhesive mounting is ideal for rental properties or delicate laminates, as it requires no drilling. However, screw mounting provides a significantly stronger, permanent hold that is highly recommended for heavy drawers containing heavy pots, pans, or sharp utensils. If you choose screw mounting, pre-drill small pilot holes to prevent the wood or laminate from splitting.
After mounting both the lock body and the catch, test the mechanism’s alignment. Close the cabinet door gently to see if the latch engages securely with the catch. Then, take the magnetic key and hold it against the outside of the cabinet door directly opposite the internal lock. The lock should smoothly disengage, allowing the door to open. If the latch sticks or fails to release, loosen the mounting screws or adjust the adhesive position slightly to realign the components.
A critical safety warning accompanies all magnetic lock systems: the magnetic key itself is a potential choking hazard and must be stored completely out of your child’s reach and sight. If a child gains access to the key, they can easily defeat the lock, exposing themselves to the hazards inside the cabinet. Store the key on a high magnetic surface, such as the top of your refrigerator, or inside a secure high drawer that does not require a key to open.
Step-by-Step Installation for Door Lever and Knob Locks
Preventing unsupervised access to bedrooms, bathrooms, and kitchens is essential for comprehensive home safety. Installing a safety lock for door handles ensures that toddlers cannot wander into hazardous areas or accidentally lock themselves inside a room. Because door hardware varies, you must choose a lock designed specifically for either lever handles or round door knobs.
For adhesive cover-style locks, which are commonly used on lever handles, begin by cleaning the door panel and the handle housing. Wipe the area around the handle base with isopropyl alcohol and dry it thoroughly. Align the lock housing so that the blocking arms prevent the lever handle from being pushed downward. Once aligned, peel the adhesive backing, press the lock firmly against the door face, and hold it in place for the manufacturer’s recommended time to secure the bond.
If you are installing adjustable or clamp-style locks on round door knobs, the process does not require adhesives. Instead, fit the two halves of the lock cover over the existing door knob. Align the interlocking tabs and tighten the securing screws or adjustment dials until the cover fits snugly. The cover should spin freely over the knob, preventing a child’s small hands from gripping and turning the actual knob underneath, while still allowing adults to squeeze the release buttons to open the door.
Before declaring the installation complete, perform a critical safety check to verify that the door can be quickly and easily opened from the outside in an emergency. Some safety locks can accidentally lock a child inside a room if the mechanism jams or is engaged from the inside. If a lock does not feature a reliable, intuitive emergency release mechanism that an adult can operate from the outside, do not install it on any room where a child could potentially become trapped. Always prioritize quick emergency access over absolute restriction.
Curing Time and Post-Installation Safety Checks
The physical installation of a safety lock is only the first part of the process; ensuring its long-term reliability requires patience and regular maintenance. Adhesives do not bond instantly; they require a specific curing window to reach maximum holding strength.
Always respect the manufacturer’s specified curing time before allowing children near the secured areas. This curing window typically ranges from 24 to 72 hours. In Singapore’s warm and highly humid climate, the moisture in the air can slow down the chemical curing process of acrylic adhesive tapes. To ensure the lock does not fail under pressure, strictly adhere to the product label’s recommended wait times, and consider extending the curing period by an extra 12 to 24 hours if your home is not air-conditioned.
Once the curing period has fully elapsed, perform a post-installation safety test. Gently but firmly pull on the cabinet door or drawer, simulating the force a determined toddler would apply. Observe the adhesive pads and mounting brackets closely; there should be no lifting, sliding, or flexing at the attachment points. If you notice any movement, the adhesive has not bonded correctly, and you must remove the lock, clean the surface again, and apply a fresh adhesive pad.
Next, run your fingers along the edges of the installed locks to inspect for any sharp plastic burrs or rough edges left over from the manufacturing process. These minor imperfections can easily scratch a child’s sensitive skin during daily use. If you find any sharp edges, gently smooth them down with a fine-grit sandpaper nail file, or contact the manufacturer for a replacement if the defect compromises the safety of the device.
It is vital to remember that no safety lock can ever replace active adult supervision. Children are natural problem solvers and will continuously observe how adults operate these devices. Over time, older toddlers may learn to mimic your movements and bypass the locks entirely. Routinely inspect all installed locks for signs of physical wear, plastic degradation, or adhesive lifting. If a lock becomes loose, cracked, or fails to latch smoothly, replace it immediately to maintain a secure environment for your family.
Frequently Asked Questions (FAQ)
Can I install adhesive safety locks on painted or wallpapered surfaces?
Using strong adhesive safety locks on painted walls or wallpapered doors carries a significant risk of surface damage. The industrial-strength adhesives used in baby proofing products are designed to hold fast under heavy tension, which means they can easily peel away paint layers or tear delicate wallpaper when pulled by a child or during eventual removal. Before applying an adhesive lock, check the product label for specific surface exclusions. If you must secure a painted or wallpapered area, consider using screw-mounted locks that attach directly to the wooden door frame, or accept that cosmetic repairs will be necessary once the lock is removed.
How do I remove adhesive safety locks without damaging my cabinets?
To remove adhesive safety locks safely when your child has outgrown them, use a hairdryer set to a warm, medium heat to soften the adhesive backing. Direct the warm air at the adhesive pad for one to two minutes to make the glue pliable. Next, gently slide a piece of dental floss or a thin plastic scraper behind the lock base, using a sawing motion to slice through the softened adhesive. Once the lock is detached, apply a small amount of mild adhesive remover or baby oil to clean up any sticky residue. Always test the adhesive remover on a hidden area of your cabinet first to ensure it does not discolor or dull the protective finish.

Community discussion
Share your experience or ask a question. Comments are reviewed before publication.