
Properly baby-proofing your kitchen is a key step in creating a safer environment for your growing toddler. Kitchen cabinets often house heavy cookware, sharp utensils, and cleaning chemicals that pose significant risks to curious hands. Installing Khoa cabinet locks provides a physical barrier, but their effectiveness depends on correct installation and precise alignment. By taking the time to prepare your cabinet surfaces, align the locking mechanisms accurately, and allow adhesives to cure fully, you can help secure your kitchen storage.
Every home environment is unique, and toddlers are remarkably persistent when exploring their surroundings. While safety locks are excellent tools to assist caregivers, they do not replace active adult supervision. Before beginning the installation, it is essential to review the manufacturer’s specific age recommendations, weight limits, and safety warnings included in your product packaging. This guide walks you through the process of preparing, mounting, testing, and maintaining your cabinet locks to help them perform as intended.
Preparing Your Cabinets and Gathering Tools
Before you begin mounting any hardware, take a few moments to verify the contents of your cabinet lock package. Lay out all the components on a flat surface and compare them against the parts list in the manufacturer’s instruction manual. A standard installation kit typically includes the main lock bodies, corresponding catches or striker plates, mounting screws, adhesive pads, and sometimes an alignment template. Verifying you have every necessary piece beforehand helps prevent frustrating interruptions mid-installation and ensures you do not compromise the security of the lock by using mismatched hardware.
Products mentioned in this guide
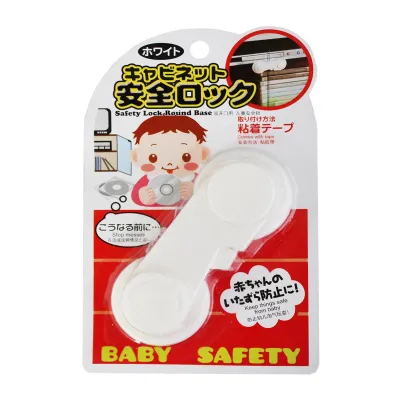
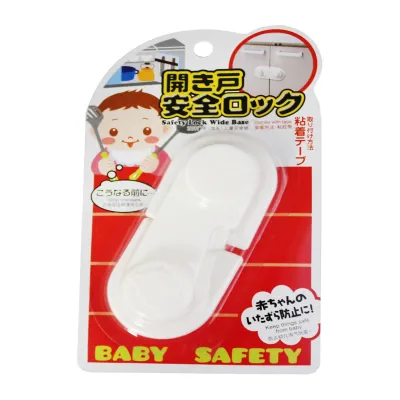
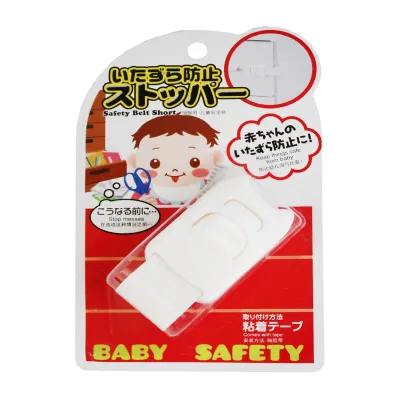
Prices are valid at publication and may change. Please refer to the product page for the latest price.
Proper surface preparation is a key factor for helping achieve a secure bond, especially if you are using adhesive-mounted locks. Kitchen cabinets naturally accumulate a thin layer of airborne grease, cooking oils, steam residue, and dust over time, which can severely compromise adhesive performance. Clean the designated installation areas on both the cabinet frame and the inside of the doors using a mild degreasing agent or a simple mixture of dish soap and warm water. Once clean, wipe the surfaces down with rubbing alcohol to remove any remaining soap film, and allow them to dry completely before proceeding.
Next, analyze the specific layout of your kitchen cabinetry to determine the suitable placement for each lock. Double-door cabinets, single drawers, and pull-out pantries all require slightly different positioning to ensure the locking mechanism engages smoothly. For double doors, you will need to decide whether to mount a lock on each door or use a central latching system, depending on the design of your cabinet frame. Hold the lock body and catch against the cabinet surfaces in a closed position to visualize how they will interact, ensuring there is sufficient clearance for the latch to catch securely without binding.
Take note of any structural details that might affect the installation, such as face frames, frameless cabinet designs, or decorative molding. Frameless cabinets, common in modern kitchens, often require the lock to be mounted directly to the interior side panel, whereas traditional face-frame cabinets offer a lip on the frame itself. Marking the intended positions lightly with a pencil helps maintain alignment during the actual mounting phase. If you plan to use screws, pre-drilling small pilot holes can prevent the cabinet wood from splitting, particularly when working with hardwoods or delicate veneers.
Step-by-Step Installation Process
With your surfaces clean and your positions marked, you are ready to begin the physical installation of the lock components. Start by positioning the main lock body on the cabinet frame or the interior drawer front, depending on the specific model of your lock. It is important to position the lock so that it does not interfere with the natural opening and closing motion of the door or drawer. If the lock body is placed too close to the edge, it may rub against the door frame, causing premature wear on both the lock and your cabinetry.

Once the lock body is temporarily held in place, align the corresponding catch or striker plate on the inside of the cabinet door or drawer. The catch must align with the lock’s latching arm so that they engage when the door is pushed closed. Many kits include a temporary alignment template or double-sided tape to help you hold the pieces in position while you verify the fit. Close the door slowly to observe how the latch meets the catch, making minor adjustments to the position until the mechanism slides together smoothly without resistance.
After confirming the alignment, you can permanently secure the components using either the provided screws or adhesive pads. If you choose the screw-mounting method, use a hand screwdriver rather than a high-powered drill to avoid over-tightening and stripping the screw holes in the wood. For adhesive-mounted locks, peel the protective backing from the adhesive pad, taking care not to touch the sticky surface with your fingers, as skin oils can weaken the bond. Press the component firmly onto the prepared cabinet surface, applying even pressure across the entire adhesive area for at least thirty seconds.
If your installation relies on adhesive pads, patience is helpful for achieving a secure hold. The adhesive requires time to cure and bond with the cabinet surface, and testing the lock too early is one of the most common causes of installation failure. Refer to the manufacturer’s instructions for the exact curing time, which is typically twenty-four hours under standard household conditions. Avoid pulling on the cabinet doors or testing the lock’s tension during this curing period, as any premature stress can permanently weaken the adhesive bond and cause the lock to fail later.
Testing the Lock and Ensuring Toddler Safety
Once the adhesive has cured or the screws are tightened, you should test the installation to verify its hold. Begin by operating the lock mechanism yourself, opening and closing the cabinet door several times to ensure the action is smooth. The lock should engage when the door is closed and release when you apply the correct release pressure. If the mechanism feels stiff, catches awkwardly, or requires excessive force to operate, double-check the alignment of the lock body and catch, as even a millimeter of misalignment can affect performance.
Next, simulate the actions of a curious toddler by applying a gentle but firm pulling force to the closed cabinet door or drawer. The lock should hold the door securely in place, preventing it from opening wide enough for a child to reach inside. Observe how the lock components behave under tension; there should be no visible flexing of the plastic, slipping of the adhesive, or loosening of the screws. If the lock yields or feels unstable under moderate pressure, it may be necessary to reinstall the components or consider a screw-mounted installation for added strength.
Inspect the closed cabinet to check for any remaining gaps that small fingers could slip through. If the lock allows the door to open slightly before catching, verify the gap is narrow enough to prevent a child from reaching hazardous items or getting their fingers pinched. If the gap is too wide, adjust the position of the catch further back into the cabinet to create a tighter seal when closed. Remember that as children grow, their strength and dexterity increase, so a lock that is effective for an infant may require re-evaluation as your child enters toddlerhood.
If at any point during testing the locking mechanism fails to engage fully, feels loose, or shows signs of wear, stop using the lock and consult the manufacturer’s guidelines. Do not attempt to modify the lock or use makeshift fixes, as this can compromise child safety. Consult the manufacturer’s guidelines for troubleshooting advice, or contact their customer support for assistance. If a particular cabinet cannot be secured reliably with the current lock style, consider relocating hazardous items to higher shelves out of reach until a suitable safety solution is installed.
Maintaining and Safely Removing the Locks
Baby-proofing hardware is subject to daily wear and tear in a busy kitchen, making regular checks important for ongoing functionality. Conduct routine visual inspections of your cabinet locks to check for signs of wear, loose screws, or peeling adhesive. Kitchen environments, particularly in humid climates like Singapore, experience frequent temperature fluctuations and high humidity from cooking, which can gradually degrade adhesive bonds over time. Catching a loose lock early allows you to repair or replace it before a curious toddler discovers the weakness.
When cleaning your kitchen, take care not to damage the lock mechanisms with harsh chemical cleaners or abrasive scrubbing pads. Clean the exterior plastic surfaces of the locks with a soft, damp cloth and a mild soap solution if necessary, then dry them thoroughly. Avoid spraying liquid cleaners directly into the locking mechanism, as moisture can become trapped inside, leading to mechanical stiffness or mold growth. Keeping the locks clean and free of grease buildup helps them continue to operate.
When you no longer require the cabinet locks, you can remove the hardware using methods designed to protect your cabinetry’s finish. For screw-mounted locks, simply unscrew the components and fill the small pilot holes with a matching wood putty or wax filler stick to restore the cabinet’s appearance. For adhesive-backed locks, removing them safely requires a bit of care to avoid peeling away wood veneer, paint, or laminate. Apply gentle heat to the adhesive pad using a hair dryer on a low setting for a few minutes to soften the glue.
Once the adhesive is warm and pliable, slide a piece of dental floss or thin fishing line behind the lock body, using a sawing motion to slice through the foam pad. This technique separates the lock from the cabinet without pulling on the wood surface. Any remaining adhesive residue can be gently rubbed away with your fingers or treated with a mild, adhesive-remover solution that is safe for finished wood. Always test any adhesive remover on an inconspicuous area of the cabinet first to verify it does not dull or discolor the finish.
Frequently Asked Questions (FAQ)
Can I install these locks on handle-less or curved cabinets?
Standard cabinet locks generally require flat, clean, and sufficiently wide surfaces on both the cabinet frame and the door to function correctly. If your kitchen features modern handle-less cabinets with integrated J-pull channels or curved doors, finding a flat mounting surface can be challenging. Before purchasing or attempting to install locks on these designs, check the manufacturer’s specifications for the minimum surface area and clearance requirements. If the cabinet design does not allow for proper alignment of standard latch locks, you may need to explore alternative baby-proofing methods, such as magnetic locks that mount entirely on the interior or external strap locks that flex around curved surfaces.
What should I do if the adhesive pad loses its grip?
Adhesive failure in the kitchen is usually caused by environmental factors like high humidity, grease buildup, or textured cabinet surfaces that prevent a full bond. If an adhesive pad loses its grip, do not attempt to reattach it using generic household glues or superglue, as these can permanently damage your cabinet finish and may fail under tension. Instead, completely remove the old adhesive residue from both the lock and the cabinet surface using a safe adhesive remover, clean the area thoroughly with rubbing alcohol, and let it dry. Apply a new, manufacturer-approved replacement adhesive pad, pressing it firmly into place and allowing it to cure fully for twenty-four hours before testing.

Community discussion
Share your experience or ask a question. Comments are reviewed before publication.