
Installing a cubble magnetic lock on your kitchen cabinets is a highly effective way to secure hazardous areas as your baby transitions into crawling and walking. In Singapore, where kitchens often house heavy cookware, cleaning agents, and sharp utensils within low-level cabinets, childproofing is a vital step in maintaining a safe home environment. These magnetic locks remain completely hidden from the outside, preserving the clean aesthetic of your cabinetry while preventing curious toddlers from accessing dangerous items. However, the security of these locks depends entirely on precise installation, correct alignment, and proper surface preparation.
To ensure the safety of your child, always verify that your child’s age, development stage, and physical capabilities align with the manufacturer’s guidelines for this childproofing system. While magnetic locks serve as an excellent physical barrier, they do not promise absolute safety or replace active adult supervision. If at any point you are unsure about the suitability of these locks for your specific cabinets, or if you encounter conflicting instructions, stop the installation and consult the manufacturer or a professional childproofing installer.
Preparation and Tools Needed
To achieve a secure and long-lasting installation, it is essential to gather the correct tools and understand your cabinetry’s material properties before you begin. Preparing your workspace in advance prevents interruptions and ensures that adhesive components are applied under optimal conditions.
Products mentioned in this guide
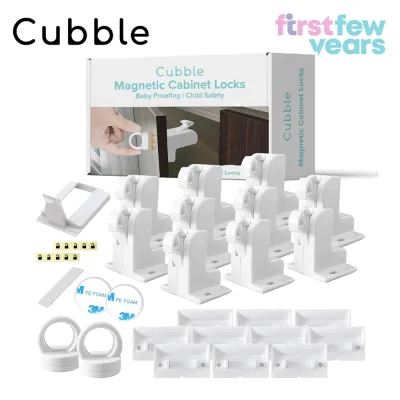
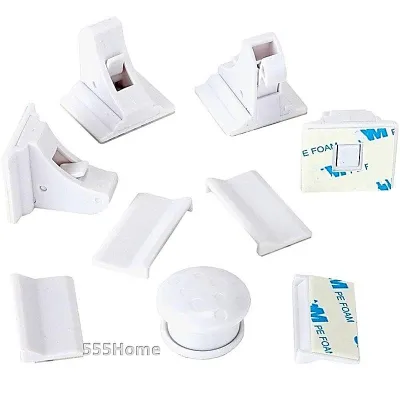
Prices are valid at publication and may change. Please refer to the product page for the latest price.
Essential Tools and Materials:
- Rubbing alcohol or a mild grease-cutting cleaner: This is crucial for removing the thin layer of oil and grease that naturally accumulates on kitchen surfaces.
- Microfiber cloth: Used to wipe down surfaces without leaving behind lint, dust, or fibers that could interfere with the adhesive bond.
- Measuring tape: Helps determine consistent placement across multiple cabinets, ensuring a uniform look and function.
- Pencil: For marking the exact boundaries and alignment lines of the lock body and the catch.
- The Cubble magnetic key: Essential for testing the locking mechanism during and after the installation process.
Surface Compatibility and Cabinet Requirements: Before applying any adhesive or drilling holes, check your cabinet manufacturer’s care instructions and the Cubble product manual. If the instructions conflict, the cabinet material is unidentified, or the use is not covered, stop and consult the manufacturer or a qualified professional. Magnetic locks perform best on flat, smooth, non-porous surfaces such as laminated wood, painted timber, or smooth acrylic finishes.
Textured surfaces, unfinished wood, highly porous materials, or heavily molded cabinet interiors present significant challenges. The adhesive tape may not form a complete bond on these surfaces, which could cause the lock to fail when pulled forcefully. If your kitchen cabinets feature rough or untreated wood interiors, you must inspect the surface carefully and consider using the screw-mounting option instead of relying solely on adhesive tape.
Step-by-Step Cubble Magnetic Lock Installation Guide
Step 1: Clean and Dry the Cabinet Surfaces
Kitchen cabinets are constantly exposed to airborne grease, steam, and cooking oils. Over time, an invisible layer of residue settles on both the exterior and interior surfaces of your cabinetry. This residue is the primary cause of adhesive failure, as it prevents the tape from making direct contact with the cabinet material.

To clean the surfaces properly, spray rubbing alcohol or a specialized grease-cutting cleaner onto a clean microfiber cloth. Thoroughly scrub the inner corner of the cabinet door where the lock body will sit, as well as the corresponding area on the cabinet frame or the underside of the shelf where the catch will be mounted.
After scrubbing, use a dry section of the microfiber cloth to wipe away any remaining liquid. Allow the area to air-dry completely for at least five to ten minutes. Even a small amount of moisture can trap air bubbles under the adhesive tape, leading to premature failure of the lock.
Step 2: Position and Mark the Alignment
Perfect alignment is the secret to a functional cubble magnetic lock. Because the locking mechanism is completely hidden inside the cabinet, a minor misalignment of even a few millimeters can prevent the latch from catching or make it difficult to open with the magnetic key.
Begin by closing the cabinet door to its natural resting position. Observe how the door aligns with the frame and identify the most practical spot for the lock. For standard cabinets, mounting the lock near the top corner of the door opposite the hinges is usually the most effective position.
Open the door and hold the lock body against the inside of the cabinet door. Simultaneously, hold the catch against the cabinet frame or shelf. Slowly close the door to ensure that the lock arm meets the catch flush without any obstruction.
Use your pencil to trace the outlines of both components. Mark the exact placement of the screw holes if you plan to use screws, or draw a neat outline of the adhesive boundaries. Ensure there is sufficient clearance so that when the door is closed, the lock does not scrape against the cabinet frame or shelves, which could damage the wood or loosen the mechanism over time.
Step 3: Attach the Lock and the Catch
Depending on your preference and cabinet type, you can secure the lock using either the high-strength adhesive tape or the included screws.
Adhesive Tape Method: Peel the protective backing off the adhesive tape on the back of the lock body. Be careful not to touch the sticky surface with your fingers, as skin oils can reduce its bonding strength. Align the lock body precisely with your pencil marks on the inside of the cabinet door. Press the lock firmly against the surface, applying even pressure across the entire component for at least 30 seconds. Repeat this process for the catch on the cabinet frame, ensuring that the catch is facing the correct direction to receive the lock arm. Press and hold firmly for another 30 seconds.
Screw-Mounting Method: If you have heavy wooden cabinet doors or prefer a more permanent, heavy-duty installation, screw mounting is highly recommended. Position the components on your pencil marks. Use a small drill bit to pre-drill pilot holes. Pre-drilling is a crucial step to prevent the cabinet wood from splitting or cracking, especially in older or delicate cabinetry. Secure the lock body and the catch using the screws provided in the Cubble kit. Tighten them securely with a screwdriver, but avoid over-tightening, which could strip the screw holes or crack the plastic components.
Important Safety Note: Keep the magnetic key far away from the lock mechanism while you are installing the components. Bringing the key close to the lock during installation can trigger the internal magnetic latch, causing misalignment or accidental sticking before the adhesive has fully bonded.
Step 4: Allow Adhesive to Cure
If you chose the adhesive installation method, patience is critical. Adhesive tapes require time to undergo a chemical bonding process with the cabinet surface, a process known as curing.
Check the Cubble instruction manual for the exact recommended curing time. Typically, high-performance adhesive tapes require a full 24 hours to reach their maximum bonding strength.
During this curing period, do not test the lock’s pulling strength, do not pull forcefully on the cabinet doors, and ensure that children are kept away from the kitchen area. Opening the door prematurely or applying pressure to the lock before the adhesive has fully cured can cause the tape to lift slightly, permanently weakening the bond and leading to eventual failure.
Testing and Troubleshooting
Once the adhesive has cured completely (or immediately after securing the screws), it is time to test the system to ensure it operates smoothly and securely.
The Testing Process: With the cabinet door open, manually press the lock arm to ensure it moves freely and springs back into place. Close the cabinet door gently. You should hear a subtle click indicating that the lock arm has engaged with the catch. Try to pull the door open gently; it should remain securely shut. Hold the Cubble magnetic key against the outside of the cabinet door, directly opposite where the internal lock is mounted. You should hear the mechanism disengage. While holding the key in place, pull the door open. Once open, remove the key and verify that the lock arm automatically returns to its active locking position.
Troubleshooting Misalignment: If the cabinet door does not lock when closed, or if the key fails to disengage the lock, the most likely cause is misalignment. Inspect the gap between the lock body and the catch when the door is closed. If the gap is too wide, the lock arm may not reach the catch. You may need to adjust the position of the catch forward or use a spacer if provided by the manufacturer. Check for any physical obstructions, such as cabinet shelves or hinges, that might be preventing the door from closing fully or blocking the lock mechanism.
Troubleshooting Adhesion Failure: If the lock pulls off the surface during testing or normal use, evaluate the cause. Common reasons include a greasy surface, insufficient cleaning, inadequate curing time, or a highly textured cabinet material. To resolve this, clean the area again thoroughly with rubbing alcohol. Replace the adhesive tape with a fresh, high-quality double-sided safety tape, or transition to the screw-mounting method for a permanent hold.
Safety Stop Condition: If your cabinet doors are exceptionally heavy, thick, or made of specialized materials where screws cannot be used (such as glass or metal), and the adhesive repeatedly fails to hold, stop using this specific lock model on those doors. Continuing to use an unstable lock can lead to sudden failure, exposing your child to hazards. Consult a childproofing professional or investigate alternative safety latches designed specifically for heavy-duty or non-standard cabinet types.
Maintenance and Safety Tips for Kitchen Cabinets
Kitchens are dynamic environments characterized by high humidity, steam from cooking, and temperature fluctuations. In Singapore’s tropical climate, these environmental factors are amplified. High humidity and heat can gradually degrade adhesive bonds over time, causing even high-quality tapes to lose their grip.
To maintain safety, perform periodic visual and physical inspections of all installed magnetic locks. At least once a month, gently pull on each secured cabinet door to verify that the lock holds firm. Inspect the plastic components for any signs of cracking, wear, or shifting.
Proper key management is essential for the daily operation of magnetic locks. If you lose the magnetic key, you will not be able to access your cabinets without potentially damaging the lock or the cabinet door.
Key Storage Best Practices:
- Store the magnetic key on a high shelf, inside a high-level drawer, or mounted on a magnetic hook placed high on the refrigerator or wall, completely out of reach and sight of children.
- Consider keeping a spare key in a designated, secure location in case the primary key is misplaced.
Always remember that childproofing products, including the Cubble magnetic lock, are designed to assist parents and caregivers by creating a physical barrier. They are a supplementary layer of safety and must never replace active adult supervision. Children are remarkably creative and persistent; given enough unsupervised time, they may find ways to bypass safety devices. Always keep high-risk items—such as sharp knives, heavy glass cookware, and toxic cleaning chemicals—stored in the highest, most inaccessible cabinets possible, even if your lower cabinets are locked. If you suspect your child has accessed hazardous items or if a safety device fails, consult a medical professional or emergency services immediately.
Frequently Asked Questions (FAQ)
Can magnetic locks be installed on cabinets with no visible frame?
Yes, magnetic locks can be installed on frameless (also known as full-overlay) cabinets, but the process requires careful positioning. Since there is no face frame, the catch must be mounted to the underside of the cabinet’s top panel or side wall. Ensure that the lock body on the door aligns perfectly with this interior mounting point. If the interior clearance is tight, you may need to check the manufacturer’s instructions for specific brackets or alternative mounting orientations.
Will the magnetic key interfere with kitchen appliances?
The magnetic key used for Cubble locks contains a localized magnet that is generally not strong enough to interfere with large kitchen appliances like refrigerators, ovens, or dishwashers. However, to prevent any potential issues, avoid storing the key directly on or near sensitive electronic control panels, digital displays, smart home tablets, or magnetic strips used for holding kitchen knives.
How do I remove the lock without damaging the cabinet finish?
When your child outgrows the need for cabinet locks, or if you are living in a rental property and need to restore the cabinets to their original state, you can remove the adhesive-mounted locks safely. Slide a piece of dental floss or thin fishing line behind the adhesive pad and use a sawing motion to gently slice through the foam tape. Once the plastic component is detached, apply a mild adhesive remover or rubbing alcohol to the remaining residue, let it sit for a few minutes, and gently wipe it away with a microfiber cloth. Avoid prying the lock off forcefully, as this can peel the paint, laminate, or wood veneer.

Community discussion
Share your experience or ask a question. Comments are reviewed before publication.