
Securing your home as your baby transitions into an active toddler is a major milestone in parenting. Among the most critical areas to address are kitchen and bedroom cabinets, which often house sharp utensils, heavy cookware, cleaning chemicals, or delicate personal items. Properly installing a child safety drawer lock requires matching the lock type to your cabinet material, thoroughly prepping the surface, and ensuring precise alignment so the mechanism can withstand a child’s persistent pulling.
While the market offers various locking systems, parents generally choose between adhesive-mounted locks and screw-on hardware. Adhesive options are excellent for renters or delicate finishes, while screw-on models provide maximum durability for heavy-duty drawers. Before beginning any installation, always check the manufacturer instructions for your specific lock model and your cabinet manufacturer’s care guidelines. If the instructions conflict, or if you are unsure about your cabinet’s material compatibility, consult a professional installer or the manufacturer directly to prevent damage.
Preparation and Tools Needed for Cabinet Lock Installation
Before you begin mounting any child safety drawer lock, taking the time to prepare your workspace and gather the correct tools will ensure a smooth, efficient process. This guide is designed for standard flat-panel kitchen and bedroom cabinets, which are the most common configurations found in modern homes, including typical HDB flats and condominiums in Singapore.
Products mentioned in this guide
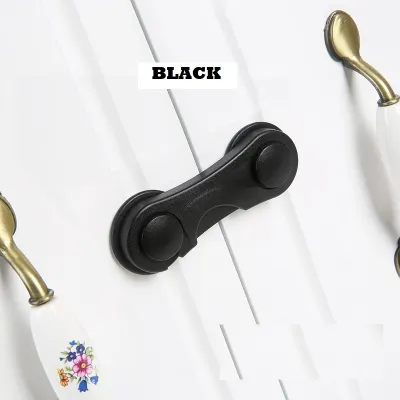

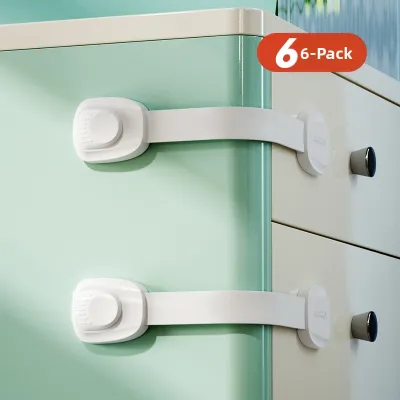

![[Ship in 24 Hours] Baby Safety Lock Cupboard Lock Cabinet Locks Wardrobe Drawer Fridge Lock Child Safe Lock Kid Safety Door Latches Children Day Gifts](https://img.lazcdn.com/g/p/e09ea02a4ce08945db1e68c840159c92.jpg_400x400q80.jpg_.webp)
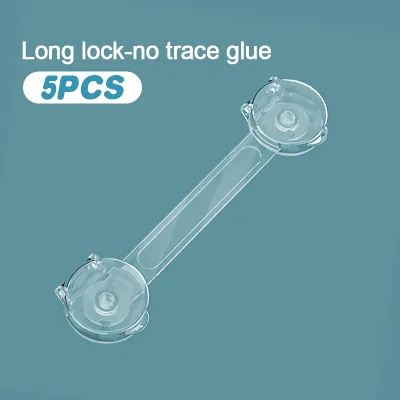
Prices are valid at publication and may change. Please refer to the product page for the latest price.
To ensure a successful installation, gather the following essential tools and materials:
- Isopropyl alcohol (70% or higher concentration): Crucial for removing grease and oils from the mounting surfaces.
- Microfiber cloths: For lint-free cleaning and drying.
- Measuring tape: To ensure precise centering and alignment.
- Pencil: For marking placement and screw points.
- Small spirit level: To verify that the lock mechanisms are perfectly horizontal or vertical.
- Screwdriver or power drill: Required for hardware-mounted locks, along with a selection of small wood drill bits.
- Painter's tape: Useful for holding adhesive pieces in place while they cure.
- Your chosen child safety drawer lock kits: Ensure you have all components, including latches, catches, and screws.
Identifying your cabinet material is a vital step before choosing your installation method. Standard kitchen and bedroom cabinets are typically finished with melamine laminates, wood veneers, polyurethane paint, or solid timber. Laminate and painted surfaces are generally smooth and highly receptive to adhesives, but low-quality laminates or peeling paint can tear or lift when strong adhesives are eventually removed. Conversely, raw, unvarnished wood or highly textured surfaces are porous and do not bond well with adhesive pads; these materials almost always require hardware-mounted, screw-on locks to guarantee child-safe security.
Step-by-Step Guide to Installing Adhesive Child Safety Drawer Locks
Adhesive-mounted locks are highly popular because they do not require drilling into your expensive cabinetry. This makes them the ideal choice for renters who want to protect their security deposits, or for homeowners who wish to preserve the pristine exterior of their premium wooden or acrylic cabinets. However, the strength of an adhesive lock relies entirely on the quality of the installation process.

Cleaning and Prepping the Cabinet Surface
The absolute foundation of a secure adhesive bond is a pristine surface. In kitchens, cabinets accumulate a microscopic layer of grease, cooking oils, steam residue, and dust over time. In bedrooms, hand oils, lotions, and polish can leave a similar invisible barrier. If you apply an adhesive pad directly onto this residue, the lock will likely peel off the very first time your toddler gives it a firm tug.
To clean the surface properly, pour a generous amount of isopropyl alcohol onto a clean microfiber cloth. Scrub the exact area on both the cabinet frame (where the catch will sit) and the drawer front or side (where the lock body will be mounted). Do not use standard household glass cleaners, multi-surface sprays, or dish soaps; these products frequently contain surfactants, silicones, or fragrances that leave behind a slick film, which actively prevents the adhesive from fully bonding.
After scrubbing, wipe the area with a dry section of the microfiber cloth. Allow the surface to air-dry completely for at least two to three minutes. In humid tropical environments like Singapore, ensuring absolute dryness is especially important, as moisture trapped beneath an adhesive pad can severely compromise its chemical curing process.
Positioning and Applying the Adhesive Lock
Before peeling off the protective backing from the adhesive pad, perform a dry fit. Hold the lock components against the cabinet and drawer to determine the optimal placement. The latch must engage with the catch smoothly, leaving just enough play for the drawer to close completely without forcing the mechanism, but not so much play that a child’s small fingers can squeeze through the gap.
When positioning the lock, consider the physics of a toddler’s pull. Placing the lock too far down on a deep drawer face creates a high-leverage point at the top. When the child pulls the top handle, they can flex the drawer front, putting immense peeling stress on the adhesive. Position the lock as close to the natural pulling point (the drawer handle or knob) as structurally possible.
Once you have marked the perfect position with a pencil, carefully peel the protective film off the adhesive pad. Avoid touching the sticky surface with your fingers, as skin oils will immediately degrade the adhesive quality. Align the component with your pencil marks and press it firmly against the cabinet surface. Apply hard, even pressure with your thumb or palm for at least 30 seconds. To prevent gravity or slight surface tension from shifting the lock while the adhesive begins to grip, secure the component tightly with a strip of painter’s tape.
Curing Time and Initial Testing
One of the most common reasons adhesive locks fail is premature use. Pressure-sensitive adhesive pads do not dry like liquid glue; instead, they undergo a chemical curing process where the adhesive slowly flows into the microscopic pores of the cabinet surface. This process takes time to reach maximum bonding strength.
Strictly follow the manufacturer’s specified curing time, which is typically between 12 and 24 hours. During this period, do not close the drawer so tightly that it puts tension on the lock, and absolutely do not allow anyone to pull on the drawer. In highly humid climates, it is best to err on the side of caution and allow a full 24 hours for the bond to cure completely.
Once the curing window has passed, remove the painter’s tape and perform a gentle initial test. Open the drawer slowly until the lock engages, then apply a light, steady outward pressure. Verify that the adhesive pad remains completely flat against the cabinet surface without any lifting or peeling at the edges. If the bond looks secure, the lock is ready for daily use.
Step-by-Step Guide to Installing Screw-On Drawer Locks
For heavy drawers, high-use kitchen zones, or cabinets made of solid wood or rough-textured materials, hardware-mounted screw-on locks are the gold standard. While they require permanent modifications to your cabinetry, they offer unparalleled mechanical strength that can withstand even the most determined toddler’s pulling forces.
Marking and Drilling Pilot Holes
Precision is key when installing screw-on locks. Because you are drilling permanent holes into your cabinetry, minor alignment errors can leave you with unsightly, misplaced holes. Start by holding the lock mechanism and its corresponding catch inside the drawer cabinet in their closed, locked positions.
Using a sharp pencil, mark the exact center of each screw slot onto the wood. Use a small spirit level to ensure the lock body sits perfectly straight. If the lock is crooked, the latch may rub against the catch, causing premature wear on the plastic components or making the drawer difficult for adults to open.
Before you pick up your power drill, you must perform a critical safety check: measure the thickness of your drawer panel and cabinet frame. Compare this measurement to the length of the screws provided in your lock kit. If your drawer panel is 15mm thick and the provided screws are 16mm long, the screws will pierce through the beautiful exterior face of your drawer, ruining the finish and creating a sharp hazard. If the kit screws are too long, purchase shorter, high-quality wood screws from a local hardware store.
Select a drill bit that is slightly narrower than the inner shank of your mounting screws. Wrap a piece of painter’s tape around the drill bit at the exact depth of the screw length to act as a visual depth stop. Carefully drill your pilot holes at the marked pencil points. Drilling pilot holes is a non-negotiable step; driving screws directly into dry wood, MDF, or particle board without pilot holes can easily split the material, permanently ruining your cabinet structure.
Securing the Lock Mechanism
With your pilot holes drilled, align the lock base over the holes. Using a manual screwdriver or a power drill set to a very low torque setting, drive the screws into the wood. Manual screwdrivers are highly recommended for this step, as they give you a tactile feel for the resistance of the wood, preventing damage to the cabinet.
Be incredibly careful not to over-tighten the screws. Over-tightening can easily strip the wood fibers inside the pilot hole—especially in soft particle board or MDF—rendering the screw loose and ineffective. It can also crack the plastic mounting tabs of the child safety lock itself. Tighten the screws just until they are snug and the lock body is firmly held against the wood without shifting.
Next, repeat this process for the corresponding catch piece on the underside of the cabinet frame or divider. Ensure the catch is aligned perfectly with the path of the latch. If your lock kit includes adjustable screw slots, place the screws in the center of the slots to allow room for minor adjustments later.
Checking Alignment and Drawer Movement
Once both components are screwed down, test the mechanical movement of the drawer. Slowly slide the drawer closed and watch how the latch interacts with the catch. The latch should glide smoothly over the catch and click into place without binding, scraping, or requiring you to slam the drawer.
If you feel resistance or if the latch fails to catch, the alignment is slightly off. Loosen the mounting screws on the catch or lock body by a half-turn. Gently slide the component within its adjustable screw slots until it aligns perfectly with its counterpart, then retighten the screws securely.
Open and close the drawer several times to ensure the mechanism operates flawlessly. Finally, test the adult release mechanism. Ensure that you can easily depress the latch or apply the magnetic key (depending on your lock style) to open the drawer with one hand, which is essential when you are busy in the kitchen or holding a baby.
Common Installation Mistakes and How to Avoid Them
Even high-quality child safety drawer locks can fail if they are installed incorrectly. Understanding the most common pitfalls will help you avoid safety gaps and prevent unnecessary damage to your home.
- Skipping the surface preparation step: In a busy household, it is tempting to quickly wipe a cabinet with a damp cloth and stick the lock on. However, invisible grease and dust will prevent the adhesive from bonding directly to the cabinet material. Within a few weeks or even days, the lock will peel off under minimal pressure. Always use pure isopropyl alcohol and let it dry completely.
- Incorrect leverage placement: Installing a lock too far from the drawer handle allows a child to pull the drawer open slightly on one side. This creates a leverage point where the child can repeatedly yank the drawer, eventually snapping the plastic latch or pulling the adhesive off. Always install the lock centered or directly adjacent to the main pulling force.
- Testing the lock immediately: It takes time for pressure-sensitive adhesives to cure. Testing the lock or allowing children access to the drawer before the full curing window (usually 24 hours) has passed will permanently weaken the chemical bond, even if the lock does not fall off immediately.
- Using screws that are too long: Always measure your cabinet panels before drilling or driving screws. Using screws that are too long can cause them to protrude through the exterior face of the drawer, creating an unsightly hole and a sharp, dangerous point that can scratch hands or snag clothing.
- Over-tightening hardware: Using a high-torque power drill to drive screws into plastic lock brackets often leads to cracked plastic or stripped wood threads. Always use a manual screwdriver for the final tightening turns to ensure a snug, undamaged fit.
Testing, Maintenance, and Safe Removal
Once your child safety drawer locks are installed, your safety job is not quite finished. Regular testing, ongoing maintenance, and knowing how to safely remove the locks when they are no longer needed are all part of maintaining a safe home environment.
To perform a realistic safety test, wait until any adhesives have fully cured. Do not just pull the drawer straight out gently. Toddlers do not pull gently or in a single direction; they shake, wiggle, and pull downward or upward with their entire body weight. Simulate this action by grabbing the drawer handle and pulling firmly outward and downward simultaneously. If the lock bends excessively, lifts at the edges, or slips out of its catch, you must reinstall or adjust the alignment to ensure it holds under real-world stress.
Environmental factors can affect your locks over time. High humidity in bathrooms and kitchens can slowly degrade adhesive backings and cause wood cabinets to expand and contract, which may loosen wood screws. Make it a habit to inspect your cabinet locks monthly. Check adhesive pads for lifting edges or dirt accumulation. Inspect plastic components for hairline cracks or signs of wear, and use a manual screwdriver to tighten any screws that may have vibrated loose. If you notice any damage or wear, replace the lock immediately to maintain a secure barrier.
When your child outgrows the need for cabinet locks, you will want to remove them without ruining your cabinetry. For adhesive locks, do not try to pry them off with brute force, as this can rip the paint or laminate clean off the wood. Instead, use a hairdryer on a low heat setting to gently warm the adhesive pad for one to two minutes. This softens the glue. Take a piece of dental floss or fishing line, slide it behind the plastic lock body, and use a sawing motion to slice through the softened foam tape.
Once the lock is removed, a sticky residue will likely remain. Apply a small amount of a surface-safe adhesive remover, eucalyptus oil, or warm soapy water to a microfiber cloth and gently rub the residue away. Always test a small, hidden area of your cabinet finish first to ensure the remover does not dull or discolor the paint or varnish.
For screw-on locks, simply unscrew the components. You can fill the small pilot holes with a color-matched wood putty or wax filler stick, smoothing it flat with a plastic putty knife to restore your cabinet’s original appearance.
Frequently Asked Questions (FAQ)
Can I install drawer locks on cabinets with curved or textured surfaces?
Standard rigid adhesive locks require flat, smooth surfaces to achieve 100% contact with the adhesive pad. If your cabinets have curved profiles, decorative shaker-style trim, or heavily textured surfaces, rigid adhesive locks will not hold securely. For these configurations, look for specialized flexible strap locks with adjustable webbing that can bend around corners and contours, or opt for internal hardware-mounted screw-on locks that attach to the flat interior surfaces of the drawer and cabinet frame.
What should I do if the adhesive lock keeps failing?
If your adhesive locks repeatedly peel off, check for underlying surface issues. Porous raw wood, peeling paint, or cheap paper-foil laminates do not provide a stable substrate for adhesives. Additionally, persistent grease in cooking areas can ruin a bond if the surface was not cleaned thoroughly with isopropyl alcohol. To resolve this, you can switch to a hardware-mounted screw-on lock for a permanent mechanical hold, use a specialized heavy-duty mounting tape designed for textured surfaces, or install an internal magnetic lock system that mounts securely on the inside of the cabinet doors where surfaces are often flatter and cleaner.

Community discussion
Share your experience or ask a question. Comments are reviewed before publication.