
Securing kitchen cabinets is a fundamental step in childproofing your home, especially as toddlers begin to explore their surroundings. Installing a child lock cabinet system involves evaluating your cabinet design, preparing the mounting surfaces, and carefully executing the installation steps for either adhesive or hardware-mounted locks. By choosing the correct locking mechanism and following a systematic setup process, you can effectively restrict access to hazardous household items.
Assessing Your Cabinets and Choosing the Right Child Lock
Before purchasing any childproofing hardware, you must evaluate the structural characteristics of your kitchen cabinets. Cabinets constructed from solid wood, wood veneer, laminate, metal, or glass each present unique mounting challenges and limitations. For instance, glass-fronted cabinets cannot accommodate hardware-mounted locks that require drilling, making high-quality adhesive locks the only viable option. Similarly, the style of your cabinet doors—whether they are overlay, inset, frameless, or traditional face-frame designs—will dictate where a lock can be physically positioned.
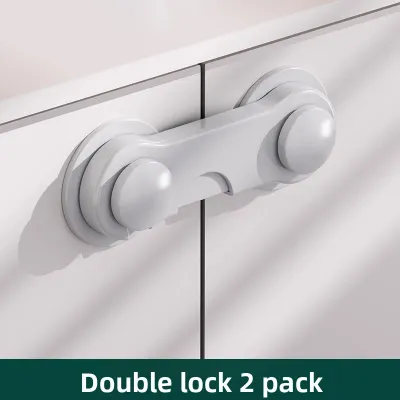
Handle styles also play a critical role in determining lock compatibility. Double cabinet doors with D-shaped handles or knobs can easily be secured with external sliding latch locks or cord locks, which require no permanent installation. However, modern handleless cabinets or those with flat-panel doors require internal locking mechanisms, such as magnetic locks or spring-loaded latches, which remain completely hidden from the exterior.
Products mentioned in this guide


![[Ship in 24 Hours] Baby Safety Lock Cupboard Lock Cabinet Locks Wardrobe Drawer Fridge Lock Child Safe Lock Kid Safety Door Latches Children Day Gifts](https://img.lazcdn.com/g/p/e09ea02a4ce08945db1e68c840159c92.jpg_400x400q80.jpg_.webp)
![[SG Local Stock] Baby Safety Lock Childrens Anti-pinch Safety Lock Catch Anti-collision Premium Safety Locks Self-adhesive Baby Safety Buckle For Cabinet Drawer Fridge Door Wardrobe Children Day Gifts](https://img.lazcdn.com/g/p/638abdf5a97199a85681991ebc624026.jpg_400x400q80.jpg_.webp)
Prices are valid at publication and may change. Please refer to the product page for the latest price.
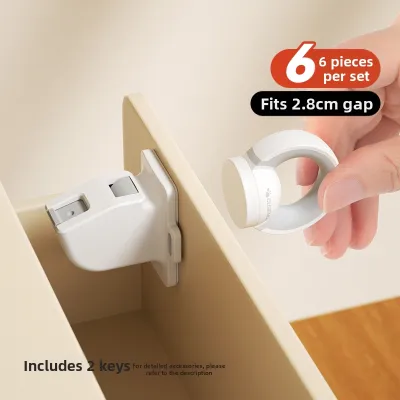
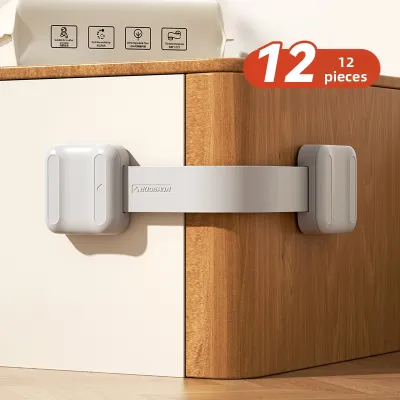
When selecting a child lock cabinet solution, compare the three primary categories based on your specific household needs. Adhesive strap locks are highly versatile, bending around corners to secure drawers, appliances, and cabinets alike without damaging the underlying material. Magnetic locks offer an invisible aesthetic and robust security but require precise alignment and a dedicated magnetic key to operate. Sliding latch locks are highly portable and simple to use but are visible on the exterior and only work on adjacent cabinet handles.
Always check the manufacturer’s product packaging for weight limits, age recommendations, and surface warnings before making a final decision. Some adhesive locks are not rated for heavy drawers containing heavy pots and pans, while others may specify that they are not suitable for use on delicate wallpaper, unfinished wood, or high-humidity areas. Verifying these specifications ensures the lock can withstand the physical force of a growing toddler.
Preparing the Surface and Tools for Installation
Proper preparation is the foundation of a secure and long-lasting child lock installation. To begin, gather all the necessary tools and materials to ensure a smooth workflow. For adhesive-based locks, you will need rubbing alcohol, clean microfiber cloths, and a measuring tape. If you are installing hardware-mounted or magnetic locks, prepare a pencil, a drill with appropriately sized drill bits, a screwdriver that matches the provided screws, and safety glasses.

For adhesive locks, the cleanliness of the mounting surface directly determines the strength of the bond. Kitchen cabinets frequently accumulate a thin layer of grease, cooking oils, steam residue, and dust, which will prevent adhesives from bonding correctly. Thoroughly clean the designated installation areas using rubbing alcohol and a microfiber cloth to strip away any oily residue. Avoid using household glass cleaners or multi-surface sprays, as these often leave behind a slick film that compromises adhesive performance. Allow the cleaned areas to dry completely before proceeding.
Safety must remain your top priority throughout the preparation and installation process. Keep all tools, screws, drill bits, and small plastic components strictly out of reach of children to prevent choking hazards or accidental injuries. If you are using strong cleaning agents or solvents to prep the surfaces, ensure the kitchen is well-ventilated by opening windows or turning on a range hood.
Step-by-Step Installation: Adhesive Strap and Latch Locks
Adhesive strap and latch locks are favored for their straightforward, drill-free installation process. To begin, close the cabinet doors completely and hold the lock assembly against the cabinet surface to plan the placement. Use a measuring tape to ensure the lock is positioned high enough to be out of a young child’s natural line of sight, yet accessible enough for adult operation. Mark the exact boundaries of the lock base and the catch with a pencil, ensuring the connecting strap is straight and taut but not overstretched.
Once the placement is marked, peel the protective backing off the first adhesive pad, taking care not to touch the sticky surface with your fingers. Align the pad precisely with your pencil marks and press the lock base firmly against the cabinet door. Apply continuous, heavy pressure with your palm or thumb for at least thirty seconds to activate the pressure-sensitive adhesive. Repeat this exact process for the catch or the second anchor point on the cabinet frame.
After both components are firmly pressed into place, you must strictly observe the manufacturer’s specified curing time before subjecting the lock to any physical tension. Most high-quality adhesives require a full 24 hours to cure completely and reach their maximum holding strength. Operating the lock or allowing a child to pull on the cabinet door during this curing window will weaken the bond and lead to premature failure.
To ensure a successful installation, avoid several common mistakes that compromise adhesive performance. Never install adhesive pads on uneven, heavily textured, or grooved cabinet surfaces, as this reduces the contact area between the adhesive and the cabinet. Do not stretch flexible straps too tightly during installation, as constant tension will gradually pull the adhesive pads away from the surface. Finally, resist the temptation to test the lock’s strength immediately after application; patience during the curing phase is essential.
Step-by-Step Installation: Magnetic and Hardware-Mounted Locks
Magnetic and hardware-mounted locks provide a highly secure, heavy-duty childproofing barrier that is completely concealed within the cabinet. Start the installation by using the manufacturer-provided template or installation cradle to mark the drilling points on the inside of the cabinet door and the cabinet frame. Ensure there is adequate clearance for internal shelves, pull-out drawers, and door hinges so the lock mechanism does not obstruct the normal function of the cabinet when closed.
Once the marks are verified, select a drill bit that matches the diameter of the pilot holes recommended in the product manual. Drill the pilot holes carefully, taking extreme care not to drill too deeply or penetrate through the front face of the cabinet door. Secure the lock mechanism and the corresponding latch catch to the wood using the provided screws. Tighten the screws firmly with a manual screwdriver, avoiding power drills for this step to prevent overtightening, which can strip the wood fibers or crack thin cabinet frames.
After securing the hardware, test the alignment of the magnetic lock by slowly closing the cabinet door. The internal latch should engage smoothly with the catch. To open the cabinet, place the magnetic key against the outside of the door directly opposite the internal lock mechanism. Establish a strict routine for storing the magnetic key on a high, metallic surface—such as the side of the refrigerator or a dedicated magnetic wall mount—well out of your child’s reach and sight.
A strict stop condition applies to all hardware-mounted installations: halt the process immediately and consult a professional if you encounter unexpected resistance. If your cabinet walls are exceptionally thin, lack solid structural backing, or if you suspect the presence of hidden electrical wiring or plumbing pipes behind the cabinet panels, do not proceed with drilling. A professional installer can help identify safe mounting points or recommend alternative securing methods.
Testing, Maintenance, and When to Replace
Once your child locks are installed and any necessary adhesives have fully cured, you must verify their effectiveness. Perform a manual pull-test by pulling on the cabinet door with the moderate force typical of an active toddler. The lock should hold firmly without slipping, yielding, or causing visible flexing in the cabinet doors or frames. If the lock shifts or the adhesive begins to lift during this test, re-evaluate the installation steps and surface preparation.
Child locks are subject to daily wear and tear in a busy kitchen, making regular maintenance checks essential. Schedule a quick inspection of all cabinet locks every few weeks to identify potential points of failure. Check adhesive locks for signs of peeling, cracking, or dirt accumulation along the edges of the pads. For hardware-mounted locks, verify that the mounting screws remain tight and that the magnetic mechanism or spring-loaded latch operates smoothly without sticking.
Knowing when to replace a child lock cabinet mechanism is critical to maintaining a safe kitchen environment. Replace any lock immediately if you observe visible cracking in the plastic, frayed or stretched straps, loose screws that can no longer be tightened, or a weakened magnetic grip. Additionally, as children grow older and develop greater physical strength and problem-solving skills, they may outgrow the effectiveness of certain lock types. Transition to more robust locking systems if your child learns to bypass or overpower the existing locks.
Frequently Asked Questions (FAQ)
Can I install adhesive child locks on painted or textured cabinets?
Textured, porous, or freshly painted cabinet surfaces significantly reduce the contact area and bonding capability of adhesive locks. If your cabinets have a textured laminate finish or have been painted recently, the adhesive may pull the paint off the wood or fail to stick entirely. Always check the manufacturer’s surface compatibility list on the product packaging before attempting installation. For delicate, painted, or highly textured finishes, hardware-mounted locks are generally the safer and more reliable alternative.
How do I remove adhesive cabinet locks without damaging the finish?
Removing adhesive locks safely requires patience to avoid peeling away the cabinet’s protective finish or paint. Use a handheld hairdryer on a low to medium heat setting to gently warm the adhesive pad for a few minutes, which softens the bond. Once the adhesive is warm, slide a piece of dental floss or a thin plastic scraper slowly behind the lock base to separate it from the cabinet surface. Always test this method on a small, hidden area of the cabinet first, and stop immediately if you notice the cabinet finish lifting or peeling.
Are magnetic cabinet locks safe if the child finds the key?
Magnetic cabinet locks are highly effective, but their security relies entirely on keeping the magnetic key completely out of your child’s reach and sight. If a child gains access to the key, they can easily open any secured cabinet in the kitchen. Store the key on a high magnetic surface, inside a locked drawer, or in a secure lockbox. Remember that no physical lock or safety device can ever replace active adult supervision in the kitchen.

Community discussion
Share your experience or ask a question. Comments are reviewed before publication.