
To properly install a baby safety lock on your household cabinets, you must carefully match the lock type to your cabinet’s material, thoroughly clean the mounting surface to ensure a secure bond, and allow any adhesives to cure fully before use. Properly installed locks act as vital physical barriers that delay curious toddlers from accessing hazardous cleaning agents, sharp utensils, or fragile items. While the installation process is straightforward, skipping basic preparation steps can lead to loose locks and compromised safety.
In households with active toddlers, securing storage spaces is a fundamental step in creating a safe environment. Whether you are dealing with solid wood kitchen drawers, delicate glass display cases, or sliding wardrobe doors, each material presents unique physical challenges. By understanding the specific installation requirements for each cabinet type, you can ensure your childproofing efforts remain durable and effective over time.
Preparing for Installation: Tools and Surface Cleaning
Before you begin installing any baby-proofing hardware, gathering the necessary tools ensures a smooth and efficient process. Having everything on hand prevents interruptions and ensures that adhesive components are applied immediately after the surface is prepped.
Products mentioned in this guide
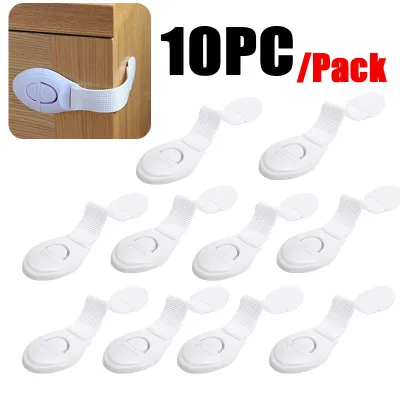
![[SG Local Stock] Baby Safety Lock Childrens Anti-pinch Safety Lock Catch Anti-collision Premium Safety Locks Self-adhesive Baby Safety Buckle For Cabinet Drawer Fridge Door Wardrobe Children Day Gifts](https://img.lazcdn.com/g/p/638abdf5a97199a85681991ebc624026.jpg_400x400q80.jpg_.webp)
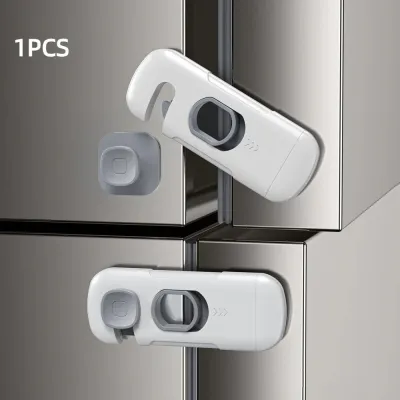
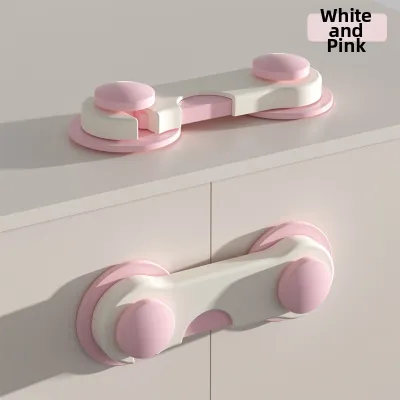
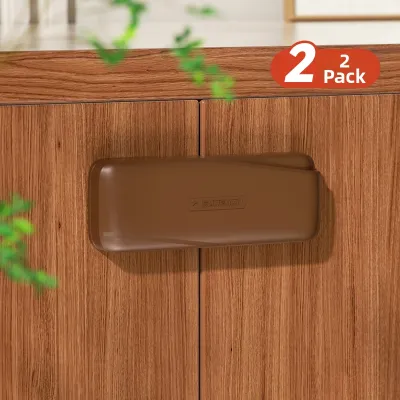
Prices are valid at publication and may change. Please refer to the product page for the latest price.
For most standard installations, you will need the following basic tools:
- Measuring tape: Essential for ensuring precise alignment and centering your locks.
- Isopropyl rubbing alcohol (70% concentration): Used to strip away grease and oils without leaving a chemical residue.
- Microfiber cloth: A lint-free option to wipe down surfaces cleanly.
- Pencil: For marking exact placement lines before peeling adhesive backings.
The foundation of a reliable adhesive-based safety lock is a pristine mounting surface. Kitchen and bathroom cabinets naturally accumulate a layer of grease, dust, cooking oils, and moisture over time, which prevents adhesives from bonding securely. To clean the surface, wipe the targeted area with a microfiber cloth dampened with rubbing alcohol. Avoid using heavy household spray cleaners or dish soaps, as they often leave behind a slick chemical residue that degrades adhesive performance.
In Singapore’s highly humid climate, moisture is a major threat to adhesive bonding. After cleaning the surface with alcohol, allow it to air-dry completely, or wipe it down with a dry, lint-free cloth. Applying an adhesive pad to a damp or humid surface prevents the glue from curing correctly, which can cause the lock to fail when a toddler pulls on it. If you are installing locks during a particularly humid day, using a fan or a hairdryer on a cool setting can help ensure the surface is bone-dry.
Always read the specific manufacturer’s instructions for your chosen safety lock model before proceeding. Different brands have unique requirements regarding surface compatibility, curing times, and alignment. Familiarizing yourself with these details beforehand prevents alignment errors, protects your furniture from damage, and ensures the lock functions exactly as designed.
Step-by-Step Installation for Wooden Cabinets and Drawers
Wooden cabinets and drawers are the most common storage units in a home, and they offer the greatest flexibility when choosing childproofing hardware. Parents generally select between two primary categories: external adhesive strap locks and internal magnetic locks. Your choice will depend on whether you prefer a visible deterrent that reminds caregivers to keep the door shut, or a completely concealed mechanism that preserves the aesthetic of your furniture.

Adhesive Strap Locks
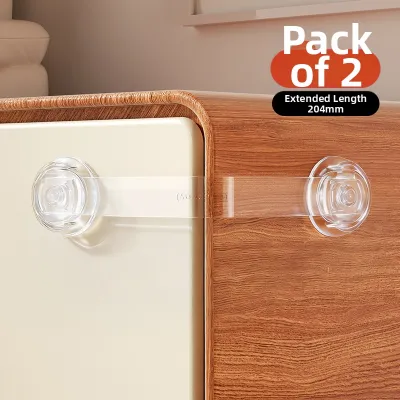
Adhesive strap locks are highly versatile and work exceptionally well on corners, curved edges, and double-door configurations. They provide a visible physical barrier that is easy for adults to operate but difficult for young children to figure out.
To install an adhesive strap lock, follow these key steps:
- Step 1: Measure and mark: Close the cabinet door or drawer fully to identify the natural resting position of the lock. Use your measuring tape and a pencil to mark the exact placement of the two anchor points on either side of the opening gap. Ensure the flexible plastic strap is straight and taut between the anchors, but avoid stretching it so tightly that it puts constant tension on the adhesive pads.
- Step 2: Apply the adhesive: Peel the protective backing off the first adhesive pad. Carefully align the pad with your pencil mark and press it firmly onto the cabinet surface. Apply continuous, heavy pressure with your thumb or palm for at least 30 seconds to activate the pressure-sensitive adhesive. Repeat this exact process for the second anchor pad on the adjacent frame or drawer face, ensuring the strap remains level.
- Step 3: Allow to cure: The most critical step in this process is patience. Do not immediately test the lock or allow your child to pull on it. Most high-quality adhesives require a full 24 hours to cure completely and reach their maximum holding strength. Keep the strap unlatched or avoid using the cabinet entirely during this curing window to prevent premature failure.
Magnetic Locks
Concealed magnetic locks are installed entirely inside the cabinet or drawer, making them invisible from the outside. They are an excellent choice for maintaining the clean look of your wooden cabinetry while keeping hazardous items completely out of reach.
To install a magnetic safety lock, use the following method:
- Step 1: Use the alignment template: Most magnetic lock kits include a plastic alignment template or installation cradle. Insert the lock body and the catch (the strike plate) into this template, peel the adhesive backing off both pieces, and position the template against the inside corner of the cabinet door and frame.
- Step 2: Mount the catch: Close the door firmly to transfer the adhesive pieces to their respective permanent spots. If your chosen model requires screws for a more permanent hold on solid wood, use your pencil to mark the screw holes through the template. Drill shallow pilot holes using a drill bit slightly smaller than the screws to prevent the wood from splitting, then hand-tighten the screws into the cabinet frame and door.
- Step 3: Secure the magnetic key: To operate these locks, you must use a specialized magnetic key held against the outside of the cabinet door. Install the included magnetic key holder on a high wall, refrigerator side, or another secure, elevated surface that is completely out of your toddler's reach and line of sight. Never leave the magnetic key resting on low countertops or tables, as young children can easily mimic your actions and learn how to unlock the cabinets themselves.
Securing Glass Cabinets and Display Cases
Glass cabinets and display cases pose unique safety challenges because they are fragile and susceptible to shattering. You must never attempt to drill holes or use screws on any glass or acrylic surfaces, as even tempered glass can shatter instantly under localized pressure. Instead, exclusively use high-quality adhesive safety locks designed specifically for smooth, non-porous surfaces like glass.
When choosing and installing a safety lock on glass, you must consider the risk of glass breakage. If a lock is mounted with too much tension, or if a child pulls aggressively on the locked door, the concentrated force can crack or shatter the glass panel. Choose locks with flexible, shock-absorbing materials that distribute the pulling force across a wider surface area rather than concentrating it on a single point.
To apply the adhesive mounting plates to glass, clean the area thoroughly with rubbing alcohol and let it dry completely. When pressing the adhesive pad onto the glass, start from one edge and roll your thumb across the pad to the other side. This technique prevents air bubbles from becoming trapped under the adhesive, which can significantly weaken the bond and make the lock easy to pull off.
Before declaring the installation complete, verify the manufacturer’s specified weight and pull limits for the adhesive lock. If a heavy glass door is pulled with enough force to detach a weak adhesive, the lock itself can become a choking hazard, or the heavy door could swing open violently and cause injury. Regularly inspect the glass around the mounting area for any hairline fractures or signs of stress, and stop using the lock immediately if any damage is detected.
Childproofing Sliding Doors and Wardrobes
Sliding doors and bypass wardrobes require specialized safety locks because standard latches and strap locks cannot prevent lateral sliding motion. Common options for these configurations include sliding door wings (which fold flat to allow passage and pop up to block movement), track clamps, or heavy-duty sliding door stoppers. These mechanisms physically block the overlapping door from sliding past the frame or the adjacent panel.
Before purchasing or installing a lock for sliding doors, you must measure the physical dimensions of your setup. Check the width of the sliding track, the thickness of the doors, and the clearance gap between the overlapping doors. If the gap between the doors is too narrow, a pop-up wing lock may scrape against the inner door or prevent it from sliding smoothly when the lock is disengaged.
To install a sliding wing lock, clean the outer surface of the inner glass or wood panel where the outer door overlaps it. Peel the adhesive backing and mount the lock high up on the panel, well out of your child’s reach. Position it so that when the wings are popped open, they physically block the outer door from sliding open more than a few centimeters, keeping the opening too narrow for a child’s hand or head to pass through.
Ensure the installation area is safe and does not create a pinch point for little fingers. When the sliding door is pushed against the lock, there should still be enough clearance to prevent fingers from being trapped in the gap. Test the sliding motion several times to confirm that the lock does not catch, scrape, or cause friction when folded down into the unlocked position.
Testing, Maintenance, and Safety Boundaries
Once the manufacturer’s recommended adhesive curing period has passed (usually 24 hours), you must perform a thorough pull test. Gently but firmly pull on the cabinet door or drawer with a force similar to what a determined toddler would exert. The lock should remain securely anchored, and the door should not open wide enough to allow access to the cabinet’s contents or create a gap where fingers can be pinched.
Establish a routine maintenance schedule to check the integrity of your baby-proofing hardware every few weeks. Inspect adhesive pads for peeling edges, discoloration, or signs of dry rot, especially in high-humidity areas like bathrooms and kitchens. For mechanical locks, verify that latches slide smoothly, spring mechanisms function correctly, and magnetic keys successfully actuate the internal catches.
It is crucial to understand that cabinet safety locks are designed as physical deterrents and delay tactics, not absolute security systems. They are meant to buy you valuable seconds to intervene, but they can never replace active adult supervision. As children grow, they develop better motor skills and problem-solving abilities, and some may eventually figure out how to bypass or force open these devices.
If you notice an adhesive pad lifting, a plastic latch showing signs of stress whitening, or a magnetic mechanism sticking, replace the safety lock immediately. Do not attempt to re-adhere a failing lock with household glue, as this can damage your furniture’s finish and will not provide the reliable hold necessary to keep your child safe.
Common Installation Mistakes to Avoid
One of the most common installation mistakes is applying adhesive pads over uneven surfaces, deep wood grain gaps, or grout lines. Adhesives require a completely flat, smooth surface to establish a full bond. If you mount a lock over a textured surface or a gap, air will seep underneath, causing the adhesive to dry out prematurely and fail under minimal pressure.
Another frequent error is testing the strength of the lock or using the cabinet before the adhesive has fully cured. It can be tempting to pull on the lock immediately to see if it works, but doing so breaks the chemical bonds forming between the adhesive and the cabinet surface, permanently reducing its maximum holding power. Always wait the full duration specified in the product manual.
Parents also make the mistake of installing locks or their release mechanisms within a toddler’s direct line of sight or physical reach. Children learn by watching their parents. If they see you press a specific button or slide a latch at their eye level, they will quickly attempt to replicate the action. Whenever possible, mount locks on the upper edges of cabinets or use concealed magnetic systems.
Finally, never use screws or attempt to drill into any glass, acrylic, or mirrored cabinet doors. Even if you use a specialized glass drill bit, the vibration and pressure can create micro-fractures that weaken the panel, making it highly susceptible to shattering later if a child bumps into it. Stick strictly to specialized adhesive options for these delicate materials.
Frequently Asked Questions (FAQ)
Finding the right baby-proofing setup can raise several practical questions about installation, daily use, and eventual removal. Below are answers to some of the most common concerns parents face when securing their home cabinets.
Can I install cabinet safety locks without drilling?
Yes, many high-quality safety locks are designed specifically for no-drill installation. Adhesive strap locks, sliding door wing locks, and adhesive-mounted magnetic locks all provide excellent holding power without damaging your cabinetry. However, these no-drill options require perfectly flat, clean, and non-porous surfaces to bond correctly, and they may not adhere well to heavily textured, oiled, or unfinished wood surfaces.
How do I remove adhesive cabinet locks without damaging the wood?
To remove adhesive locks safely, use a hairdryer on a low-to-medium heat setting to warm the adhesive pad for one to two minutes, which softens the glue. Next, take a piece of dental floss or fishing line, hold it tautly against the cabinet surface, and gently slide it behind the mounting plate in a sawing motion to slice through the foam tape. Once the plastic piece is removed, use a mild, furniture-safe adhesive remover or rubbing alcohol to clean away any remaining sticky residue, then wipe the area dry.
Are magnetic cabinet locks safe for babies?
Yes, magnetic cabinet locks are highly safe because the entire locking mechanism is completely concealed inside the cabinet, out of your child’s reach. The primary safety risk is actually the external magnetic key itself. Because these keys are small and contain powerful magnets, they must be stored securely on a high shelf or wall mount well out of your child’s reach to prevent accidental swallowing or choking hazards.

Community discussion
Share your experience or ask a question. Comments are reviewed before publication.