
Child safety in the home becomes a top priority the moment your baby begins to crawl and explore. Between 6 to 12 months of age, infants rapidly develop the motor skills and curiosity needed to open low-lying cabinets and drawers. These storage spaces often house household cleaners, heavy cookware, sharp utensils, or delicate glassware that pose significant safety hazards. Installing reliable cabinet locks is one of the most practical steps you can take to childproof your living environment. However, because cabinets come in various designs—such as standard hinged doors, sliding panels, and deep drawers—there is no one-size-fits-all childproofing solution.
To ensure these safety devices work effectively, you must select the correct lock type for each cabinet style and install them with precision. Properly installed locks act as a robust physical barrier, but it is important to remember that they are safety aids designed to complement, not replace, active caregiver supervision. Understanding the mechanics of your furniture and the specific requirements of different locking systems will help you create a secure environment for your growing child.
Prepare Your Cabinets and Gather the Right Tools
Before beginning the installation process, taking the time to gather the correct tools and prepare your furniture surfaces will save time and prevent installation failures. The tools you require will depend on whether you are installing adhesive-based locks or hardware-mounted screw-in models. For adhesive locks, you should gather rubbing alcohol (isopropyl alcohol), clean microfiber cloths, a measuring tape, and a pencil. If you are installing hardware-mounted locks, you will also need a hand screwdriver, a power drill with small drill bits suitable for pilot holes, and safety glasses to protect your eyes.
Products mentioned in this guide
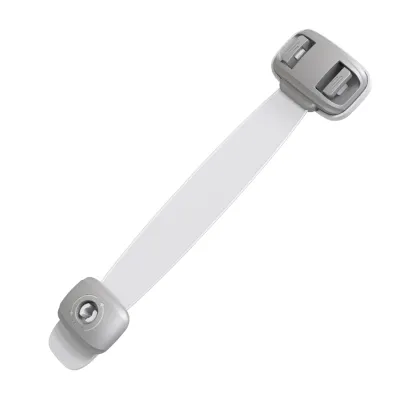
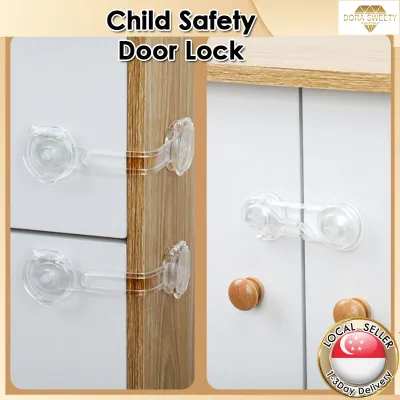
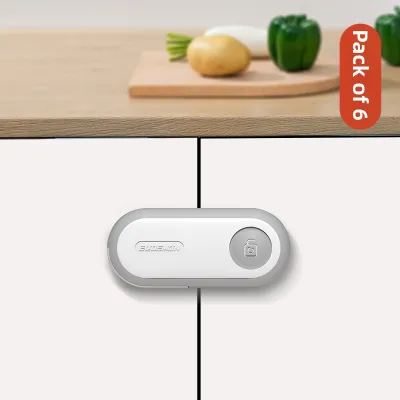
Prices are valid at publication and may change. Please refer to the product page for the latest price.
Surface preparation is the single most critical factor in determining whether an adhesive lock will hold up against a toddler’s persistent pulling. Kitchen and bathroom cabinets naturally accumulate an invisible layer of cooking oils, grease, dust, skin oils, and moisture. Adhesive pads cannot form a secure chemical bond with a contaminated surface, which often leads to the lock peeling off within days. To prevent this, wipe the target area thoroughly with rubbing alcohol and a microfiber cloth. Avoid using standard household glass cleaners or multi-surface sprays, as many of these products contain silicone, wax, or oils that leave behind a slick residue. After cleaning, allow the surface to air-dry completely for several minutes.
Before peeling any adhesive backings or drilling holes, unbox your cabinet locks and inspect each mechanism. Verify that all components listed in the packaging are present, including latches, catches, keys, and mounting templates. Manually operate each lock several times to ensure that springs, magnetic releases, or sliding straps move smoothly without binding or sticking. If a lock feels stiff or defective out of the box, replace it before mounting it to your furniture.
Finally, always read the manufacturer’s specific instructions before starting. Different brands utilize various adhesive formulations and hardware designs, meaning curing times, surface compatibility limits, and weight limits can vary significantly. Some adhesives are not recommended for use on unfinished wood, veneered surfaces, or certain plastics. Understanding these manufacturer warnings beforehand ensures you do not inadvertently damage your cabinets or install a lock that is destined to fail.
How to Install Locks on Standard Hinged Doors
Standard cabinet doors with traditional hinges are the most common storage style in modern homes. When securing these cabinets, you must first identify the optimal placement for the lock. The ideal position is typically near the upper corner of the door or close to the handles. Placing the lock high up keeps it out of a toddler’s direct line of sight and reach, reducing the temptation for them to play with the mechanism. At the same time, this height ensures that adults can easily access and operate the lock without excessive bending.

If you are installing adhesive strap locks, start by performing a dry fit. Keep the protective backing paper on the adhesive pads and hold the lock against the cabinet doors. Use a pencil to mark the exact boundaries of where the adhesive pads will sit. The strap should be straight and slightly taut, but not stretched to its absolute limit. Once you have marked the position, peel the backing paper off the first pad and press it firmly onto the cabinet frame or the adjacent door, holding it with steady pressure for at least 30 seconds. Next, peel the backing from the second pad, align the strap horizontally across the door gap, and press the second pad firmly into place for another 30 seconds.
For magnetic cabinet locks, which remain completely hidden inside the cabinet, precise alignment between the internal latch and the catch is essential. Most high-quality magnetic lock kits include a plastic installation template or alignment cradle. Insert both the lock body and the catch into this cradle, peel off the adhesive backings, and position the assembly against the inside of the cabinet door and frame. Close the cabinet door firmly; this action transfers the adhesive pads to their correct positions on the interior surfaces. If you prefer a more permanent, hardware-mounted installation, use your pencil to mark the screw holes through the bracket holes. Drill small pilot holes to prevent the cabinet wood from splitting, and then secure the brackets using a manual screwdriver.
A common installation mistake is testing the strength of the lock immediately after application. Adhesive polymers require time to flow into the microscopic pores of the cabinet surface and cure completely. Always allow the adhesive to cure undisturbed for the full duration recommended by the manufacturer, which is typically 24 hours. Avoid opening the cabinet or pulling on the lock during this curing window, as any early stress can permanently weaken the bond.
If your chosen strap locks feature adjustable lengths, make sure to adjust the tension carefully. The strap should hold the cabinet doors tightly closed so that a child cannot pull them open even a fraction of an inch. If a door can be pulled open slightly, it creates a tempting gap where a child might insert their fingers, leading to a painful pinch if they let go. However, avoid overtightening the strap excessively, as constant high tension will place continuous stress on the adhesive pads, eventually causing them to peel away from the cabinet surface.
Securing Sliding Doors: Track and Clamp Locks
Sliding doors, which are frequently used on wardrobes, media consoles, and balcony access points, present a distinct childproofing challenge. Standard adhesive strap locks or magnetic latches are generally ineffective on sliding doors because the doors slide horizontally past one another. Any external lock that protrudes too far will block the sliding motion or be sheared off when the doors slide open. To secure these configurations, you must use specialized track blockers, clamp-style locks, or low-profile sliding door locks.
Before purchasing a lock for a sliding door, measure the width of the track and the clearance gap between the overlapping door panels. Track blockers work by sitting directly inside the runner track, physically preventing the door from sliding past a designated point. Clamp-style locks attach securely to the edge of the outer door frame, blocking the path of the inner door. Knowing these dimensions ensures that the lock you purchase will fit securely without slipping out of place or preventing the doors from closing fully.
To install a track blocker or clamp lock, begin by thoroughly cleaning the metal, plastic, or wood track to remove accumulated dust, hair, and residual lubricants. If you are using an adhesive-backed sliding door lock (often designed with folding “wings”), position it on the surface of the inner door panel at a height that is completely out of your child’s reach. When the wings are pressed flat, the doors can slide past each other freely. When you fold the wings upward, they catch against the frame of the outer door, stopping it from opening. Press the adhesive base firmly onto the clean door surface and allow it to cure for the recommended 24 hours.
For clamp-style locks, slide the clamp mechanism onto the track or the edge of the door frame. Tighten the tension screw manually until the clamp is firmly anchored. Do not use power tools to tighten these clamps, especially on aluminum frames or glass panels, as excessive force can warp the metal, crack the glass, or strip the screw threads. Many high-quality clamps feature rubberized or padded contact points to protect your furniture’s finish from scratches.
When installing any hardware on sliding doors, ensure the lock does not create a sharp or hard protrusion. If a toddler loses their balance and bumps against the door, a protruding metal clamp or sharp plastic edge at head height could cause an injury. Position these locks either very high up on the door frame or deep within a recessed area of the track where they do not pose a physical hazard to a child navigating the room.
Installing Locks on Drawers for Safe Access
Drawers require a specialized childproofing strategy. Unlike cabinet doors, which might tolerate a small amount of play, a drawer that opens even slightly can be highly dangerous. A child pulling on a partially opened drawer can easily reach inside to grab sharp objects, or worse, pull the entire drawer out of its tracks and onto themselves. Furthermore, multiple open drawers can make a chest of drawers front-heavy, creating a severe tip-over hazard.
The ideal placement for drawer locks is on the top inside edge of the drawer box, with the corresponding catch secured to the underside of the cabinet frame or countertop overhang. Internal spring-loaded latches and magnetic locks are highly effective for this setup. When a spring-loaded latch is installed, the drawer can only be pulled open a tiny fraction of an inch—just enough for an adult to insert a finger, depress the spring latch, and open the drawer fully.
To install an internal spring latch, start by measuring the distance from the top edge of the drawer front to the underside of the cabinet frame to ensure there is enough clearance for the latch mechanism. Clean the interior mounting surfaces thoroughly. If you are using adhesive-backed latches, press the latch body onto the inside of the drawer face and the catch onto the cabinet frame, ensuring they align perfectly when the drawer is closed. For hardware-mounted models, use a pencil to mark the screw holes. Carefully drill shallow pilot holes, taking extreme care not to drill completely through the decorative front face of your drawer. Secure the components in place using a manual screwdriver.
Another option is using external U-shaped sliding locks or heavy-duty corner strap locks. These are mounted on the outer side of the cabinet frame and wrap around to the front of the drawer. While these locks are highly visible, they are exceptionally sturdy and easy for adults to operate. When installing external strap locks on drawers, measure the strap tension carefully to ensure the drawer is held completely flush against the cabinet frame, preventing any movement.
Avoid placing external locks or latches on the side edges of drawers where a child’s fingers might naturally rest when they attempt to pull the drawer open. If the lock allows even a small amount of movement, a child pulling on the drawer could slip their fingers into the gap. When they let go, the drawer can snap shut, resulting in a painful pinch. Keeping all locking mechanisms centered or positioned high out of reach minimizes this risk.
Test the Locks, Maintain Adhesion, and Remove Safely
After allowing the adhesive to cure for the recommended 24 hours, you must thoroughly test the installation. Apply a gentle, steady pulling force to the cabinet door or drawer, simulating the strength and weight of a determined toddler. The lock should remain firmly anchored, and the door or drawer should not open wide enough to allow access or create a finger-pinch hazard. If you notice any wobbling, sliding, or peeling, remove the lock, clean the surface again, and re-apply it with fresh adhesive.
Maintaining your cabinet locks is an ongoing responsibility. Singapore’s tropical climate is characterized by high relative humidity, which can gradually degrade adhesive backings over time, particularly in high-moisture areas like kitchens and bathrooms. Inspect your cabinet locks monthly. Gently tug on each lock to check for play, and look closely at the adhesive pads for any signs of lifting, peeling, or a spongy texture in the foam tape. If you detect any degradation, replace the adhesive pads immediately with high-quality, moisture-resistant mounting tape recommended by the manufacturer to ensure continuous safety.
When your child outgrows the need for childproofing, you will want to remove the adhesive locks without damaging your furniture’s varnish, paint, or wood veneer. To do this safely, never attempt to pry the locks off with brute force, as this can rip away paint or splinter wood. Instead, use a hairdryer on a low or medium heat setting to gently warm the plastic base of the lock. The heat will soften the acrylic foam tape, making it pliable.
Once the adhesive is warm, slide a piece of dental floss or thin fishing line behind the plastic base. Use a gentle sawing motion to slice through the softened foam tape, separating the lock from the cabinet surface. If any sticky adhesive residue remains on the cabinet, apply a small amount of vegetable oil, olive oil, or a dedicated furniture-safe adhesive remover to a microfiber cloth. Rub the spot gently until the residue lifts, and then wipe the area clean with a damp cloth and mild soapy water to restore your cabinet’s finish.
Frequently Asked Questions (FAQ)
Can I install adhesive cabinet locks on glass cabinets?
Before installing any adhesive lock on a glass surface, always consult the lock manufacturer’s guidelines to verify compatibility. You should avoid using highly industrial or permanent adhesives on tempered glass cabinets. The constant tension and pulling forces applied to the lock can place localized stress on the tempered glass, which may risk causing the glass to shatter. If you have glass cabinets containing hazardous items, the safest childproofing strategy is to relocate those items to high, inaccessible shelves, or use physical barriers to prevent your child from approaching the cabinet altogether.
What should I do if the adhesive lock keeps failing?
Inadequate surface preparation is the most common reason adhesive locks fail. If a lock peels off repeatedly, it is usually because invisible grease, dust, or moisture remained on the cabinet surface during the initial installation. To resolve this, remove the old adhesive, clean the cabinet surface thoroughly with rubbing alcohol, let it dry completely, and apply a fresh adhesive pad. If your cabinets are made of highly textured wood, raw unfinished timber, or porous materials, adhesive pads may not be able to form a proper bond. In these situations, you should switch to hardware-mounted screw-in locks or use specialized, heavy-duty mounting tape designed specifically for textured furniture surfaces.

Community discussion
Share your experience or ask a question. Comments are reviewed before publication.