
Comparing popular baby food maker brands for steaming and blending performance requires looking beyond marketing claims and focusing on how specific technical features align with your daily kitchen routine. While some models excel at processing large batches of dense root vegetables for weekly freezing, others are optimized for preparing single, fresh portions of delicate greens. The ideal appliance is not a one-size-fits-all solution; rather, it is the one that matches your preferred weaning approach, kitchen space, and willingness to manage manual food transfer or detailed cleaning routines.
To evaluate these appliances effectively, parents in Singapore should examine key engineering differences, such as heating element wattage, water tank accessibility, motor torque, and blade configurations. Because Singapore’s humid climate can accelerate mold growth in poorly ventilated appliances, maintenance and descaling designs are just as critical as raw blending power. By understanding how these specifications translate into daily performance, you can confidently select a model that simplifies meal preparation while ensuring consistent textures for your baby’s developmental stage.
Key Specifications to Check for Steaming Efficiency
Steaming is the foundation of most baby food makers, designed to cook ingredients gently to preserve water-soluble nutrients. When comparing models, the heating element’s wattage is a primary indicator of how quickly the machine can bring water to a boil and generate consistent steam. Higher wattage elements generally heat up faster, which is particularly useful when preparing dense ingredients like sweet potatoes, carrots, or pumpkin. You should verify the manufacturer’s specified wattage to understand the heating capability of each model.
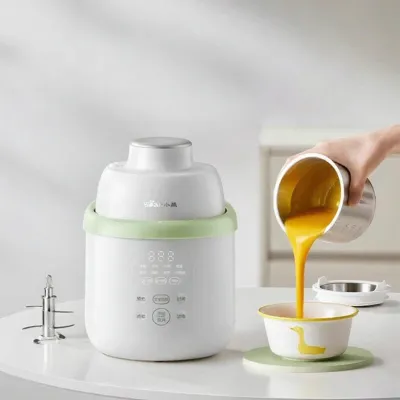
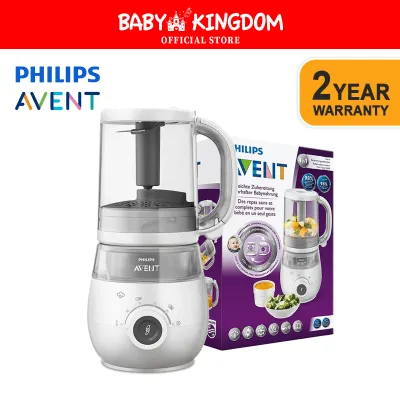
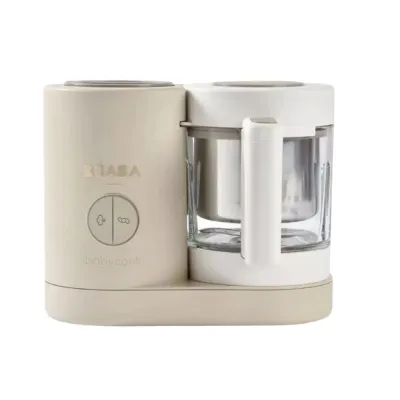
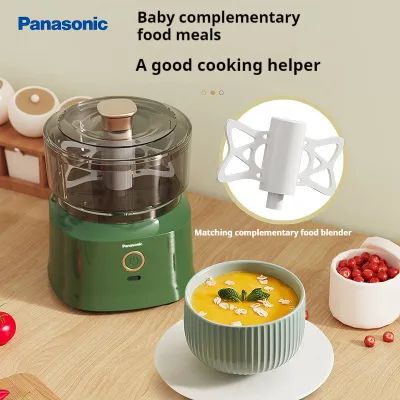
Products mentioned in this guide
![[NEWLY UPGRADED] TOYOMI NourishMix All-In-One Baby Food Maker BBF 7003](https://img.lazcdn.com/g/p/71065d29f0e3e108344a7919d97f50dc.png_400x400q80.png_.webp)
![[SG Plug] Einmilk Mini Baby Food Blender Cute Small Electric Food Blender Puree Blender Grinder Chopper with 300ml Cup Glass Bowl & 6 Blade](https://img.lazcdn.com/g/p/e9ee7d42b14b3b5fdc5d475c80202df5.jpg_400x400q80.jpg_.webp)
Prices are valid at publication and may change. Please refer to the product page for the latest price.
Water tank capacity directly dictates the maximum continuous steaming time available before a refill is required. A larger reservoir allows for longer steam cycles, which are necessary for thoroughly softening tough root vegetables without interruption. Conversely, smaller tanks may require you to pause the cycle and add water, which can disrupt the cooking process and lead to unevenly cooked food. Check the product manual for the maximum run time per tank fill to ensure it accommodates your typical cooking batches.
The internal steam distribution design also plays a crucial role in how evenly ingredients are cooked. Some brands utilize a vertical steam path that rises from the bottom of the basket, while others employ a 360-degree circulation system designed to envelop the food from all sides. If steam cannot circulate freely, ingredients at the top of the basket may remain firm while those at the bottom become overcooked. Look for baskets with perforated sides or multi-tier designs that promote uniform heat distribution.
Basket material and capacity constraints are equally important to evaluate based on your meal preparation habits. Food-contact baskets are typically made from durable plastics, silicone, or glass, each offering different thermal properties and weight profiles. You should verify that the basket capacity matches your typical batch size, keeping in mind that packing a small basket too tightly with dense ingredients can block steam pathways and result in undercooked pockets.
Evaluating Blending Power and Texture Control
Once ingredients are steamed, the blending phase determines the final texture of the puree, which must match your baby’s current developmental stage. The motor’s wattage and torque are the main factors governing its ability to process different food densities. A motor with insufficient power may struggle with fibrous vegetables or small portions of meat, resulting in a gritty texture or causing the motor to overheat. Review the technical specifications for the blending motor wattage, noting that some integrated units use separate wattages for heating and blending.

Blade design, quantity, and jar shape work together to create an efficient blending vortex that prevents “dead zones” where food remains unblended. Multi-tiered blade assemblies or curved blades are often more effective at pulling ingredients down toward the cutting edge, especially when working with smaller volumes. The shape of the blending jar also influences this movement; jars with internal ridges or non-cylindrical shapes help disrupt the circular flow, forcing ingredients back into the path of the blades for a smoother result.
Texture control is vital as your baby transitions from smooth, single-ingredient purees to chunkier, textured meals. Models that offer variable speed settings or a manual pulse function provide the greatest flexibility, allowing you to control the exact consistency of the food. A simple one-button interface that blends at a single high speed may make it difficult to achieve anything other than a completely smooth puree, which can limit the machine’s usefulness as your child grows and requires more texture.
When evaluating blending performance, consider the minimum volume the machine can process effectively. Some high-capacity jars require a minimum amount of liquid and solid ingredients to engage the blades properly, making them less suitable for preparing tiny, single-serving meals. If you plan to make fresh, daily portions rather than large batches, verify whether the blade height and jar design can handle small quantities without simply slinging the food against the walls of the container.
Combined Workflow: Integrated vs. Manual Transfer Designs
Baby food makers generally fall into two design categories: integrated “all-in-one” systems and manual transfer models. Integrated systems allow you to steam and blend in the same container, often with a single button press or by simply turning the jar over. This automated workflow minimizes the need for active monitoring, making it highly convenient for busy parents who want to multi-task in the kitchen without worrying about timing the transition from cooking to blending.
Manual transfer designs, on the other hand, require you to cook the ingredients in a steaming basket and then physically pour or flip them into a separate blending jar or compartment. While this adds an extra step to the process, it offers distinct advantages in terms of texture control and ingredient management. For instance, manual transfer allows you to easily discard excess cooking liquid before blending, preventing the final puree from becoming too watery, or to add specific liquids like breast milk or formula directly to the blending jar.
The physical act of transferring hot ingredients does introduce minor risks that you should consider. Handling hot baskets and pouring steaming food can present a risk of minor burns or spills if the design lacks secure handles or pouring spouts. Additionally, transferring food between hot containers can expose the ingredients to more air, which may slightly increase oxidation compared to a fully sealed, integrated system that transitions directly from steaming to blending.
Cleaning complexity and descaling requirements vary significantly between these two workflows. Integrated systems often feature more complex internal pathways, valves, and lid mechanisms to manage both steam and blending functions within a single vessel, which can make manual washing more tedious. Manual transfer models often have simpler, more open components that are easier to wipe down and dry, though they may involve more individual parts to wash after each use.
Safety, Materials, and Maintenance Verification
When preparing food for an infant, verifying the safety and composition of all appliance materials is a critical step. You should carefully check product labels and manufacturer documentation to confirm that all components coming into contact with food or steam are certified as free from BPA, BPS, and phthalates. Because these machines operate at high temperatures, choosing high-quality, heat-resistant materials like borosilicate glass or food-grade plastics is essential for long-term durability and peace of mind.
Built-in safety mechanisms are standard on reputable baby food makers and should be verified before purchase. Look for features such as automatic shutoff, which turns off the heating element once the water tank is empty, and boil-dry protection to prevent damage to the machine. Safety locks that prevent the blades from spinning unless the jar and lid are securely locked into place are also crucial, especially in households with older siblings or busy kitchens.
Maintenance is key to ensuring the longevity and hygiene of your baby food maker, particularly in Singapore’s warm and humid environment. You should review the manufacturer’s instructions regarding dishwasher compatibility, as some brands allow you to place jars, baskets, and blades on the top rack, while others require strict hand-washing to preserve seals and bearings. Easy disassembly of the blade assembly is highly desirable, as food particles can easily become trapped underneath the blades and lead to bacterial growth.
Descaling the steam generator is a mandatory maintenance task to prevent mineral buildup from affecting heating efficiency. Depending on the hardness of your local water supply, minerals can accumulate quickly on the heating element, reducing steam output and potentially causing the machine to overheat. Verify the manufacturer’s recommended descaling procedure, which typically involves running a cycle with a water-and-vinegar solution, and ensure the water tank is designed with a wide opening that allows you to physically inspect and wipe down the interior.
Decision Framework: Matching Features to Your Feeding Routine
To choose the right baby food maker, you must evaluate how its specific features align with your household’s feeding philosophy and daily schedule. If you prefer batch-cooking and freezing a week’s worth of meals at once, a high-capacity, integrated model is often the most efficient choice. These machines allow you to process larger volumes of food with minimal intervention, freeing up your time to focus on other tasks while the appliance handles the cooking and blending cycles automatically.
For parents who prefer to prepare small, fresh portions of food daily, a compact, manual-transfer model may be more practical. These units typically have a smaller countertop footprint, which is ideal for space-constrained kitchens in Singapore apartments. They also tend to handle smaller ingredient volumes more effectively without wasting food, and their simpler designs often translate to faster cleanup times after a single meal preparation session.
Before making a final decision, it is important to verify the warranty terms and the availability of local after-sales support in Singapore. Purchasing from an authorized local distributor ensures that you have access to replacement parts, such as new blades or silicone seals, and that the appliance complies with local electrical safety standards. Compare the S$ price-to-value ratio of each model, factoring in how long you plan to use the machine and whether its features justify the initial investment for your family’s weaning journey.
Frequently Asked Questions (FAQ)
Can I use a regular blender instead of a dedicated baby food maker?
Yes, you can use a standard kitchen blender or food processor, but the workflow is different. Regular blenders lack built-in steaming capabilities, meaning you must first cook the ingredients using separate stovetop or steaming equipment before transferring them to the blender. Additionally, standard blenders are often designed for larger volumes and may struggle to process the very small portions typical of early weaning stages, often requiring you to add excess liquid to get the blades to catch, which can make the puree too runny for a baby.
How do I prevent mold or odors in the steam tank?
To prevent mold, bacteria, and unpleasant odors, you should empty any remaining water from the reservoir and leave the tank lid open to air-dry completely after every use. Using filtered or distilled water instead of tap water will significantly reduce mineral buildup and scaling inside the tank. Always follow the manufacturer’s specific descaling instructions, typically using a diluted white vinegar solution, and perform this maintenance regularly to keep the heating chamber clean and hygienic.

Community discussion
Share your experience or ask a question. Comments are reviewed before publication.