
Cleaning baby feeding equipment requires meticulous attention to detail, especially when dealing with the intricate parts of bottle caps, collars, and covers. Parents often wonder if they must purchase a dedicated, brand-specific brush for every bottle system they own, or if a universal water bottle cover brush can handle the job. The short answer is that while standard screw caps and wide-neck collars can often be thoroughly cleaned with a high-quality universal detail brush, specialized bottle designs with proprietary anti-colic vents, deep silicone seal grooves, or unique straw ports frequently demand matching, brand-specific cleaning tools. Using the wrong brush size or bristle type can leave behind microscopic milk residues, which quickly become breeding grounds for bacteria in warm, humid climates like Singapore’s.
To ensure your baby’s feeding accessories are completely sanitary, you must understand how the physical geometry of different bottle caps interacts with various brush designs. Choosing the right tool is not just about convenience; it directly impacts the longevity of your bottle components and the safety of each feed. By evaluating the specific structural features of your bottle system, you can make an informed decision between universal cleaning kits and brand-specific accessories.
Assessing Your Baby Bottle Cap and Cover Design
Every baby bottle brand utilizes a distinct engineering approach to manage liquid flow, prevent leaks, and reduce air ingestion. These design choices directly influence the shape, depth, and accessibility of the bottle’s cap and cover components. Wide-neck bottle systems, which are highly popular for mimicking natural breastfeeding, feature wide collars with shallow, broad threads. Conversely, narrow-neck bottles have smaller, deeper collars with tightly wound threads that are significantly harder to reach with standard cleaning sponges. The pitch and depth of these threads create narrow channels where milk fats and proteins can easily accumulate during feeding.
Products mentioned in this guide

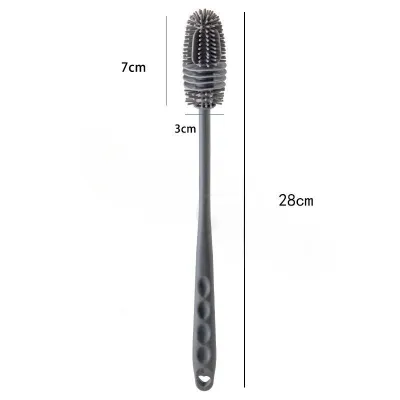
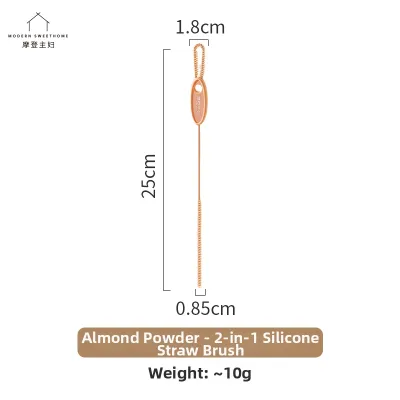
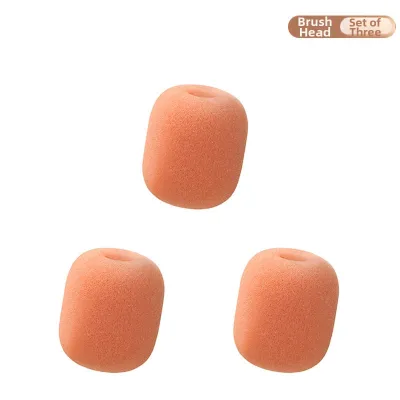
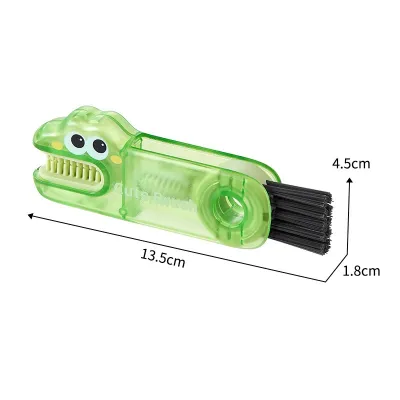
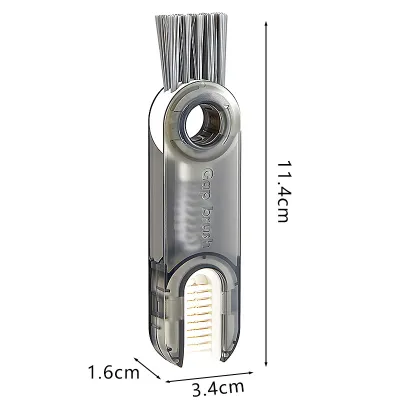

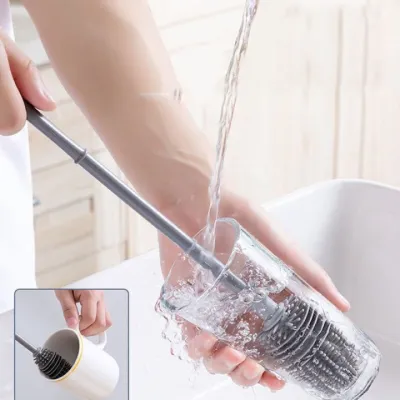
Prices are valid at publication and may change. Please refer to the product page for the latest price.
Beyond the screw threads, modern bottle caps often house complex components designed to regulate air pressure. Anti-colic valves, ventilation ports, and removable silicone gaskets are common features in premium bottle systems. These parts contain tiny crevices, microscopic air holes, and deep grooves where the silicone seal seats against the plastic collar. Because milk is an emulsion of fats, proteins, and sugars, it clings tenaciously to these hidden surfaces. If these areas are not thoroughly scrubbed, a thin biofilm can develop over time, which is highly resistant to simple rinsing.
To identify these hidden residue traps, parents should establish a routine visual inspection method. Before washing, hold the disassembled cap up to a bright light source and gently flex any silicone parts. Look closely at the junction where the soft silicone meets the hard plastic, as well as the innermost recesses of the screw threads. If you spot a dull, cloudy film or tiny white flecks, milk residue has already begun to accumulate. Recognizing these specific high-risk zones is the first step in determining whether a standard brush can reach them or if a specialized micro-detail tool is required.
Brand-Specific vs. Universal Water Bottle Cover Brushes
When shopping for cleaning accessories on local ecommerce platforms, you will encounter both brand-specific brushes and universal water bottle cover brushes. A universal cover brush typically features a slender handle with a small, concentrated head of stiff nylon or flexible silicone bristles, often accompanied by a pointed detail tip. These tools are highly versatile and cost-effective, often retailing for under S$10 for a multi-piece set. For standard wide-neck bottle collars and simple, single-piece travel caps, a universal brush is usually more than sufficient. The medium-stiff bristles can easily sweep through broad threads and clear away loose residue without requiring a proprietary tool.

However, brand-specific brushes become necessary when dealing with proprietary, multi-part venting systems. Some bottle manufacturers design unique, elongated vent tubes or intricate two-way valves that cannot be reached by standard off-the-shelf brushes. For instance, a ventilation channel that is only a few millimeters wide requires a brush with an ultra-thin, flexible wire core and precisely calibrated bristle diameters. Using a universal brush that is too large can force the bristles into a tight space, potentially tearing delicate silicone membranes or stretching out air valves, which compromises the bottle’s leak-proof seal.
When deciding between these options, always evaluate the brush head diameter, shape, and bristle stiffness against the dimensions of your bottle caps. A brush that is too wide will simply glide over the top of narrow grooves rather than penetrating them, while a brush with overly stiff bristles can scratch the soft plastic surfaces of the cap. These micro-scratches are highly problematic, as they provide a textured surface where bacteria can easily cling and multiply, even after sterilization.
Before purchasing any third-party cleaning tool, check the product labels and the bottle manufacturer’s official cleaning guidelines. Many brands specify the exact type of cleaning instruments that are safe for their materials, and using unapproved, abrasive tools can void product warranties. Verifying compatibility ensures that you do not accidentally damage expensive feeding systems while trying to maintain hygiene.
Step-by-Step Guide to Cleaning Bottle Caps and Narrow Covers
Achieving a clinically clean bottle cap requires a systematic approach that goes far beyond a quick rinse under the tap. The first and most crucial step is complete disassembly. You must remove every single detachable component, including silicone sealing rings, anti-colic valves, travel discs, and dust covers, according to the manufacturer’s instructions. Leaving a silicone gasket seated inside a plastic cap during washing creates a trapped moisture barrier where mold can easily flourish, particularly in Singapore’s humid environment.
Once disassembled, perform a thorough pre-rinse under warm running water. This initial step helps flush away loose milk liquid and prevents the milk proteins from coagulating when they come into contact with hot water later. After the pre-rinse, apply a small amount of baby-safe, fragrance-free liquid cleanser directly to your water bottle cover brush. Avoid using standard dishwashing liquids, which often contain heavy perfumes and synthetic surfactants that can leave a chemical residue on the feeding components.
Next, begin the targeted brushing process using techniques tailored to each specific component. For the screw threads of the collar, insert the brush head and rotate it in a continuous circular motion, matching the direction of the threads. This ensures the bristles penetrate the deepest part of the groove. When cleaning narrow cover areas, anti-colic vents, or silicone gaskets, switch to a micro-detail brush. Apply gentle, steady pressure and use straight, back-and-forth strokes. Never force a brush into a space that feels too tight; instead, select a smaller brush size to avoid tearing the material.
After scrubbing all surfaces, rinse each component thoroughly under warm, running tap water. Hold the parts under the stream and gently massage the silicone pieces to ensure all soap suds and loosened milk fats are completely flushed away. Inspect the rinsed parts under clean light to verify that no soap film or loose bristle fibers remain trapped in the narrow grooves before proceeding to the drying phase.
Verifying Cleanliness and Maintaining Your Brush
Once the washing process is complete, you must verify that the bottle caps are truly clean before storing or sterilizing them. Perform a simple visual and tactile check. Run a clean, dry finger along the inside of the screw threads and the seating grooves of the silicone seals. The surface should feel completely squeaky-clean; any sensation of slickness, grease, or stickiness indicates that milk fat residue remains, requiring another round of targeted scrubbing. Visually inspect the narrowest crevices under a bright light to confirm there are no cloudy patches or discolored spots.
Proper drying is just as critical as the washing itself, especially in tropical climates where high humidity slows down evaporation. Place all disassembled caps, collars, and silicone seals on a clean, elevated drying rack that allows for maximum airflow from underneath. Avoid placing wet components flat on a solid countertop or towel, as this traps moisture and creates a perfect microclimate for mold growth. Similarly, your water bottle cover brush must be thoroughly rinsed, shaken out to remove excess water, and hung vertically to air-dry in a well-ventilated area. Never store a damp brush in a closed drawer or cupboard.
To maintain a safe feeding routine, you must regularly monitor the condition of your cleaning tools. A worn-out brush is not only ineffective at removing residue, but it can also harbor harmful bacteria within its degraded fibers. Inspect your water bottle cover brush weekly for observable signs of wear. If you notice frayed or splayed bristles, a bent or rusting wire core, or a persistent sour odor that remains after washing, the brush must be replaced immediately. Following the manufacturer’s recommended replacement intervals—typically every few months, or sooner if physical degradation is visible—is essential for keeping your baby’s feeding equipment pristine.
Frequently Asked Questions (FAQ)
Can I use a regular straw brush to clean baby bottle caps?
A regular straw brush can be a highly effective tool for cleaning the narrowest parts of a bottle cap, such as anti-colic vent holes or tiny straw ports, due to its ultra-thin wire core and soft bristles. However, it is generally unsuitable for cleaning the wider screw threads of the bottle collar. Because straw brushes have a very small diameter, their bristles cannot exert enough outward pressure to scrub the broad, flat surfaces of the threads effectively. For a complete clean, use a straw brush for the micro-details and a dedicated cover brush for the wider threads.
How often should I replace my water bottle cover brush?
Rather than relying solely on a fixed calendar timeline, you should replace your water bottle cover brush based on observable physical wear and hygiene indicators. If the bristles become splayed, flattened, or start falling out, the brush can no longer apply the necessary friction to clean deep grooves. Additionally, if the wire core becomes severely bent, rusted, or if the brush develops a persistent odor, it poses a contamination risk and must be discarded immediately. Always consult the manufacturer’s guidelines, as some materials may degrade faster under frequent sterilization or heavy daily use.

Community discussion
Share your experience or ask a question. Comments are reviewed before publication.