
Choosing the right training chopsticks for your child depends on matching their physical development and hand coordination to the correct mechanical design. Instead of relying solely on age recommendations, look at how your child handles other utensils and objects. For toddlers around two years old who are just starting, spring-assisted chopsticks offer an easy transition by automatically opening after each pinch. As children reach three or four years old and develop better finger control, ring-type or finger-slot designs help guide their fingers into the correct positions. Finally, older children or those with advanced coordination can progress to fixed-grip or hinge-connected chopsticks, which require more active finger movement while keeping the sticks aligned.
By focusing on your child’s current fine motor skills rather than their exact age, you can select a tool that encourages independence and reduces mealtime frustration. The goal is to provide just enough mechanical support to build confidence, gradually reducing that assistance as their hand muscles and muscle memory develop.
Assessing Your Child's Readiness for Training Chopsticks
Before purchasing their first pair of training chopsticks, it is helpful to observe your child’s daily play and self-feeding habits to gauge their physical readiness. Fine motor development varies widely among young children, meaning some toddlers may be eager and physically capable at two years old, while others might find the task more comfortable closer to age three or four. A reliable indicator of readiness is the development of a strong pincer grasp, which is the ability to pick up small objects using the thumb and index finger. If your child can easily pick up small pieces of food, stack small blocks, or hold a crayon with a controlled grip, their hand muscles are likely ready for the basic pinching motion required by training chopsticks.
Products mentioned in this guide
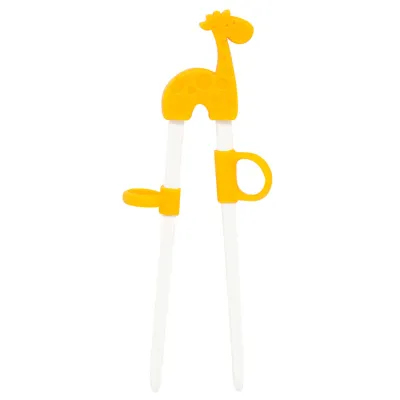
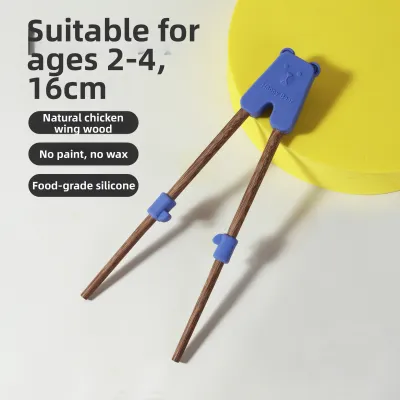
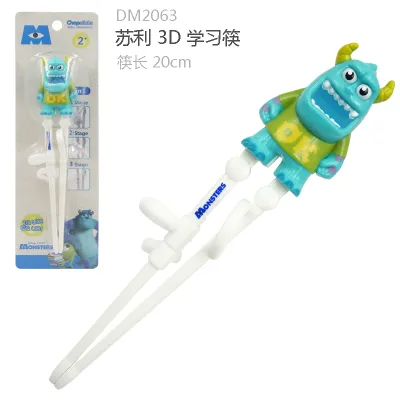
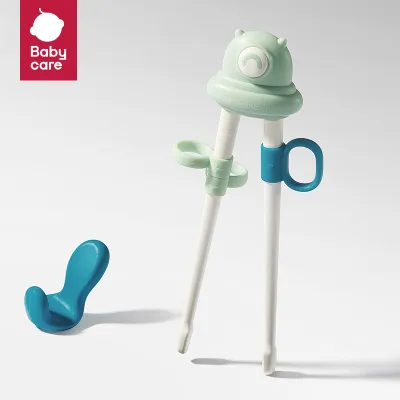
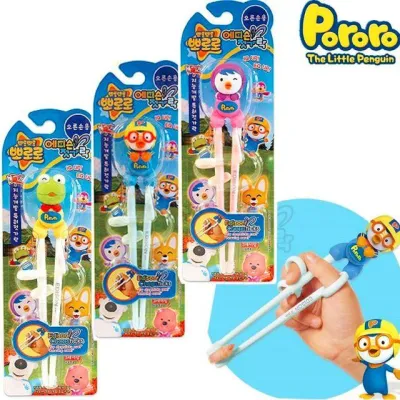
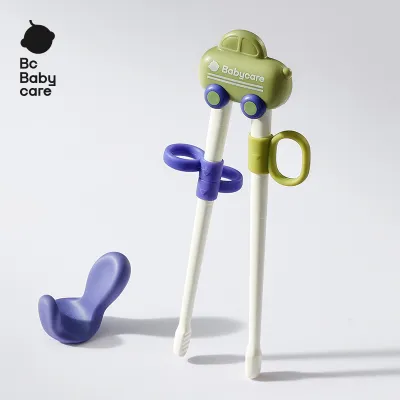
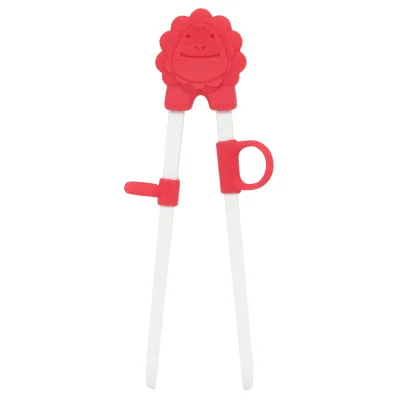
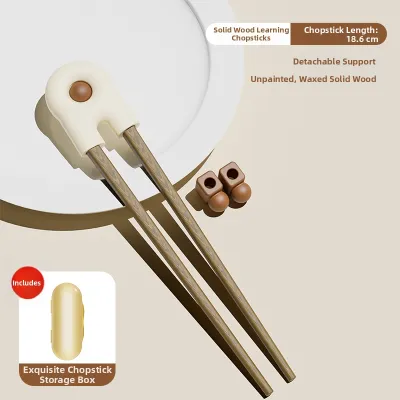
Prices are valid at publication and may change. Please refer to the product page for the latest price.
Interest and curiosity also play a significant role in determining when to introduce these utensils. Children often show readiness simply by mimicking family members during meals, reaching for adult chopsticks, or expressing a desire to feed themselves with more challenging tools. If your child shows enthusiasm for using chopsticks, introducing a beginner-friendly pair can turn mealtime into an engaging learning experience. However, forcing the transition too early can lead to unnecessary stress and resistance.
It is equally important to recognize when your child is not yet ready or when it might be best to temporarily pause the training process. If a child experiences extreme frustration, repeatedly drops their food, or throws the utensils in anger, it is a clear sign that their hand muscles are tiring or that the coordination required is still too demanding. In these situations, gently guide them back to using a spoon or fork without making them feel like they have failed. You can always reintroduce the training chopsticks a few weeks later when their hand strength and patience have naturally increased.
Matching Chopstick Designs to Age and Skill Stages
Selecting the right training chopsticks requires understanding how different mechanical designs support a child’s learning curve. Manufacturers design these tools with varying levels of assistance, ranging from fully automated spring mechanisms to simple alignment hinges. By matching the mechanical complexity of the chopsticks to your child’s current dexterity, you can ensure they receive the right amount of support without becoming overly dependent on the tool.

When shopping, always cross-reference your child’s physical hand size with the manufacturer’s recommendations on the packaging. Chopsticks that are too long or too heavy can strain small hands, making it difficult for children to control the tips. Conversely, chopsticks that are too small can cause cramping and lead to improper grip habits that are hard to correct later. Checking the physical dimensions and weight of the product ensures a comfortable fit that promotes natural hand movement.
Spring-Assisted Chopsticks for Beginners
Spring-assisted chopsticks are a practical starting point for toddlers who are transitioning from spoons and forks to their first pair of chopsticks. These designs feature a built-in spring or flexible plastic bridge at the top that automatically pushes the two sticks apart after they are squeezed together. This mechanism significantly reduces the grip strength and coordination required to open the chopsticks, allowing young children to focus entirely on the simple action of pinching the tips together to grab food.
This design is particularly beneficial for early learners because it provides immediate success, which helps build confidence at the dining table. Toddlers who might otherwise struggle to keep two separate sticks aligned can easily pick up larger, soft food items with minimal effort. The spring action does the work of resetting the chopsticks after every bite, preventing the sticks from crossing over or slipping out of the child’s hand.
However, parents should monitor how their child uses spring-assisted models to ensure they do not develop a reliance on the automatic opening mechanism. Because the spring does the work of separating the sticks, children do not need to use their fingers to push the chopsticks open. If a child uses this style for too long, they may struggle to transition to designs that require active finger extension. Once your child can easily pinch food and shows consistent hand strength, it is usually time to move to a design that offers less mechanical assistance.
Ring-Type and Finger-Slot Chopsticks for Intermediate Learners
For children who have developed basic hand strength but struggle with finger placement and alignment, ring-type and finger-slot chopsticks offer an excellent intermediate step. These models feature soft silicone or plastic rings attached to the sides of the sticks, guiding the thumb, index, and middle fingers into their correct positions. By physically holding the fingers in place, these guides teach children the proper muscle memory required for traditional chopstick use.
A key benefit of ring-type chopsticks is that they enforce correct finger positioning while still requiring the child to actively control both the opening and closing motions. Unlike spring-assisted models, there is usually no automatic mechanism pushing the sticks apart, meaning the child must use their own finger muscles to expand and contract the chopsticks. This active engagement helps build the specific hand muscles needed for unassisted dining.
When choosing an intermediate model, look for designs that feature adjustable or removable rings. As your child becomes more confident and their finger placement becomes second nature, you can gradually remove the rings one by one—starting with the index finger ring, then the middle finger ring, and finally the thumb guide. This step-by-step removal allows for a seamless transition to standard chopsticks without overwhelming the child with sudden changes in support.
Fixed Grip or Hinge-Connected Chopsticks for Advanced Practice
Fixed-grip or hinge-connected chopsticks represent the final stage of training before a child transitions to standard, independent chopsticks. These designs feature a simple hinge or connector at the top that keeps the two sticks aligned and prevents them from crossing over, but they do not include finger rings or spring assistance. The child must hold the chopsticks using their own grip and actively control the entire opening and closing movement.
This style is well-suited for older children or those who have successfully mastered the finger placement taught by ring-type models. The top hinge provides a safety net, ensuring that the tips of the chopsticks always meet precisely when squeezed, which prevents food from slipping away. This alignment support allows the child to focus on refining their grip pressure and coordination without the frustration of the sticks twisting in their hands.
When evaluating hinge-connected chopsticks, pay close attention to the tightness and flexibility of the pivot point. The hinge should provide enough alignment support to keep the sticks parallel, but it should not do the mechanical work of opening or closing them. If the pivot is too stiff, it can cause hand fatigue; if it is too loose, the chopsticks may cross over, defeating the purpose of the training aid. A well-designed hinge allows the child to practice the natural, fluid motion of traditional chopsticks with just a small amount of structural guidance.
Essential Safety and Material Checks Before Buying
When purchasing training chopsticks, safety, durability, and hygiene should be your top priorities. Because these utensils go directly into your child’s mouth and come into contact with warm food, it is essential to verify the safety of the materials used. Look for products that are explicitly labeled as BPA-free, phthalate-free, and made from food-grade silicone or high-quality, non-toxic plastics. If you prefer natural materials, opt for untreated, splinter-free wood or bamboo, ensuring there are no rough edges or chemical coatings that could peel off over time.
Choking hazards are another critical consideration, especially with training chopsticks that feature detachable parts. Many intermediate models come with removable silicone finger rings, decorative toppers, or small plastic springs. Before each use, inspect these components to ensure they are securely fastened and show no signs of wear, tearing, or loosening. If a silicone ring becomes torn or a plastic hinge cracks, replace the utensil immediately to prevent small pieces from detaching during a meal.
Ergonomics and proportions must also match your child’s physical capabilities. Choose chopsticks that are lightweight and properly proportioned for small hands; heavy or overly long utensils can cause hand strain and discourage your child from practicing. Additionally, look for chopsticks with textured or matte tips, as these provide extra friction that helps grip slippery foods like noodles or tofu, reducing frustration during the learning process.
Finally, consider the ease of cleaning and maintenance to prevent the buildup of mold and bacteria. Training chopsticks often have complex designs with hinges, crevices, and finger rings where food particles and moisture can easily become trapped. Check the manufacturer’s instructions to see if the chopsticks are dishwasher-safe or if they require careful hand-washing with specialized small brushes. Ensuring that all parts can be thoroughly dried after washing is key to maintaining a hygienic utensil for your child.
Tips for a Smooth Transition to Regular Chopsticks
Graduating from training aids to standard chopsticks is a significant milestone that requires patience, encouragement, and a gradual reduction of support. You can begin this transition when you observe that your child can easily pick up small or slippery foods, such as peas or noodles, without showing signs of frustration or relying heavily on the mechanical guides. If they are consistently holding the training chopsticks with correct finger placement and minimal effort, they are likely ready to try the real thing.
A successful strategy is to introduce the transition gradually rather than making a sudden switch. If you are using a model with removable silicone rings, try removing the index finger ring first while keeping the others in place for a few days. Once your child adapts to this change, remove the middle finger ring, and eventually the thumb guide, until they are using the chopsticks with only the top hinge for alignment. This step-by-step approach allows their hand muscles and muscle memory to adapt naturally to the increasing difficulty.
To make the process enjoyable and low-pressure, incorporate fun practice games outside of regular mealtimes. You can set up a play station with a bowl of soft, lightweight objects like pom-poms, cotton balls, or large dry pasta shapes, and encourage your child to transfer them from one container to another using their chopsticks. Practicing in a play-based environment removes the pressure of hunger and mealtime expectations, allowing your child to focus entirely on refining their coordination and grip.
Always maintain a positive and supportive atmosphere at the dining table, celebrating small successes and keeping mealtimes relaxed. If your child becomes tired or frustrated during a meal, allow them to switch back to a spoon, fork, or their favorite training chopsticks without any negative feedback. Building confidence and positive associations with utensils is far more important than achieving precise technique overnight.
Frequently Asked Questions (FAQ)
At what age should a child stop using training chopsticks?
There is no strict or universal age limit for stopping the use of training chopsticks, as every child’s physical development and coordination progress at different rates. Most children naturally begin to transition to standard chopsticks between the ages of five and eight, but this timeline depends entirely on their individual comfort and hand strength. Rather than focusing on a specific birthday, look for signs that the training tools are beginning to hinder their eating speed or that they are actively trying to use adult utensils. If the mechanical parts or finger rings seem to get in the way of their natural hand movements, or if they express a desire to use the same chopsticks as the rest of the family, it is a clear indication that they are ready to move on.
Are wooden or plastic training chopsticks better for kids?
Both wooden and plastic training chopsticks have distinct advantages, and the most suitable choice depends on your child’s needs and your cleaning preferences. Plastic models are highly durable, lightweight, and often come with colorful designs and removable silicone components that appeal to younger children. They are also generally easier to sanitize and are frequently dishwasher-safe, making them a convenient option for busy parents. On the other hand, wooden or bamboo training chopsticks offer a more natural feel and a textured surface that naturally grips food better than smooth plastic, which can help reduce frustration for beginners. However, wooden utensils require careful hand-washing and thorough drying to prevent moisture absorption and mold growth, and they must be regularly inspected for splinters or wear.
Can left-handed children use standard training chopsticks?
Left-handed children often require specialized or adjustable training chopsticks, as many standard models are designed specifically for right-handed finger placement. Symmetrical, spring-assisted designs without molded finger slots can often be used comfortably by both left- and right-handed children, making them a versatile choice for early beginners. However, for intermediate ring-type chopsticks, it is crucial to purchase a model specifically labeled for left-handed use or one with fully adjustable, rotatable silicone rings that can be repositioned to accommodate a left-handed grip. Using a right-handed training tool with a left hand can force the fingers into unnatural angles, causing hand strain and making it difficult for the child to develop proper muscle memory.

Community discussion
Share your experience or ask a question. Comments are reviewed before publication.