
As your baby transitions from crawling to pulling themselves up, the sharp corners and hard edges of your home’s furniture suddenly become significant hazards. Choosing the right silicone edge protector requires balancing the physical dimensions of your furniture, the material of the surface, and the developmental stage of your child. By matching the correct shape, thickness, and adhesive type to each specific piece of furniture, you can create a cushioned environment that absorbs impacts while preserving your household items.
Key Specifications to Evaluate for Baby Safety
When evaluating silicone edge protectors, the physical properties of the material dictate how well it will perform under impact. Silicone is highly favored for baby-proofing because of its natural elasticity and non-toxic properties, but not all protectors are manufactured to the same specifications. You must assess the thickness and width of the protector to ensure it provides sufficient cushioning for high-impact zones, such as the sharp corners of low coffee tables or the hard edges of dining tables. A thicker profile generally offers greater shock absorption, which is critical when a toddler loses their balance and falls directly against a rigid surface.
The adhesive backing is another critical specification that determines both the longevity of the protector and the safety of your furniture’s finish. Most protectors utilize either double-sided acrylic tape or built-in gel adhesives. Acrylic tape typically provides a very strong, semi-permanent bond that resists the tugging of curious toddlers, but it may require more effort and care to remove without damaging delicate wood veneers or paint. Built-in gel adhesives are often more flexible and easier to apply, but their holding power can vary depending on the texture and porosity of the furniture surface. You should check the manufacturer’s specifications to verify which adhesive is recommended for your specific furniture material, whether it is finished hardwood, glass, metal, or laminate.
Products mentioned in this guide

Prices are valid at publication and may change. Please refer to the product page for the latest price.
Additionally, you must evaluate the density and flexibility of the silicone material. High-density silicone is firm enough to prevent a child from biting through the protector, which is a common concern during the teething phase. If the silicone is too soft or low-density, a teething child might easily tear off small pieces, creating a serious choking hazard. Conversely, the material must remain flexible enough to wrap around curved edges or conform to slight irregularities in the furniture’s shape without lifting at the ends. Balancing these two properties ensures the protector remains intact and securely bonded over months of daily use.
Matching Protector Shapes to Common Furniture Hazards
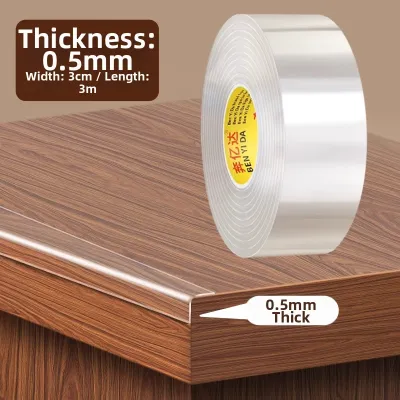
Different furniture designs present unique hazards, meaning a single type of edge protector will not work effectively throughout your entire home. For low-profile furniture where children are highly likely to fall from above—such as coffee tables, dining tables, and low TV stands—thick, wide U-shaped protectors or continuous rolls are highly effective. A U-shaped profile wraps completely around the top, edge, and bottom of a table rim, providing comprehensive coverage from multiple angles of impact. Continuous rolls allow you to customize the length, ensuring there are no gaps along the entire perimeter of the table where a child could catch their forehead or hands.

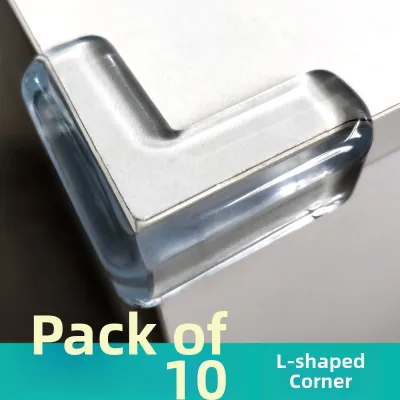
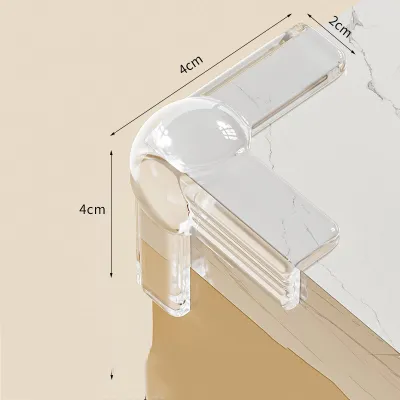
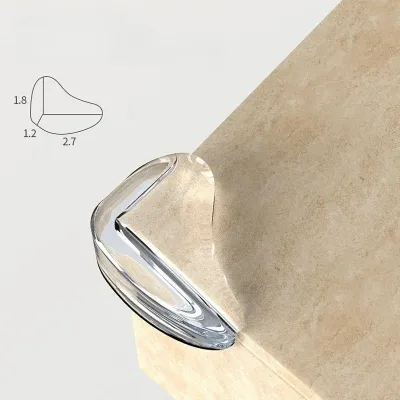
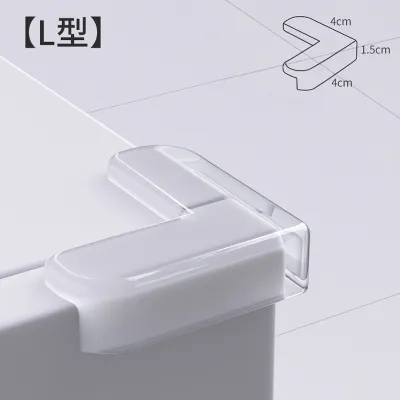
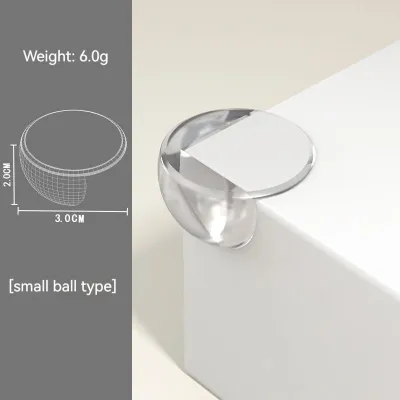
For cabinets, drawers, and storage units, slim L-shaped protectors or discrete corner guards are generally more appropriate. These areas require a lower profile to prevent the protectors from interfering with the opening and closing of doors or drawers. A bulky protector on a cabinet door can prevent it from latching properly, or it may catch on adjacent handles, leading to premature peeling. Discrete corner guards focus protection solely on the sharpest points of the furniture, offering a subtle baby-proofing solution that does not compromise the functionality of your daily storage spaces.
Vertical hazards and structural elements require specialized solutions. Door frames, fireplace hearths, and bed frames often feature long, vertical edges or irregular surfaces that standard corner guards cannot adequately cover. For these areas, look for specialized continuous rolls or custom-cut profiles that can be tailored to the exact dimensions of the hazard. When protecting a fireplace hearth, for example, the material must be able to adhere to rough stone or brick, which often requires a highly conformable silicone profile and a heavy-duty adhesive designed for masonry. For bed frames, especially those with wooden slats or low-slung platforms, a flexible, wrap-around protector can prevent painful shin scrapes and bumps as your child learns to navigate the bedroom.
Surface Preparation for a Secure, Long-Lasting Bond
The success of any silicone edge protector relies heavily on how well the adhesive bonds to the furniture surface. Even the strongest adhesive will fail prematurely if it is applied to a surface covered in dust, grease, or household polish. Before beginning the installation, you must clean the target surface thoroughly. Use a mild cleaning solution or rubbing alcohol, depending on what is safe for your specific furniture finish, to remove all residues. Ensure the surface is completely dry before applying the adhesive, as trapped moisture will weaken the bond and can potentially damage wood finishes over time.
When working with continuous rolls of silicone, precise measurement and cutting are essential. Measure the edge of the furniture carefully and cut the silicone to the exact length required. Avoid the temptation to stretch the silicone material during application to make it fit a slightly longer span. Silicone has a natural elasticity and memory; if you stretch it while applying it, the material will constantly pull back toward its original shape. This continuous tension will eventually overcome the adhesive bond, causing the ends of the protector to peel away from the furniture within days or weeks.
Once the protector is positioned and pressed firmly onto the clean surface, you must allow the adhesive to cure. Curing is a chemical process where the adhesive fully bonds with the substrate, and it requires time to reach maximum strength. Refer to the manufacturer’s instructions for the exact curing duration, which is typically between 12 and 24 hours. During this curing period, do not test the strength of the bond, pull on the protector, or allow your child to access the area. Restricting access ensures the adhesive sets undisturbed, providing a long-lasting barrier that can withstand the daily bumps and pulls of an active toddler.
Ongoing Maintenance and Safe Removal Techniques
Baby-proofing is not a one-time task; it requires ongoing vigilance to ensure the protective measures remain effective. You should conduct regular visual and physical checks of all installed silicone edge protectors. Look closely for peeling edges, lifting corners, or signs of chewing damage. If a protector begins to peel, it loses its ability to absorb impacts properly and can easily be pulled off entirely by a child. Any damaged or loose protectors should be replaced immediately to maintain a safe environment.
Cleaning the exposed silicone surfaces is necessary to maintain hygiene, especially since toddlers often touch or mouth these areas. You can clean the silicone with a soft cloth, mild soap, and warm water. Avoid using harsh chemical cleaners, abrasive scrubs, or soaking the area, as excess liquid can seep under the edges of the silicone and degrade the adhesive bond underneath. Gently wipe the surface and dry it immediately with a clean towel to prevent moisture from lingering near the adhesive seams.
When your child outgrows the need for edge protectors, removing them safely is crucial to preserve your furniture’s appearance. Applying direct force to pull off a strongly bonded protector can tear away wood veneers, lift paint, or leave a stubborn, sticky residue. To prevent this, apply gentle heat to the protector using a hair dryer on a low setting. The heat softens the adhesive, making it pliable and easier to peel away slowly. For any remaining adhesive residue, use a manufacturer-approved solvent or a mild adhesive remover that is explicitly safe for your specific furniture finish, testing it on a hidden area first.
Safety Boundaries and Alternative Baby-Proofing Needs
While silicone edge protectors are excellent for mitigating the impact of bumps and falls, they are only one component of a comprehensive home safety plan. It is vital to recognize that edge guards do not prevent furniture from tipping over. Heavy items such as bookshelves, dressers, and TV stands pose a severe risk of tipping if a child attempts to climb them. You must verify that all heavy furniture is securely anchored to the wall using appropriate safety straps or wall anchors, regardless of whether the edges are cushioned.
Additionally, caregivers must remain aware of potential choking hazards associated with soft safety products. If a child manages to bite or tear off pieces of the silicone material, these small fragments can easily block their airway. Regularly inspect the physical integrity of the silicone, and immediately remove any protector that shows signs of tearing, cracking, or bite marks. Supervision remains the most critical safety measure, as no physical barrier can completely replace the watchful eye of a caregiver.
Finally, special care must be taken with high-value, antique, or delicate furniture. Adhesives can react chemically with certain varnishes, lacquers, or unsealed wood finishes, leading to permanent discoloration or structural damage. Before applying any adhesive-backed protector to a valuable or antique piece, consult the furniture manufacturer’s guidelines or a professional furniture restorer. In some cases, alternative baby-proofing methods—such as temporarily moving the delicate furniture to an inaccessible room or using free-standing safety gates—may be a safer choice for preserving the item.
Frequently Asked Questions (FAQ)
Can silicone edge protectors be reused on different furniture?
Generally, silicone edge protectors cannot be effectively reused once they have been removed from their original location. The removal process stretches the silicone and significantly degrades the adhesive backing, leaving it unable to form a secure bond on a new surface. Attempting to reuse them by applying household tape or glue often fails to provide the necessary impact resistance and can create a peeling hazard that a child can easily pull off. For safety and reliability, always use fresh protectors with new adhesive when baby-proofing a different piece of furniture.
Are clear silicone protectors better than colored ones?
The choice between clear and colored silicone protectors depends on your aesthetic preferences and safety priorities. Clear protectors are popular because they blend discreetly with your furniture’s natural wood grain or color, making the baby-proofing less visually intrusive. However, clear silicone can yellow over time due to UV exposure from sunlight and contact with household oils. Colored protectors, while highly visible, can sometimes serve as a visual cue for adults to avoid sharp corners, though they may also attract a curious child’s attention more readily.
How do I know if the adhesive will damage my wood finish?
To determine if an adhesive will damage your furniture, start by checking the manufacturer’s care instructions or warranty guidelines for your specific piece. Since finishes vary widely, the most reliable method is to perform a hidden spot test. Apply a small piece of the adhesive tape to an inconspicuous area of the furniture, such as the underside of a table or the back of a cabinet leg. Leave it in place for a few days, then remove it carefully using the recommended heat method to observe if any paint, varnish, or wood fiber lifts off.

Community discussion
Share your experience or ask a question. Comments are reviewed before publication.