
Choosing the right baby chopsticks involves matching the utensil’s design to your child’s current fine motor skills rather than relying solely on their chronological age. To make a suitable choice, parents should evaluate physical features like finger loops, hinge mechanisms, and tip textures, then transition through three developmental stages: fully assisted models with built-in rings, semi-assisted designs with flexible connectors, and finally, shortened, unconnected training chopsticks. By aligning the utensil’s level of support with your child’s natural hand-eye coordination, you can foster self-feeding confidence and prevent mealtime frustration.
Recognizing Readiness and Developmental Milestones
Introducing training chopsticks too early can lead to mealtime power struggles and a dislike for self-feeding. Instead of watching the calendar, look for specific physical milestones that indicate your child is ready to try this new skill. A key indicator is the development of a strong pincer grasp, where your child can easily pick up small pieces of food using their thumb and index finger.
Observe how your child handles other utensils during family meals. If they can navigate a spoon or fork with steady control and minimal spilling, their hand-eye coordination is likely mature enough for chopsticks. Another positive sign is a sustained interest in mimicking adult eating habits, such as reaching for your chopsticks or trying to use two pens or straws to pinch food.
Products mentioned in this guide

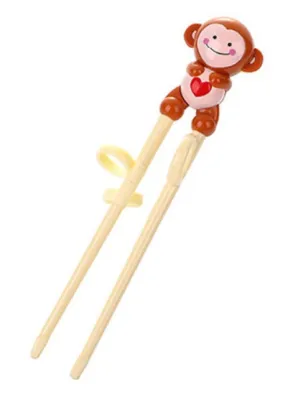
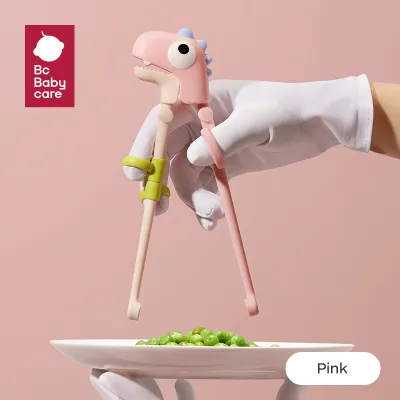
![[SG Ready Stock] Childrens Chopsticks Training Chopsticks Baby Chopsticks Practice Chopstick Paw Patrol dogs Fork & Spoons [Little Gems]](https://img.lazcdn.com/g/p/5554c4ed39261e2c591ff23a584da57c.jpg_400x400q80.jpg_.webp)
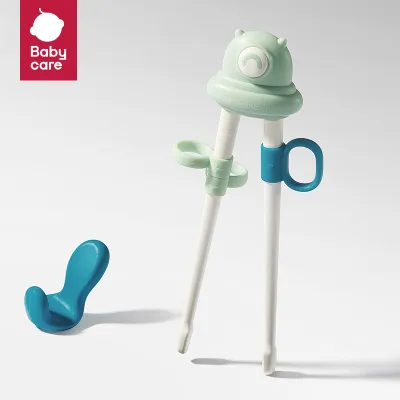
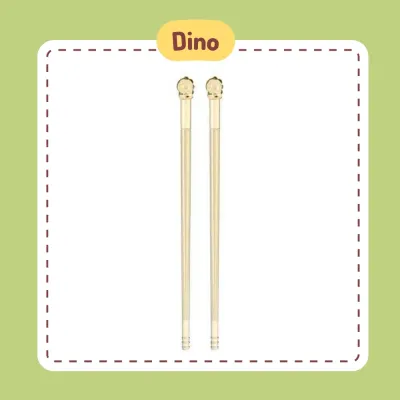
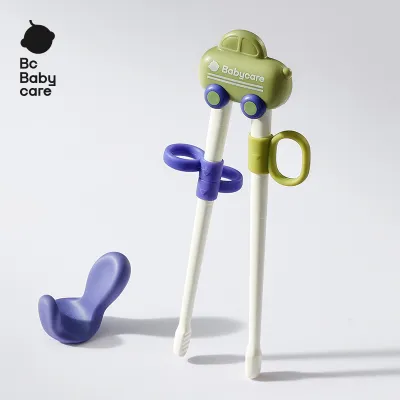
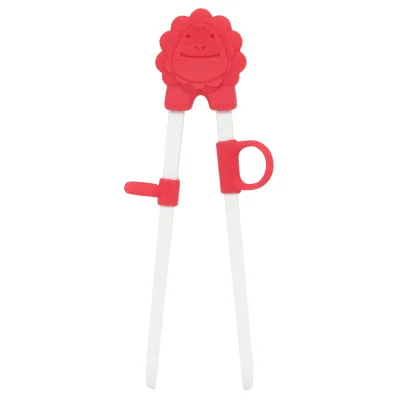
Prices are valid at publication and may change. Please refer to the product page for the latest price.
Chronological age serves only as a general reference point, with many children showing interest between two and four years old. However, individual motor skill progression varies significantly, and some children may not be ready until closer to kindergarten. Forcing the transition before the hand muscles are sufficiently developed can cause physical strain and hand fatigue.
If your child shows persistent frustration, drops the chopsticks frequently, or refuses to eat during practice sessions, it is advisable to pause the transition. Reintroducing a familiar spoon or fork keeps mealtimes positive and stress-free. You can always reintroduce the training chopsticks a few weeks later when their hand strength and interest have naturally increased.
Essential Features to Evaluate in Training Chopsticks
When browsing options at local baby boutiques or online marketplaces, evaluating the physical design of the chopsticks is crucial for a comfortable learning experience. Look for ergonomic contours, soft grip pads, or adjustable finger loops that guide small fingers into the correct positions. These features help establish proper finger placement from the very beginning without forcing the hand into an unnatural, tiring posture.

The hinge or connector mechanism at the top of the chopsticks plays a major role in how much effort is required to use them. Top-mounted plastic hinges or flexible silicone bridges keep the two limbs aligned, preventing them from crossing over or slipping apart. Symmetrical, flexible bridges are often easier for beginners to squeeze, while rigid hinges provide a more stable pivot point for older toddlers.
Pay close attention to the tips of the chopsticks, as this is the point of contact with the food. Textured tips, such as those with molded ridges, matte finishes, or wide, flat ends, make it much easier to grip slippery items like noodles or tofu. Smooth, rounded tips can be highly frustrating for a beginner, causing food to slip away repeatedly and discouraging the child.
The overall length and weight of the utensil must be scaled to your child’s hand size. Standard adult chopsticks are too long and heavy, creating a leverage disadvantage that tires out small hand muscles quickly. Lightweight plastic or hollow stainless steel designs that measure around 15 to 18 centimeters are generally well-suited for toddlers, allowing them to maneuver the tips without hand fatigue.
Matching Chopstick Designs to Skill Stages
Mastering chopsticks is a gradual process that mirrors other developmental milestones like writing or drawing. To support this journey, training chopsticks are categorized into three distinct stages that gradually reduce mechanical assistance. By observing your child’s current grip and control, you can select the appropriate starting point and transition them smoothly toward independent use.
Stage 1: Beginners (Fully Assisted)
For children who are just starting their self-feeding journey, fully assisted chopsticks provide the maximum amount of structural support. These designs typically feature a permanently connected top hinge and integrated silicone finger rings. The rings act as physical guides, showing the child exactly where to place their thumb, index, and middle fingers to establish a proper grip.
An automatic spring-back mechanism is another essential feature of beginner models. This design uses a flexible silicone bridge or a spring-loaded hinge that automatically pushes the chopsticks open after each squeeze. By removing the need for the child to actively open the chopsticks, the tool reduces the physical effort required, allowing the toddler to focus entirely on the pinching motion.
You will know your child is ready to move past this stage when they can easily pick up small food items without dropping them and no longer rely on the finger rings for stability. If they begin pulling their fingers out of the loops or trying to hold the chopsticks higher up, it is a clear sign that their muscle memory is established and they are ready for less support.
Stage 2: Intermediate (Semi-Assisted)
The intermediate stage bridges the gap between fully assisted tools and standard chopsticks by demanding more active finger control. Semi-assisted designs retain a top hinge or connector to keep the two limbs aligned, but they omit the finger loops entirely. This forces the child to actively position their fingers along the shafts and maintain their grip through their own muscle strength.
Without the physical guidance of rings, the child must learn to balance the chopsticks using their thumb and fingers while squeezing. The top connector prevents the chopsticks from crossing over, which is the most common mistake at this stage. This design allows the child to build grip strength and refine their pinching motion without the frustration of the chopsticks slipping out of alignment.
Watch for indicators that your child is relying too heavily on the mechanical hinge, such as squeezing with excessive force or using their whole hand instead of individual fingers. If they can open and close the chopsticks smoothly with proper finger placement, they are ready to transition. If they continue to struggle with alignment, keep using the semi-assisted model for a few more weeks.
Stage 3: Advanced (Unconnected Training)
The final stage of training involves transitioning to unconnected, child-sized chopsticks that mimic standard adult utensils. These chopsticks feature no hinges, connectors, or finger loops, requiring full manual control and coordination from the child. The primary difference between these and adult chopsticks is their reduced length and lightweight construction, which are tailored to small hands.
Using a shorter length is critical during this stage, as standard adult chopsticks are too long and heavy for a child’s hand, leading to improper grip habits. A shorter pair allows the child to practice the correct leverage and finger movements comfortably. Look for designs made of textured wood or textured food-grade silicone tips to provide a bit of extra grip as they practice.
As mechanical aids are removed, your child may occasionally revert to incorrect grip habits, such as crossing the chopsticks or holding them too close to the tips. You can correct these mistakes by gently demonstrating the proper finger placement and encouraging them to hold the chopsticks near the upper third of the shaft. Consistent, low-pressure practice will help solidify these habits into permanent muscle memory.
Material Safety, Hygiene, and Care Instructions
When selecting baby chopsticks, material safety and hygiene must be top priorities. Always check the manufacturer’s packaging and product labels to verify that the materials are food-grade and free from harmful chemicals like BPA, phthalates, and heavy metals. Common safe materials include food-grade silicone, high-quality BPA-free plastics, and natural, untreated wood or bamboo.
Cleaning and sterilization methods vary widely depending on the materials used, so it is essential to verify the official care instructions. Some plastic models with intricate silicone rings or spring mechanisms may warp or degrade if exposed to high heat, making them unsuitable for steam sterilizers or the bottom rack of a dishwasher. Wooden chopsticks should generally be hand-washed and dried immediately to prevent warping or mold growth.
Regularly inspect the chopsticks for signs of wear and tear, especially around the hinges, connectors, and silicone loops. Cracked plastic, loose joints, or peeling coatings can harbor bacteria and should be replaced immediately. If a hinge mechanism becomes loose or damaged, it can also pose a pinching hazard to delicate fingers or affect the alignment of the tool.
Additionally, avoid designs with small, detachable parts that could easily come loose during a meal. If a finger ring or a decorative top character can be easily pulled off by a child, it poses a serious choking hazard. Check that all components are securely integrated or designed to be removed only by an adult during cleaning, and always supervise your child during mealtimes.
Setting Up for Success During Mealtime Practice
Creating a positive, low-pressure environment helps support your child as they master the art of using chopsticks. Start by offering easy-to-grasp foods during the initial practice sessions. Large, textured, or slightly sticky items like cubed tofu, thick pasta shapes, or pieces of steamed broccoli are much easier to pick up than slippery noodles or small peas.
Modeling the correct motions is a highly practical way to teach your child. Sit together during meals and let them watch how you hold and manipulate your own chopsticks. You can exaggerate your movements slightly, showing how the bottom chopstick remains stationary while the top one moves to pinch the food, giving them a clear visual guide to mimic.
Keep practice sessions short and pressure-free, especially in the beginning. If your child becomes tired or frustrated after a few minutes, encourage them to switch back to their spoon or fork to finish their meal. The goal is to build confidence and keep mealtimes enjoyable, ensuring they associate using chopsticks with fun and independence rather than frustration.
Frequently Asked Questions (FAQ)
At what age should I introduce baby chopsticks?
While many children show interest in using chopsticks between the ages of two and four, physical readiness is a more reliable indicator than chronological age. Before introducing training chopsticks, verify that your child has developed a mature pincer grasp and can use a spoon or fork with reasonable control. If they struggle with basic utensil coordination, it is often helpful to wait a few months before trying chopsticks.
Can left-handed children use standard training chopsticks?
Symmetrical training chopsticks with simple top connectors or flexible silicone bridges can generally be used by both left- and right-handed children. However, models with molded finger rests or specific ergonomic loops are often designed exclusively for right-handed users. If your child is left-handed, carefully check the product description to verify whether the design is either ambidextrous or specifically made for left-handed grip patterns.
How do I clean chopsticks with complex hinge mechanisms?
To clean chopsticks with intricate hinges or removable silicone rings, always consult the manufacturer’s manual for specific disassembly instructions. Many designs allow you to slide off the silicone loops or detach the hinge for thorough cleaning. Allow all parts to dry completely before reassembling them, as trapped moisture in tight joints can lead to mold growth or weaken the materials over time.

Community discussion
Share your experience or ask a question. Comments are reviewed before publication.