
The journey of transitioning your child from a bottle or breast to a cup is a major developmental milestone. Among the various options available, a straw cup for kids is highly recommended by pediatric dental and speech professionals because it promotes healthy oral motor habits. Unlike spout cups, which can prolong an infant’s natural suckling reflex, drinking from a straw encourages the tongue to retract and the lips to seal actively, supporting mature swallowing patterns and speech development.
However, finding the best straw cup is not simply a matter of picking the most colorful design on the shelf. It requires a careful assessment of your child’s current physical motor skills, oral developmental stage, and grip capabilities. By understanding how different cup designs interact with your child’s growing abilities, you can support a smooth, frustration-free transition that encourages independent hydration.
When to Transition: Recognizing Readiness for a Straw Cup
Transitioning to a straw cup is a process guided by physical and behavioral milestones rather than a strict chronological age. While many pediatric experts suggest introducing a straw cup around six to nine months of age, every child develops at their own pace. Instead of watching the calendar, caregivers should observe their child’s physical readiness.
Products mentioned in this guide

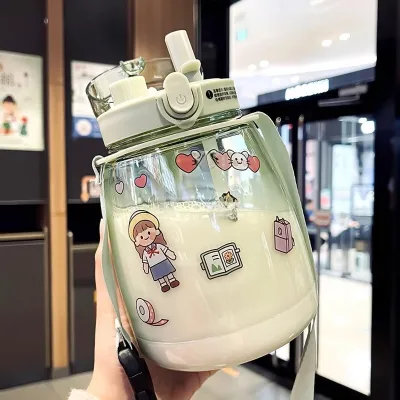
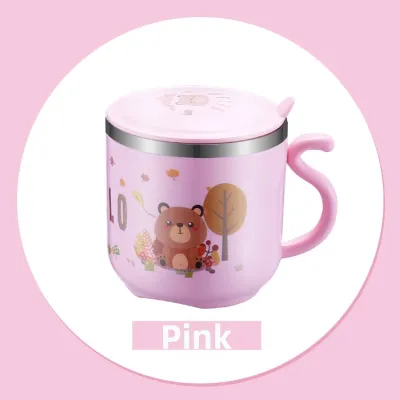
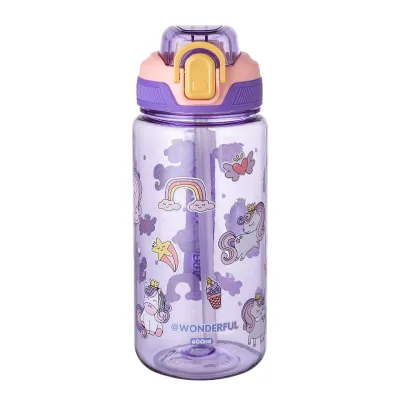
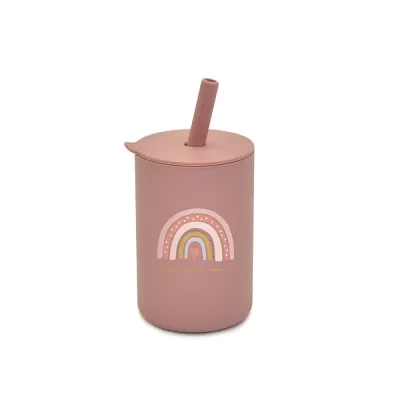
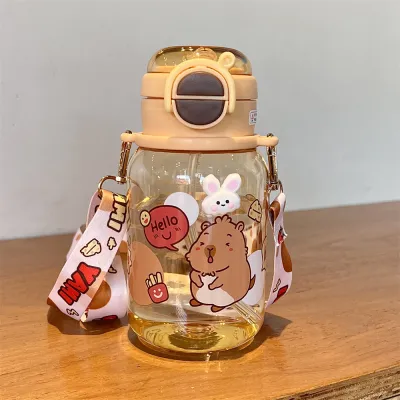
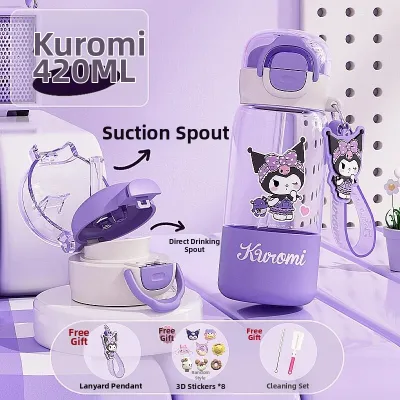
Prices are valid at publication and may change. Please refer to the product page for the latest price.
First, look for stable physical control. Your child should be able to sit upright independently in a high chair with excellent head and neck stability. This posture is critical because upright sitting aligns the airway and esophagus, minimizing the risk of choking when swallowing thin liquids. Additionally, look for the physical ability to grasp small objects and bring them accurately to the mouth. This indicates that your child’s hand-eye coordination and fine motor skills are mature enough to handle a cup.
Behavioral cues are equally telling. If your child watches you drink from a glass with intense curiosity, reaches out to grab your cup, or begins to push away their familiar baby bottle during feeding times, they may be signaling a readiness for change. These behaviors show an emerging cognitive connection between cups and hydration.
However, if you observe persistent difficulties, such as your child struggling to sit upright, showing a lack of interest in hand-to-mouth coordination, or exhibiting a strong tongue-thrust reflex that pushes objects out of their mouth, it is wise to delay the transition. If you have any concerns regarding your child’s oral motor development, swallowing coordination, or overall readiness, consult your pediatrician or a pediatric feeding specialist before introducing a straw cup.
Matching Cup Features to Motor and Oral Skills
To choose the right cup, you must align its physical design with your child’s current motor and oral capabilities. A cup that is too advanced can cause frustration and refusal, while a cup that is too basic may not challenge your child to develop new skills.

Straw Mechanisms and Flow Control
Straw designs generally fall into two categories: valve-controlled and open-flow. Understanding the differences between these mechanisms is key to supporting your child’s sucking strength and coordinating their swallowing.
- Valve-Controlled Straws: These straws feature a built-in, cross-cut, or bite-activated valve that keeps liquid from escaping unless the child applies active suction. They are highly effective at preventing spills, making them popular for active toddlers. However, because they require a combination of biting and strong suction to open the valve, they can be physically exhausting or confusing for beginners who are just learning how to draw liquid upward.
- Open-Flow Straws: These straws do not have an internal valve, allowing liquid to flow freely with minimal suction. They provide a more natural drinking experience and are excellent for teaching correct oral motor patterns, as the child does not need to bite down to drink. The trade-off is that they offer no spill protection; if the cup is tipped or dropped, the liquid will run out. Furthermore, because the flow is unrestricted, beginners must have sufficient oral control to swallow quickly enough to prevent coughing.
When introducing a straw cup, assess your child’s suction strength. If they struggle to get liquid out of a valved straw, they may benefit from an open-flow straw first, under close supervision. Always check the manufacturer’s recommended age and flow-rate specifications on the packaging, as these vary significantly between brands and are designed to match specific developmental stages.
Handle Designs and Grip Support
As your child’s grip transitions from a primitive grasp to refined finger coordination, the cup’s handle design should evolve accordingly.
- Dual-Handle Designs: For early learners (typically around 6 to 12 months), cups with two large, symmetrical side handles are ideal. At this stage, infants use a palmar grasp, wrapping their entire hand around an object. Dual handles allow them to use both hands to stabilize the cup, bring it to their mouth, and control its tilt without dropping it.
- Single-Handle or Handle-Free Cups: As toddlers reach 12 to 18 months, their fine motor skills improve. They begin to develop a pincer grasp and learn to rotate their wrists to control objects with one hand. Transitioning to a single-handle cup, or a handle-free cup with a contoured middle, encourages them to practice these mature hand movements and prepare for drinking from standard open cups.
When shopping, physically inspect the handle thickness and texture. Look for rubberized, non-slip textures that provide a secure grip even when your child’s hands are wet, sticky, or greasy from finger foods. Handles that are too thick or completely smooth can easily slip out of small hands, leading to drops and mealtime frustration.
Weight, Base Stability, and Material Checks
Evaluating the physical weight and stability of a straw cup is essential to ensure your child can lift and use it independently without physical fatigue.
- Weight Dynamics: An empty cup may feel light to an adult, but when fully filled with water or milk, its weight increases significantly. For early lifters, choose lightweight materials like food-grade silicone or thin, high-quality plastics to prevent hand and arm fatigue. Heavier materials, such as double-walled stainless steel, are highly durable and excellent for keeping drinks cool, but they are better suited for older toddlers who have developed the upper-body strength to lift them easily.
- Base Stability: Look for cups with wide, flared bases or weighted bottoms. Toddlers are naturally clumsy and often set cups down with force or at awkward angles. A wide base or a non-slip silicone bottom ring helps prevent the cup from tipping over during active meals.
- Material Safety Verification: Do not rely solely on bold marketing buzzwords on the front of the box. Carefully examine the product labels and manufacturer documentation to verify material safety. Look for explicit "BPA-free" declarations, food-grade silicone or plastic indicators (such as PP or Tritan), and statements of compliance with local consumer product safety standards.
A Practical Buyer's Checklist for Straw Cups
To narrow down your choices when shopping online or in physical stores, use this structured checklist to evaluate the practical, everyday usability of any straw cup.
- Disassembly and Cleaning Complexity: Before purchasing, look at how many individual parts make up the cup. A standard cup might have a lid, a collar, a two-part straw, and a weighted ball. Highly complex designs with multiple internal valves, tiny crevices, and non-removable parts are incredibly difficult to clean thoroughly. These hidden areas easily trap milk residue and moisture, posing significant hygiene risks.
- Leak-Proof Claims vs. Reality: Understand that "leak-proof" labels usually mean the cup is leak-resistant under normal, static conditions. In reality, physical drops, vigorous shaking, or environmental changes can cause leaks. For example, moving from a hot outdoor playground into an air-conditioned room, or traveling on an airplane, causes air pressure changes that can force liquid up and out of the straw. Read user reviews to see how a cup performs when dropped from high-chair height.
- Replacement Parts Availability: Silicone straws are soft and comforting, which means teething toddlers will frequently chew on them. This chewing can quickly split the silicone, ruin the valve, or create choking hazards. Before committing to a specific cup brand, verify if the manufacturer sells replacement straws and valves separately. If they do not, you will have to discard the entire cup every time a straw is damaged, which is neither cost-effective nor environmentally friendly.
- Dishwasher and Sterilizer Safety: Check the manufacturer's instructions for exact temperature limits and cleaning guidelines. Some plastic components will warp, crack, or release chemicals if exposed to high sterilizer heat or the intense heat cycle of a dishwasher. If you plan to use these appliances, ensure the product label explicitly states it is dishwasher-safe (typically top-rack only) and compatible with steam or UV sterilizers.
- Spout and Straw Length: Examine the physical proportions of the straw. The portion of the straw that extends outside the lid should be relatively short—just long enough for your child to wrap their lips around comfortably. If the straw is too long, it can poke the back of your child's throat, trigger a gag reflex, or potentially injure their eyes or face if they tilt the cup too quickly.
Hygiene, Cleaning, and Safety Boundaries
Maintaining a straw cup requires strict, daily hygiene practices to protect your child’s health. Because straws are narrow, enclosed tubes, they are highly susceptible to bacterial growth.
Always check the applied product’s label and the treated item’s manufacturer instructions before cleaning, sterilising, or using the cup. If instructions conflict, the item is unidentified, or the use is not covered, stop and consult the manufacturer or a qualified professional.
Daily Cleaning Protocols
Simply rinsing a straw cup under the tap is insufficient to remove milk fats, juice sugars, or saliva. Over time, these residues form a thin, slippery layer called biofilm, which serves as a breeding ground for bacteria and mold.
To clean the cup properly, disassemble every single component after each use. Use a specialized, narrow straw brush to scrub the entire length of the inside of the straw and any valve mechanisms with warm, soapy water. In warm, humid climates like Singapore, keeping your child hydrated is a daily priority, but high humidity also means mold can develop rapidly in damp cup crevices. After washing, place all disassembled parts on a clean drying rack in a well-ventilated area, ensuring they are completely dry before reassembling them.
Checking for Wear and Tear
Perform a weekly visual and tactile inspection of all cup components. Look closely for the following signs of wear, and replace the affected parts or the entire cup immediately if you spot them:
- Cloudiness or Discoloration: This indicates that the plastic or silicone is degrading, often due to heat exposure or age.
- Cracks or Scratches: Physical damage can harbor bacteria that cannot be scrubbed away, and sharp edges can cut your child's mouth.
- Bite Marks or Tears: Damaged silicone can tear completely, creating a loose piece that poses a serious choking hazard.
- Mold Spots: Black or grey spots inside the straw or valve that do not wash away are mold colonies. The part must be discarded immediately.
- Loose-Fitting Valves: If the valve no longer fits snugly, it can slip out during drinking, posing a choking risk.
Safe Usage Practices
To prevent physical injuries, establish clear safety boundaries around cup use. Never allow your toddler to walk, run, or play while holding a cup with a rigid or hard plastic straw in their mouth. If they trip and fall, a hard straw can cause severe lacerations to their tongue, palate, throat, or gums. Soft, flexible silicone straws are much safer, but active play should still be kept separate from drinking times.
Additionally, never use straw cups for hot liquids. Many straw cups are designed with airtight seals to prevent leaks. When you put a hot liquid inside, the heat causes the air inside the cup to expand, building up pressure. This pressure will force the hot liquid rapidly up through the straw, spraying out and posing a severe burn risk to your child and anyone nearby.
Troubleshooting Common Transition Challenges
It is entirely normal for children to experience difficulties when first introduced to a straw cup. Patience and low-risk training techniques can help resolve these common hurdles.
Refusal to Suck
If your child does not understand how to draw liquid up through a straw, they may simply bite, blow into, or ignore it. You can teach them the basic mechanics of straw drinking using the “pipette method”:
- Take a clean, loose straw and dip it into a cup of water, breast milk, or formula.
- Place your clean index finger over the top opening of the straw to trap a small amount of liquid inside.
- Bring the bottom of the straw to your child's lips.
- Slowly release your finger from the top, allowing the liquid to flow into their mouth.
This simple exercise helps your child connect the physical straw with the reward of getting a drink. Once they understand this connection, you can transition to placing the straw back inside the cup. Temporarily offering a highly preferred liquid, such as breast milk or formula, can also provide extra motivation.
Biting the Straw
Teething infants and toddlers often chew on silicone straws to soothe their sore gums. While silicone is flexible, persistent biting will damage the cup and prevent proper drinking.
If your child is biting the straw instead of drinking, recognize that this is a natural sensory exploration phase. To manage this, try offering a cold, textured silicone teether or a chilled washcloth for a few minutes before mealtime. This helps satisfy their oral sensory need and soothe their gums, making them more likely to focus on drinking rather than chewing when the cup is presented.
Frustration and Spills
If your child frequently coughs, sputters, or gets frustrated by spills, the liquid flow may be too fast for their current swallowing coordination. Conversely, if they are using a highly restrictive valved cup and cannot get any liquid out, they may become angry and throw the cup.
If mealtime becomes stressful, do not force the issue. Pause the transition and return to their familiar bottle or cup for a few days to let everyone calm down. When you try again, consider adjusting the cup features—such as switching from a free-flowing straw to a gentle valve, or vice versa—to better match their comfort level.
When to Seek Professional Help
While a learning curve is expected, certain physical symptoms should not be ignored. If your child consistently gags, coughs, chokes, or shows signs of respiratory distress (such as watery eyes or congestion) while trying to drink thin liquids from a straw, stop using the cup immediately. These signs can indicate that liquid is entering their airway rather than their esophagus. Consult your pediatrician or a pediatric feeding therapist to evaluate their swallowing safety and receive professional guidance.
Frequently Asked Questions (FAQ)
Can I put hot liquids in a toddler's straw cup?
No, you should not put hot liquids in a toddler’s straw cup. Most of these cups are designed with airtight seals to prevent leaks. When hot liquid is poured inside, the heat creates steam and causes the air to expand, building up internal pressure. This pressure forces the hot liquid up and out of the straw, which can spray onto your child and cause serious burns. Additionally, high heat can warp plastic or silicone components, ruin leak-proof valves, and compromise the structural safety of the cup. Always check the manufacturer’s instructions for the maximum safe temperature limit of the cup.
How often should I replace the straw part?
The replacement frequency of a silicone straw depends heavily on your child’s drinking habits, chewing tendencies, and how often the cup is used. As a general rule, you should inspect the straw weekly for any signs of physical damage. Replace the straw immediately if you notice bite marks, cracks, tears, discoloration, or persistent mold spots that cannot be cleaned. Even if there is no visible damage, many manufacturers recommend replacing silicone straws every two to three months of regular use to maintain optimal hygiene and material integrity.
Is a weighted straw cup better than a regular one?
A weighted straw cup is highly beneficial for infants who are just beginning the transition to a straw cup. The weighted ball at the bottom of the straw moves with gravity, keeping the end of the straw submerged in liquid even if your child tilts the cup backward or drinks while lying down. This prevents them from sucking in air and getting frustrated. However, weighted straws have more parts and are significantly harder to clean thoroughly. For older toddlers who can sit upright and understand that they must keep the cup upright to drink, a standard, non-weighted straw cup is often easier to maintain and perfectly adequate.

Community discussion
Share your experience or ask a question. Comments are reviewed before publication.