
When preparing feeds for your little one, keeping their feeding equipment spotlessly clean is a frequent daily task. While both glass and plastic baby bottles serve the same primary purpose, their physical properties are vastly different. These differences mean that a cleaning routine that works perfectly for a durable glass bottle could easily damage, warp, or degrade a plastic one over time.
To maintain the safety and longevity of your baby’s feeding gear, you must tailor your washing, scrubbing, and sterilising methods to the specific material of the bottle. While a mild, baby-safe bottle cleaner is the ideal choice for washing both types of materials, the physical tools you use to scrub them and the methods you employ to sterilise them must differ. Understanding these material-specific requirements helps you prevent the accumulation of harmful bacteria, avoid physical damage to the bottles, and ensure a hygienic feeding experience for your infant. If your baby experiences persistent feeding issues, gas, or colic, do not assume it is solely a bottle-cleaning issue; consult a pediatrician or lactation consultant for professional guidance.
Why Material Dictates Your Cleaning Routine
The fundamental reason glass and plastic bottles require different care lies in their chemical and physical structures. Glass bottles, typically made from high-quality borosilicate glass, possess exceptional thermal shock resistance and a highly durable, non-porous surface. This means they can withstand rapid temperature changes, intense boiling, and vigorous scrubbing without scratching or degrading. Because glass is non-porous, it does not absorb milk fats, proteins, or strong odours, making it inherently easier to clean and sanitise over long periods.
Products mentioned in this guide
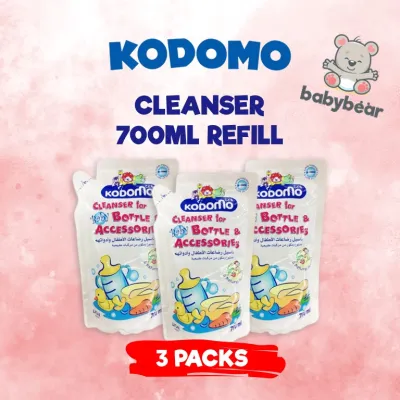
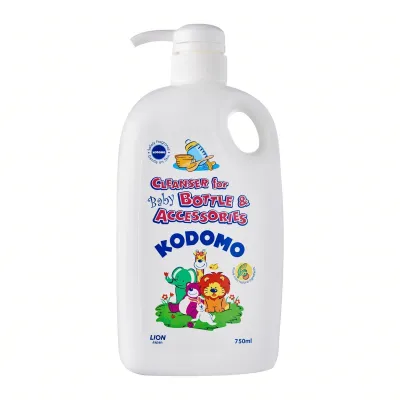
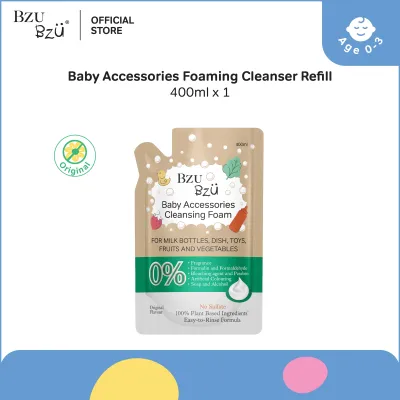
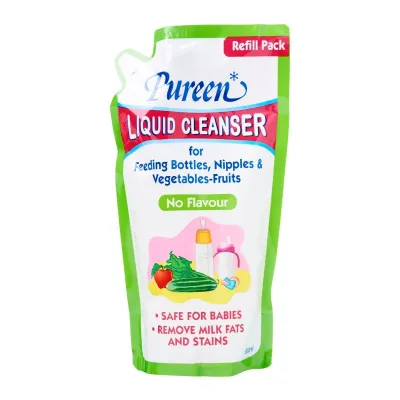
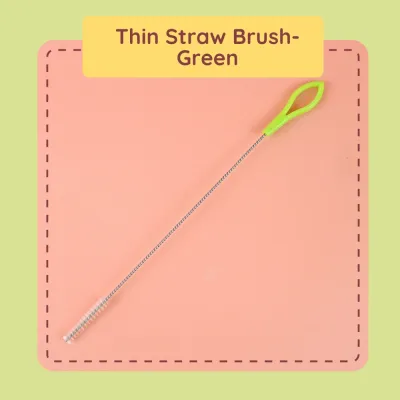
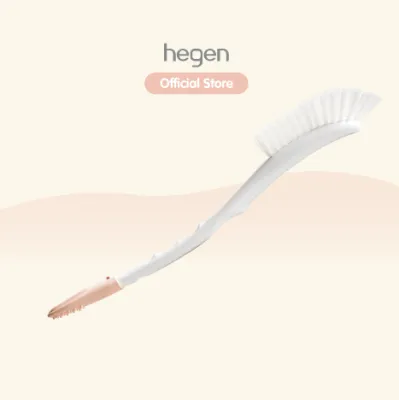
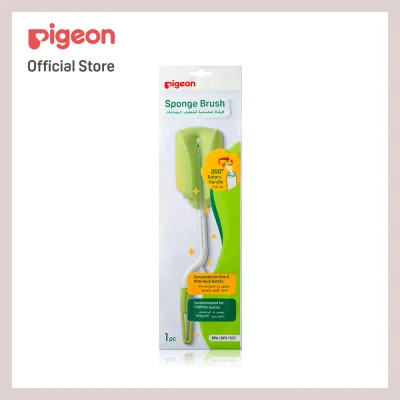
Prices are valid at publication and may change. Please refer to the product page for the latest price.
In contrast, plastic baby bottles—commonly manufactured from materials such as Polypropylene (PP), Polyphenylsulfone (PPSU), or Polyethersulfone (PES)—are much softer and more susceptible to physical and chemical wear. PP is lightweight and economical but has a lower heat tolerance (typically up to 110°C) and is relatively soft, making it highly prone to scratching. PPSU is a medical-grade plastic that is significantly more durable, possesses a natural honey-colored tint, and can withstand higher temperatures (up to 180°C), yet it remains vulnerable to physical scratching compared to glass.
The primary safety concern with plastic bottles is the risk of micro-scratches. When you use abrasive cleaning tools or harsh scrubbing motions on plastic, you create microscopic grooves on the inner surface. These tiny scratches are highly problematic because they act as safe havens where milk residue, fats, and bacteria can accumulate. Once bacteria become lodged in these micro-scratches, standard washing and even sterilisation may fail to eliminate them completely, creating a potential health hazard for your baby. Therefore, you must always verify the specific material grade, age or flow-rate guidelines, and maximum temperature tolerances printed on your bottle’s packaging before establishing your cleaning and sterilisation routine.
Step-by-Step: Cleaning Glass Baby Bottles
Cleaning glass baby bottles requires a systematic approach that balances thorough hygiene with careful physical handling to prevent breakage.

- Complete Disassembly: Begin by completely disassembling the bottle. Separate the glass body, the silicone nipple, the plastic collar, and the protective cap. If your bottle features an anti-colic valve system, disassemble those components as well. Milk proteins and moisture easily become trapped in the threads of the collar and the small crevices of valves, providing a breeding ground for bacteria if left unwashed.
- Immediate Cold Rinse: Rinse all disassembled parts under cold running water immediately after a feeding. This initial rinse is crucial because it flushes away the bulk of the milk residue before it has a chance to dry and bond to the glass surface. Using cold water at this stage prevents milk proteins from coagulating and sticking.
- Prepare the Wash Basin: Fill a clean basin—dedicated exclusively to washing baby items—with warm water and add a pump of a mild, baby-safe bottle cleaner. Avoid washing baby bottles directly in your kitchen sink, as the sink surface often harbors food bacteria, grease, and chemical residues from household dish soaps.
- Scrub with Care: Use a dedicated bottle brush to clean the interior of the glass bottle. Because glass is highly scratch-resistant, you can safely use standard nylon-bristle brushes or sponge brushes to scrub away stubborn milk fats. However, keep in mind that soapy glass is incredibly slippery. To minimize the risk of accidental drops and breakage, consider placing a soft silicone mat at the bottom of your wash basin or sink. Additionally, avoid subjecting the glass to extreme thermal shock—such as transferring a cold bottle directly into boiling water—unless the manufacturer explicitly states it is made of thermal-shock-resistant borosilicate glass.
- Inspect for Damage: After rinsing the soap away thoroughly with warm running water, perform a quick visual inspection of each glass bottle. Hold the bottle up to a bright light source and check for any hairline cracks, chips, or deep scratches. If you detect any signs of physical damage, discard the bottle immediately to prevent it from shattering during subsequent sterilisation cycles or feeding sessions.
Step-by-Step: Cleaning Plastic Baby Bottles
Because plastic is a softer, more delicate material, your daily washing routine must focus on gentle cleaning techniques that preserve the integrity of the plastic surface.
- Immediate Disassembly and Rinse: Just as with glass, take the bottle completely apart immediately after use. Rinse all parts under lukewarm running water to wash away loose milk residue. Avoid using hot water for this initial rinse, as heat can cause milk proteins to bind tightly to the plastic, leaving a stubborn, cloudy film that is difficult to remove without aggressive scrubbing.
- Soak in Warm, Soapy Water: Submerge all disassembled parts in a dedicated baby wash basin filled with warm water and a gentle bottle cleaner. Let the parts soak for a few minutes to help loosen any remaining milk fats and proteins from the plastic walls.
- Employ Gentle Scrubbing Techniques: When cleaning the interior of a plastic bottle, you must strictly avoid using abrasive sponges, steel wool, or stiff nylon-bristle brushes. Instead, use a soft silicone bottle brush or a high-quality, non-abrasive sponge brush. Use gentle, circular motions to clean the inner walls. Pay close attention to the neck and the internal threading of the bottle, where milk fats tend to collect and form a greasy residue.
- Clean the Nipples and Accessories: Use a smaller, specialized nipple brush to clean the silicone teat and collar. Gently insert the brush into the nipple, taking care not to push it through the feeding hole, which can tear or stretch the silicone. Wash these accessories with the same mild soapy water, ensuring all milk film is completely removed.
- Rinse and Dry Thoroughly: Rinse every component thoroughly under clean, running water to ensure no soap residue remains. In Singapore’s warm and highly humid climate, proper drying is essential to prevent the growth of mold and mildew. Place all parts on a clean, elevated drying rack in a well-ventilated area. Avoid drying bottles in direct sunlight, as prolonged exposure to UV rays can accelerate the degradation and yellowing of plastics like PP and PPSU.
Choosing the Right Bottle Cleaner and Brushes
Selecting the appropriate chemical agents and physical tools is a critical step in maintaining both glass and plastic baby bottles safely.
Selecting a Safe Bottle Cleaner
When choosing a liquid soap for your baby’s bottles, standard household dishwashing liquids are generally not recommended. These conventional soaps are formulated to tackle heavy grease on adult cookware and often contain strong synthetic surfactants, artificial fragrances, and chemical dyes. These ingredients can leave a persistent chemical film or a strong perfume scent on the bottle parts. Because infants have highly sensitive senses of taste and smell, any lingering soap residue can cause them to reject their milk or experience mild digestive discomfort.
Instead, look for a dedicated, baby-safe bottle cleaner. A high-quality bottle cleaner should feature a plant-based, biodegradable formula that is dermatologically tested and free from harsh chemicals, parabens, phthalates, and synthetic colorants. These specialized cleaners are specifically formulated to target and break down the tough proteins and fats found in breast milk and infant formula, allowing them to rinse away cleanly without leaving any toxic residue behind. Always verify safety certifications, chemical-free claims, or potential product recalls directly with the manufacturer or relevant regulatory bodies.
While a mild, high-quality bottle cleaner is universally safe for both glass and plastic bottles, thorough rinsing is especially critical when dealing with plastic. Because plastic is slightly more porous than glass, it is more likely to absorb chemical residues and odors if the soap is not washed away completely. Always rinse plastic bottles under running water for several seconds longer than glass to ensure a completely clean, residue-free surface.
Picking the Best Bottle Brush
The physical brush you choose to clean your bottles is just as important as the soap. The market offers three primary brush materials, each with distinct advantages and limitations:
- Nylon-Bristle Brushes: These brushes feature stiff plastic bristles that are highly effective at scrubbing away dried-on milk residue. They are excellent for durable glass bottles, which can easily withstand the friction. However, nylon bristles are too abrasive for plastic bottles and will cause micro-scratches over time.
- Sponge Brushes: Sponge brushes are incredibly soft and create a rich, thick lather, making them highly effective at cleaning plastic bottles without any risk of scratching. The primary drawback of sponge brushes is hygiene; sponges retain moisture for a long time, making them a breeding ground for bacteria. If you choose a sponge brush, you must sanitise it regularly and replace it every few weeks.
- Silicone Brushes: Silicone brushes feature soft, flexible rubber-like bristles that are completely non-abrasive. They are highly recommended as a safe, universal option for both glass and plastic bottles. Silicone does not absorb water, dries incredibly fast, and is highly resistant to bacterial growth. While they do not generate as much soapy foam as sponge brushes, they are highly durable, easy to sterilise, and will not scratch even the softest plastic surfaces.
Sterilisation Methods: What is Safe for Glass vs Plastic?
Sterilisation is the process of eliminating any remaining microorganisms that survived the washing stage. Because glass and plastic react differently to heat and radiation, you must choose a sterilisation method that is compatible with your bottle material.
Boiling Boiling is the traditional, budget-friendly method of sterilisation and is generally highly safe for glass bottles. You can submerge disassembled glass bottles in a pot of cold water, bring it to a rolling boil, and let them boil for 3 to 5 minutes. However, for plastic bottles, boiling requires extreme caution. While medical-grade PPSU can handle boiling temperatures well, lower-grade PP plastics can warp, distort, or degrade if subjected to prolonged boiling. Additionally, if a plastic bottle comes into direct contact with the hot metal bottom or sides of the pot, it can melt. Always verify your plastic bottle’s specific heat tolerance before boiling.
Steam Sterilisers Electric steam sterilisers and microwave steam bags are highly convenient options that use high-temperature steam to sanitise equipment. This method is generally safe for both glass and plastic bottles, provided the plastic is rated to withstand steam temperatures (typically around 100°C). When using a steam steriliser, ensure that all parts are placed face down so steam can circulate freely inside. Be careful to position plastic components so they do not rest directly against the heating element, which can cause localized overheating and structural damage.
UV Sterilisers UV-C sterilisers have become increasingly popular in Singapore households due to their waterless, hassle-free operation. This method uses ultraviolet light to destroy the DNA of bacteria and viruses. UV sterilisation is highly effective and completely safe for glass bottles, as glass does not degrade under UV-C light. However, prolonged exposure to UV light can cause certain plastics to undergo photo-degradation. Over time, UV radiation can break down the polymer chains in PP and PPSU plastics, causing them to become brittle, cloudy, or yellowed. If you plan to use a UV steriliser, check the bottle manufacturer’s guidelines to confirm UV compatibility. You may need to replace your plastic bottles more frequently if you sterilise them using ultraviolet light.
Ultimately, the manufacturer’s instruction manual is the final authority on how to safely clean and sterilise your baby bottles. If you are unsure of the material grade or if the instructions are unclear, consult the manufacturer’s customer service or stick to the gentlest cleaning and sterilisation methods available.
When to Replace Your Baby Bottles
Even with meticulous daily cleaning and careful sterilisation, baby bottles have a limited lifespan. Parents must regularly inspect their feeding equipment to identify when it is time to transition to new bottles.
For plastic baby bottles, the physical and chemical wear from daily washing and sterilising means they require regular replacement. Look out for clear warning signs of wear, such as deep scratches on the inner walls, persistent cloudiness or discoloration that does not wash away, a sticky or tacky texture, warping of the bottle shape, or a lingering sour milk smell even after a thorough wash. As a general guideline, PP bottles should be replaced every 4 to 6 months due to their softer nature and lower heat tolerance. High-grade PPSU bottles are more durable and can typically last between 6 to 12 months, depending on how frequently they are used and sterilised.
Glass bottles, on the other hand, offer an exceptionally long lifespan. A high-quality glass bottle can last for years and can even be reused for subsequent children, making them a highly sustainable and cost-effective choice in the long run. However, the critical rule for glass is immediate disposal if you detect any physical damage. You must discard any glass bottle that shows even a tiny chip, hairline crack, or deep scratch. Damaged glass is structurally compromised and can easily shatter under the heat of sterilisation or during a feeding, posing a severe safety hazard to both you and your baby.
Regardless of whether you choose glass or plastic, the silicone nipples (teats) must be replaced every 2 to 3 months. Silicone degrades over time from contact with milk fats, saliva, and heat. Perform a “stretch test” regularly by pulling firmly on the bulb of the nipple; if it feels sticky, looks cloudy, has thinned out, or shows any tears, replace it immediately to prevent choking hazards or flow-rate issues.
Frequently Asked Questions (FAQ)
Can I use the same bottle cleaner for both glass and plastic bottles?
Yes, you can absolutely use the same liquid bottle cleaner for both glass and plastic bottles. A high-quality, plant-based bottle cleaner is specifically formulated to break down milk proteins and fats, making it highly effective on both materials. The primary difference in your cleaning routine lies not in the soap itself, but in the physical tools you use. While you can use a standard nylon-bristle brush on durable glass, you must switch to a soft silicone or sponge brush when washing plastic bottles to prevent creating micro-scratches that can harbor bacteria.
How do I remove milk stains or odours from plastic bottles?
Plastic bottles are prone to absorbing strong odours and developing a cloudy, greasy film from milk fats over time. To safely remove these stains and smells without scratching the plastic, disassemble the bottle and soak the parts in a mixture of warm water and baking soda (sodium bicarbonate) or a mild solution of white vinegar and water for roughly 30 to 60 minutes. After soaking, wash the parts thoroughly with your standard bottle cleaner and rinse them with plenty of running water. Never use chlorine bleach, harsh chemical stain removers, or abrasive scouring pads, as these can permanently damage the plastic and leave toxic chemical residues that are unsafe for your baby.
Is it safe to wash baby bottles in the dishwasher?
Glass baby bottles are generally dishwasher safe and can be placed on the top rack for a thorough, high-temperature wash. For plastic bottles, dishwasher safety depends entirely on the specific plastic type and the manufacturer’s heat rating. The intense heat of dishwasher water and the high temperatures used during the heated drying cycle can easily warp lower-grade plastics like PP or accelerate their chemical degradation. If the manufacturer explicitly labels the plastic bottle as dishwasher safe, always place it on the top rack, far away from the heating element at the bottom of the machine, and avoid using harsh dishwasher detergents that contain strong synthetic fragrances or rinse aids.

Community discussion
Share your experience or ask a question. Comments are reviewed before publication.