
The best bottle cleaner for your nursery depends entirely on the material of your baby bottles. While glass bottles are highly versatile and compatible with almost any mild, plant-based dish wash, plastic and silicone bottles have distinct physical properties that demand targeted cleaning formulations. Silicone requires enzyme-based cleaners to break down stubborn milk lipids, whereas plastic bottles need ultra-gentle, non-abrasive liquid formulas to prevent microscopic scratching.
Selecting the wrong formulation can lead to chemical residues, cloudy surfaces, or persistent odors. By matching your cleaning agent to the specific physical characteristics of your bottles, you can ensure a higher standard of hygiene while extending the lifespan of your feeding gear.
Quick Answer: Matching Bottle Cleaners to Materials
When choosing a bottle cleaner, matching the formula to your primary bottle material is the most effective way to ensure cleanliness and safety.
Products mentioned in this guide
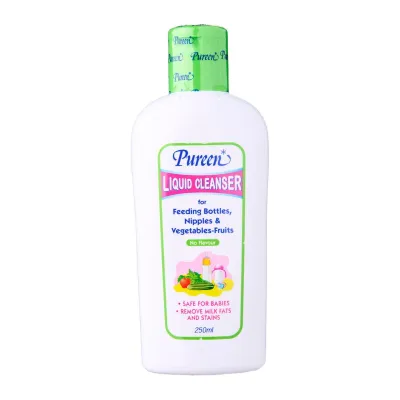
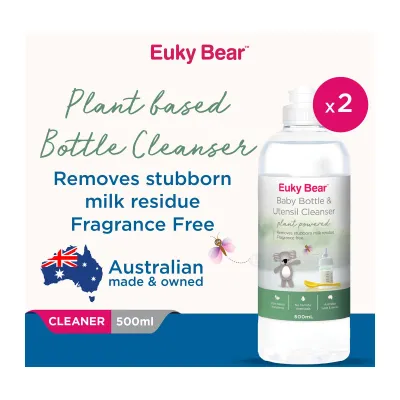
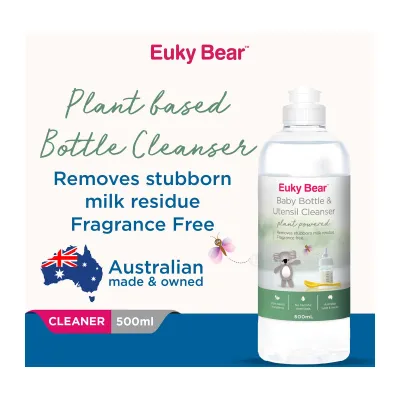
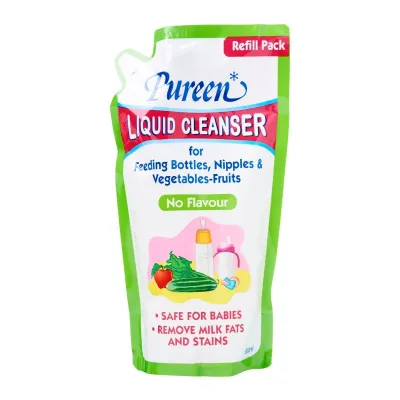
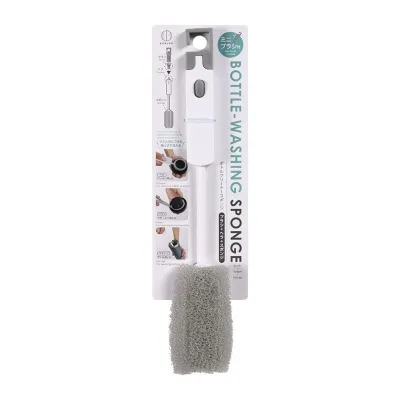
Prices are valid at publication and may change. Please refer to the product page for the latest price.
- Choose an enzyme-based bottle cleaner if you primarily use silicone baby bottles or silicone nipples. These specialized formulas contain active, plant-derived enzymes that specifically target and break down the complex proteins and fats found in breast milk and infant formula. This prevents the stubborn greasy film and sour odors that silicone easily absorbs.
- Choose a mild, low-sudsing liquid cleaner if your nursery setup relies on BPA-free plastic bottles (such as PP, PPSU, or PES). These options rinse away cleanly without leaving chemical residues or requiring aggressive scrubbing that can cause micro-scratches.
- Choose a standard plant-based liquid wash if you use glass bottles. Glass is highly versatile and non-porous, meaning it does not trap odors or fats, allowing you to use a wide variety of gentle, eco-friendly cleaners.
No single bottle cleaner is a universal solution. Your choice must balance the bottle material with your preferred cleaning method, whether you wash by hand in the sink or prepare items for a specialized appliance.
Why Bottle Material Dictates Your Cleaner Choice
To clean effectively, you must understand how milk interacts with different materials. Breast milk and infant formula are complex emulsions of proteins, carbohydrates, and lipids (fats). When these liquids sit in a bottle, the fats cling to the inner surfaces. How easily these fats are removed depends entirely on whether the bottle is made of glass, plastic, or silicone.

BPA-free plastics, including polypropylene (PP), polyphenylene sulfone (PPSU), and polyethersulfone (PES), are popular for their lightweight and shatterproof qualities. However, these materials are relatively soft. Over time, physical scrubbing, harsh chemical agents, and mineral deposits can create microscopic scratches on the inner walls. These micro-scratches are highly problematic because they act as microscopic harbors where bacteria can multiply, and they easily trap milk odors and residues that standard washing cannot reach.
Silicone is a highly flexible, durable material widely used for nipples, valves, and modern squeeze-to-feed bottles. At a microscopic level, silicone is slightly porous. This porosity means it behaves like a magnet for milk lipids. Once milk fat penetrates the microscopic pores of silicone, standard surface-active detergents (surfactants) struggle to lift them. This leads to a sticky feel and a lingering sour milk smell that persists even after multiple washes.
Glass stands out as the most chemically inert and non-porous material used for baby bottles. Because its surface is completely smooth and hard, milk fats and proteins cannot penetrate it, nor can bacteria find microscopic crevices to hide in. Glass does not absorb odors or colors. This durability allows you to use a broader range of cleaning formulations, including those containing mild natural organic acids (like citric acid) to dissolve hard water spots or stubborn milk scale without risking damage to the container.
Comparing Baby Bottle Cleaner Formulations
Understanding the chemical makeup of different bottle cleaners helps you choose the right product for your kitchen counter.
Plant-Based and Enzyme Cleaners
Enzyme-based bottle cleaners utilize natural, biodegradable proteins to catalyze the breakdown of organic matter. Unlike traditional soaps that simply surround fat molecules to wash them away, enzymes like amylase, protease, and lipase physically cut through the molecular bonds of milk proteins and fats. This makes them highly effective for silicone parts and heavily soiled bottles.
When using an enzyme cleaner, a brief soaking period is often required. Giving the enzymes three to five minutes to work in warm water allows them to fully digest the milk residues before you begin scrubbing. This minimizes the physical effort needed and protects the bottle material from abrasive wear.
Foaming and Liquid Gel Cleaners
Foaming bottle washes are incredibly popular for daily, high-frequency cleaning. These products use a specialized pump dispenser to mix the liquid soap with air, creating a rich lather instantly. This instant foam is highly convenient for quick spot-cleaning of a single bottle or nipple, providing immediate coverage over the inner surfaces.
However, foaming cleansers require meticulous rinsing. Because the foam is light and aerated, it can easily cling to the narrow necks of bottles or get trapped inside anti-colic valves. If not rinsed thoroughly with running water, dry soap residue can remain. Liquid gel cleaners, on the other hand, are more concentrated and are ideal for mixing into a basin of warm water for batch-washing multiple bottles at once.
Sterilizing Tablets and Powders
Effervescent tablets and powder cleaners are specialized formulations designed for deep cleaning, descaling, and periodic maintenance. These products often rely on oxygen-based bleaching agents or mild food-grade acids to lift stubborn mineral deposits (milk scale) and eliminate deeply embedded odors.
It is vital to distinguish between cleaning and sterilizing. Cleaning is the physical removal of dirt, fats, and organic residues from the surface, which must always occur first. Sterilizing is the process of killing pathogens, bacteria, and viruses, typically achieved through high-heat steam, boiling water, or specialized chemical sterilizers.
While sterilizing tablets are useful for travel or deep-cleaning cycles, they should not replace daily liquid bottle cleaners. Regular use of harsh chemical sterilizing agents without thorough rinsing can expose infants to chemical residues. Furthermore, repeated exposure to strong oxidizing agents can accelerate the degradation of delicate silicone valves and plastic collars, causing them to become brittle or lose their airtight seal. Always consult the bottle manufacturer’s guidelines to verify if a material can withstand specific chemical sterilizing agents.
Best Cleaning Approaches by Bottle Material
Matching your cleaning routine to the specific bottle material ensures both optimal hygiene and a longer lifespan for your feeding gear.
Glass Baby Bottles
Glass bottles are exceptionally robust when it comes to chemical and thermal exposure. To clean glass bottles, use a standard plant-based liquid or gel cleaner diluted in warm to hot water. Because glass is non-porous, you can safely use hotter water during the wash cycle than you would with plastic. Hot water helps liquefy and melt away stubborn milk fats, making the surfactant’s job much easier.
While glass is highly durable, it requires careful physical handling. Always inspect your glass bottles during the washing process for any hairline cracks, chips, or deep scratches, particularly around the rim where the collar screws on. Chipped glass can harbor bacteria and poses a physical safety risk to both caregiver and infant. If any structural defect is found, discard the bottle immediately.
BPA-Free Plastic Baby Bottles
Plastic bottles demand a much gentler touch to preserve their integrity. When washing PP, PPSU, or PES bottles, avoid harsh alkaline detergents, heavy-duty dish soaps, or abrasive cleaning tools. Instead, opt for mild, low-sudsing, plant-based liquid cleaners. These formulations rinse away easily without requiring high-pressure scrubbing that could wear down the plastic.
If your plastic bottles develop a cloudy appearance, deep scratches, or a persistent dullness, it is a sign that the material has physically degraded. Cleaners cannot reverse this physical wear, and these micro-scratches will continue to collect bacteria and milk residues. When plastic bottles reach this state, they must be replaced to maintain proper hygiene.
Silicone Baby Bottles
Silicone’s unique texture and porosity require a specialized approach to prevent the buildup of a greasy film. Use an enzyme-based bottle cleaner to target the milk lipids that cling to the silicone surface. For routine maintenance and odor removal, a gentle soak in a warm water bath mixed with a small amount of food-grade baking soda can help neutralize absorbed acids and lift stubborn smells.
To clean silicone bottles thoroughly, pay close attention to the seams, textured base, and interior curves. If the manufacturer’s design permits, gently turn the silicone body or nipple inside out. This exposes hidden areas where milk fat naturally accumulates, allowing you to clean them directly without stretching or tearing the material.
Essential Cleaning Tools and Techniques by Material
The tools you use to apply your bottle cleaner are just as critical as the formulation itself. Using the wrong brush can quickly ruin a high-quality bottle.
When choosing a bottle brush, compare sponge-tipped, silicone-tipped, and traditional nylon bristle options. For plastic and silicone bottles, highly recommend using soft sponge-tipped brushes or flexible silicone-tipped brushes. These materials glide smoothly over soft surfaces without creating the micro-scratches that ruin plastic over time.
Nylon bristle brushes, while highly effective at scrubbing away dried milk, should be reserved primarily for glass bottles. Even then, use them gently around the bottle’s rim and neck to prevent accidental chipping. Never force a stiff bristle brush into a delicate silicone nipple or anti-colic valve, as the sharp metal wire core of the brush can easily puncture or tear the material.
Instead, use specialized, ultra-soft mini brushes designed specifically for nipples and vents. Gently insert the mini brush and rotate it to clear out any milk film.
Before placing any bottle components into a dishwasher, always verify the manufacturer’s instructions. While some glass and heavy-duty plastic bottles are labeled as dishwasher-safe, the high heat of the drying cycle and the highly alkaline nature of standard dishwasher detergents can rapidly accelerate the degradation of plastic and silicone. Over time, dishwasher exposure can cause plastic to warp and silicone to become cloudy, sticky, or brittle.
In Singapore’s highly humid climate, the drying phase is just as critical as the washing phase. After washing, place all disassembled components on a clean, dedicated drying rack in a well-ventilated area. High humidity can delay drying times, creating a prime environment for mold and mildew to develop on damp silicone and plastic surfaces. Ensure all parts are completely dry before reassembling or storing them.
Safety, Rinsing, and Maintenance Boundaries
The ultimate goal of bottle cleaning is to ensure a safe feeding vessel for your infant. Ingesting even small amounts of soap residue can cause gastrointestinal discomfort or feed rejection in infants.
To ensure all cleaner residue is gone, perform a thorough rinse under clean, running water. After rinsing, perform a tactile check: rub your clean fingers against the inner surface of the bottle. It should feel completely “squeaky clean,” with no slippery or soapy sensation. If there is any residual slip, rinse the bottle again in warm water.
Keep in mind the general lifespan expectations for different feeding materials. Under normal daily use, plastic baby bottles typically require replacement every 4 to 6 months due to material wear and micro-scratching. Silicone bottles and nipples generally last slightly longer but should be inspected regularly for physical signs of wear, such as stretching, tears, or a sticky texture. Glass bottles can last indefinitely, provided they remain free of chips, cracks, or deep scratches.
If a bottle or nipple continues to retain a sour milk smell even after a thorough enzyme clean, a baking soda soak, and proper air-drying, the material has degraded beyond recovery. In such cases, stop using the item and replace it immediately to ensure your baby’s feeding safety.
Frequently Asked Questions (FAQ)
Can I use regular dish soap for baby bottles?
While standard household dish soaps are excellent for cutting grease on adult dinnerware, they are generally not recommended for baby bottles. Regular dish soaps often contain strong synthetic fragrances, artificial dyes, and heavy degreasing agents that are highly resistant to rinsing. These chemicals can leave a persistent residue on porous silicone nipples and plastic bottles, imparting an unpleasant soapy taste to the milk that may cause your baby to reject the bottle.
How do I remove the sour milk smell from silicone bottles?
To remove a stubborn sour milk smell from silicone components, you can perform a deep-cleaning soak. First, verify that your bottle parts are rated for boiling temperatures. If compatible, submerge the silicone parts in a pot of boiling water mixed with a fresh slice of lemon or a tablespoon of food-grade baking soda for 5 to 10 minutes. This helps open the microscopic pores of the silicone and neutralize the trapped lipid acids. Avoid aggressive physical scrubbing with abrasive pads, as this will not remove absorbed odors and can permanently damage the silicone surface.
Community discussion
Share your experience or ask a question. Comments are reviewed before publication.