
Transitioning your baby from a bottle or breast to a straw cup is a significant weaning milestone that requires matching the cup’s design to your child’s developing oral motor skills and physical abilities. Because every child develops at their own pace, finding the right straw cup depends less on a single brand and more on identifying the specific features—such as straw length, flow rate, and grip design—that support your baby’s current weaning stage. This guide breaks down the essential criteria for selecting an age-appropriate straw cup at 6 months, 12 months, and 18+ months, helping you build a safe and practical shortlist for your little one.
By understanding the physical mechanics of how babies drink, you can select a cup that minimizes frustration and supports natural development. Introducing a straw cup at the right time helps transition away from the infant sucking reflex toward mature swallowing patterns. This guide provides a clear roadmap to help you navigate the options in baby stores and make an informed decision for your child’s feeding journey.
Recognizing Straw Cup Readiness During Weaning
Before purchasing your first straw cup, it is helpful to observe your baby’s physical development to ensure they are ready for this new skill. Choking risks increase if a child is introduced to cup drinking before they have the core strength to support themselves. Look for key physical milestones, such as the ability to sit upright in a high chair unassisted for extended periods and good head and neck control. Another clear indicator is behavioral; if your baby reaches for your own water glass or watches you intently while you drink, they are likely ready to begin practicing.
Products mentioned in this guide
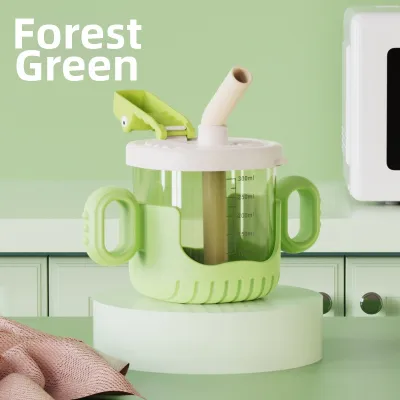

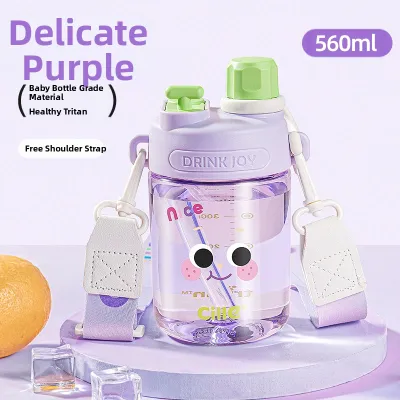
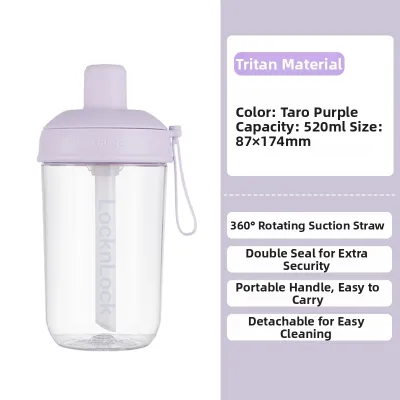
Prices are valid at publication and may change. Please refer to the product page for the latest price.
From a developmental perspective, pediatric dentists and speech therapists often recommend straw cups over traditional hard-spout sippy cups. Drinking from a straw requires a child to seal their lips around the straw, pull their tongue back, and use their cheek muscles to create suction. This active muscle engagement helps strengthen the mouth and tongue, which plays a supportive role in speech preparation and proper jaw alignment. In contrast, traditional sippy cups often allow babies to use a forward-tongue sucking motion similar to bottle feeding, which does not encourage these advanced oral motor skills.
When introducing a straw cup, safety and nutritional boundaries must remain a priority. For babies around six months of age, breast milk or formula should still provide the vast majority of their daily hydration and nutrition. Water should only be offered in very small, supervised amounts during meal times to help them practice the mechanics of drinking. Always consult your pediatrician or a qualified healthcare professional to determine the appropriate daily liquid intake for your child’s specific age and weight.
What to Look for in a Starter Straw Cup (Around 6 Months)
At around six months, your baby is transitioning to solid foods and learning to coordinate their lips, tongue, and swallowing reflex simultaneously. A starter straw cup must be designed to accommodate these early, uncoordinated movements without causing frustration, coughing, or refusal. The goal at this stage is not high-volume consumption, but rather positive exposure to a new way of drinking.

The design of the straw itself is the most critical factor for a six-month-old. Look for a cup with a short, soft, and highly flexible silicone straw. A short straw is essential because it prevents the baby from inserting the tip too far into their mouth, which can trigger a sensitive gag reflex or cause discomfort. Additionally, weighted straws are highly recommended for beginners. These straws feature a small, food-grade weight at the bottom that moves with the liquid, allowing your baby to successfully draw water even if they tilt the cup upside down or hold it at an awkward angle.
Cup size and weight must also match your baby’s physical strength. Choose a small-capacity cup, typically holding between 120ml and 150ml of liquid. A larger cup becomes too heavy for a six-month-old to lift, leading to dropped cups and mealtime frustration. Look for models equipped with large, ergonomic, easy-grip handles. Handles that are integrated into the cup’s collar or base help your baby build the necessary hand-to-eye coordination to bring the cup to their mouth independently.
Flow rate control is another vital safety feature for early weaning. Because babies are accustomed to the controlled flow of a bottle nipple, a free-flowing straw can quickly overwhelm them, leading to choking or sputtering. Select a starter cup that features a cross-cut valve or a specialized “no-spill” straw tip. These mechanisms require the baby to actively bite down or apply suction to release the liquid, ensuring they can control the pace of the flow themselves.
Finally, material safety must be verified before any purchase. Carefully inspect the manufacturer’s packaging and labels to ensure all components are certified BPA-free, phthalate-free, and made from high-quality food-grade silicone or durable plastics like polypropylene. Because these cups will undergo frequent washing and sterilization, verifying these material standards on the official product documentation ensures you are providing a safe feeding environment for your little one.
Choosing a Transitional Straw Cup (Around 12 Months)
By twelve months, your toddler’s physical abilities, mobility, and suction strength have increased dramatically. They are likely crawling, cruising, or walking, and their daily hydration needs will naturally rise as they become more active. At this stage, the ideal straw cup must balance excellent spill resistance with durable construction to withstand the daily adventures of an active toddler.
Spill-proof and leak-resistant mechanisms become a top priority as your child begins carrying their cup around the home. Look for cups that feature robust internal valves that prevent liquid from escaping even when the cup is shaken vigorously or dropped upside down. Many transitional cups feature a sliding or flip-top lid that completely encloses the straw when not in use. This design is highly practical for keeping the straw clean and preventing messy leaks inside diaper bags or stroller compartments during outings.
Durability is equally important, as twelve-month-olds frequently test gravity by throwing items from high chairs, strollers, and play tables. Look for cups constructed from impact-resistant materials, such as heavy-duty polypropylene or Eastman Tritan plastic. Some models feature shock-absorbing rubberized bases or protective silicone sleeves that cushion the impact of hard drops on tile or wooden floors, preventing the cup body from cracking or splitting.
As your child approaches their first birthday, you may also want to look for cups that offer transitional or modular features. Some feeding systems allow you to use the same cup base while swapping out the straw lid for an open-cup training lid or a soft spout. This versatility not only saves money but also allows you to gradually introduce different drinking styles as your child’s oral motor skills continue to mature.
Grip design also evolves at this stage. While handles are still helpful for some toddlers, many twelve-month-olds are capable of holding a cup directly by its body. Look for cups with contoured shapes, textured grip zones, or non-slip silicone bands wrapped around the center. These features encourage a mature, two-handed or one-handed grip, helping your child transition away from the wide-handle grip used during early infancy.
Selecting a Toddler Straw Cup (18+ Months)
Active toddlers over eighteen months require a straw cup that can keep up with their high-energy lifestyle, outdoor play, and increased fluid intake. At this stage, children are often drinking a wider variety of liquids, including water, milk, or occasional homemade smoothies, requiring a cup that is both highly functional and exceptionally easy to maintain.
For older toddlers, advanced leak-proof designs are essential for on-the-go use. Look for travel-friendly cups with secure locking lids that prevent accidental opening in backpacks or car seats. A push-button flip lid is particularly useful for this age group, as it allows toddlers to practice opening and closing their own cups independently, fostering a sense of autonomy during snack times and outdoor play.
The physical characteristics of the straw should also change to accommodate different types of beverages. If you plan to serve thicker liquids, such as smoothies, yogurt drinks, or fortified milk alternatives, standard narrow straws will quickly clog or require exhausting suction effort. Look for toddler cups designed with wider straw diameters that allow thicker liquids to flow smoothly without restriction. Ensure the straw material remains durable enough to withstand occasional biting from teething toddlers.
Capacity considerations become more prominent as your child’s hydration needs grow. Look for cups with a capacity of 250ml to 350ml to ensure you do not have to constantly refill the cup throughout the day. However, keep in mind that a fully filled 350ml cup can be heavy; ensure the cup’s empty weight is minimal and that its overall dimensions still fit comfortably into your stroller’s cup holders or your child’s small backpack pockets.
With the introduction of milk and thicker liquids, simple disassembly for thorough cleaning becomes paramount. Complex internal valves with multiple tiny, unreachable chambers are highly susceptible to trapping milk residue, leading to rapid bacterial and mold growth. Prioritize cups that can be completely stripped down into basic components—ideally just the cup, the lid, and a two-piece straw. Avoid designs that permanently fuse plastic and silicone parts together, as these seams are common breeding grounds for mold.
Building Your Straw Cup Shortlist: A Buyer’s Checklist
When browsing local baby specialty stores or online marketplaces, it is easy to feel overwhelmed by the sheer volume of options available. To help you build a practical shortlist and make a confident purchase, use this structured evaluation checklist to compare different models:
First, evaluate the cleaning complexity of the cup. Check the manufacturer’s instructions to confirm whether all components are top-rack dishwasher safe, or if they require meticulous hand-washing. Look for brands that include a specialized, ultra-thin straw cleaning brush in the packaging, as standard bottle brushes are far too wide to clean the interior of a baby straw effectively.
Second, research the availability and cost of replacement parts. Silicone straws and valves are highly susceptible to wear, tear, and damage from teething toddlers who may bite down on the soft material. Before committing to a specific cup system, verify if the manufacturer sells replacement straws and silicone seals separately. Purchasing a pack of replacement parts (which often costs under S$10) is far more economical and environmentally friendly than replacing the entire cup assembly.
Third, cross-reference the manufacturer’s age and weight guidelines with your child’s actual developmental progress. While packaging labels provide a helpful starting point, they are general estimates. If your ten-month-old is still struggling with suction, they may benefit from a starter cup designed for six-month-olds rather than a transitional cup labeled for twelve months. Always prioritize your child’s current physical abilities over the age number printed on the box.
Finally, perform a quick safety and reliability check. Before purchasing, search online for any recent product recalls or safety warnings associated with the specific brand and model. Read user reviews on independent parenting forums or online marketplaces, paying close attention to feedback regarding long-term valve reliability, ease of suction, and whether other parents have experienced persistent mold issues despite following the recommended cleaning protocols.
Frequently Asked Questions (FAQ)
How do I clean a straw cup to prevent mold buildup?
To prevent mold buildup, you must completely disassemble every single component of the straw cup after every use. This includes removing the straw from the lid, detaching any weighted balls, and pulling out any removable silicone sealing rings. Use a specialized, narrow straw brush with warm, soapy water to scrub the entire interior length of the straw and any small valve crevices where liquid can pool. Always refer to the manufacturer’s instructions to verify if the parts can be safely sterilized in boiling water, steam sterilizers, or top-rack dishwashers. After washing, shake off excess water and lay all components flat in a well-ventilated area to air-dry completely before reassembling; trapping even a small amount of moisture inside a sealed cup is the primary cause of mold growth. Inspect all silicone parts regularly, and discard them immediately if you notice persistent discoloration, black spots, or tears.
When should I stop using a straw cup and switch to an open cup?
While straw cups are highly beneficial for oral motor development, transitioning to an open cup is the ultimate goal for mature swallowing patterns. You can begin introducing an open cup as early as six months for supervised practice, but most children show readiness for more independent open-cup use between twelve and eighteen months. Look for signs of readiness such as improved hand-eye coordination, the ability to bring objects to the mouth steadily, and controlled swallowing without excessive spilling. Start practicing during supervised mealtimes using a small, durable, open cup filled with just a few tablespoons of water to minimize mess. If you notice persistent coughing, choking, or if you suspect oral motor delays, consult your pediatrician or a pediatric feeding specialist for personalized guidance.

Community discussion
Share your experience or ask a question. Comments are reviewed before publication.