
To clean baby bottles and straw cups from brands like Pigeon, Dr. Brown’s, and Avent effectively, you need a straw brush that matches the specific internal dimensions and structural features of each straw. Because these brands design their drinking systems with varying diameters, lengths, and safety valves, a single generic brush rarely fits every model. Finding the right match requires checking the manufacturer’s specifications for both the bottle and the cleaning tool to ensure a snug yet gentle fit.
Using the wrong brush size can either leave harmful milk residue behind or permanently damage delicate silicone parts. A brush that is too wide can stretch or tear anti-leak valves, while a brush that is too narrow will simply slide through without scrubbing the inner walls. By understanding the unique design elements of your specific bottle brand and matching them to the correct brush features, you can maintain excellent hygiene and extend the lifespan of your feeding gear.
Understanding Straw Design Differences in Pigeon, Dr. Brown's, and Avent
Each major baby bottle brand utilizes a distinct engineering approach for its straw and vent systems, which directly dictates the type of cleaning tool you must use. Pigeon, for instance, is widely known for its Mag Mag transition cups and weighted straw systems. These designs often feature a gravity ball at the bottom of the straw to allow drinking from any angle. The presence of this gravity ball means you cannot simply push a standard straight brush all the way through; instead, you need a highly flexible brush or a specialized loop cleaner that can navigate around the weight without dislodging the internal mechanism.
Products mentioned in this guide
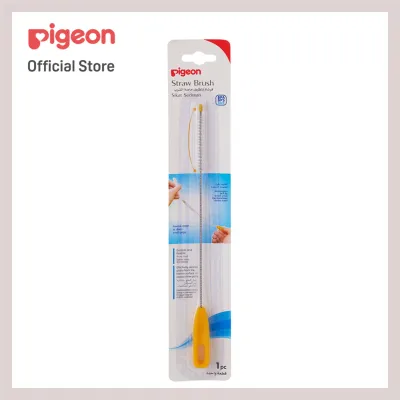
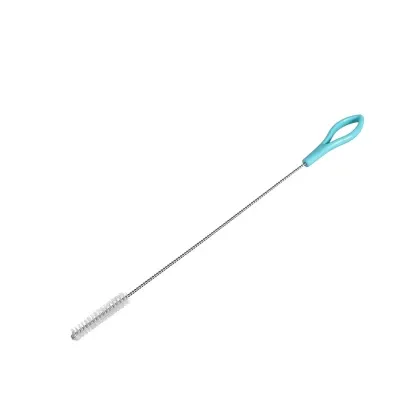
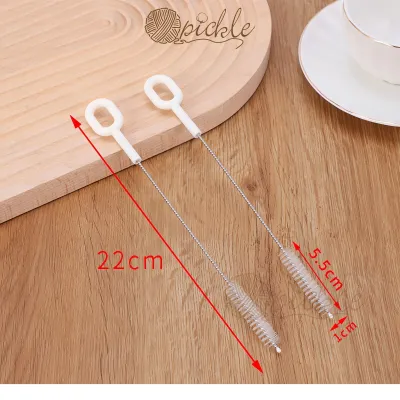

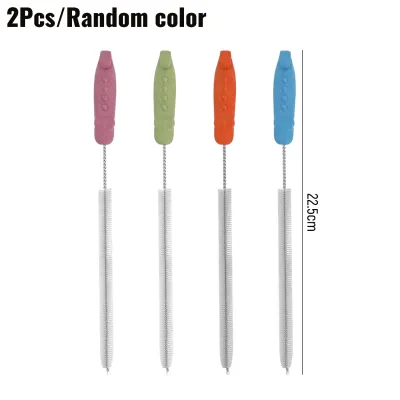

Prices are valid at publication and may change. Please refer to the product page for the latest price.
Dr. Brown’s bottles utilize a unique internal green or blue reservoir vent system alongside their transition straw cups. While the vent tubes are rigid plastic, the transition straws are made of soft, flexible silicone. Both components have exceptionally narrow inner diameters. Furthermore, Dr. Brown’s straws often incorporate built-in anti-leak valves or cross-slits at the tip. These cross-slits are designed to open only when the child sips, meaning any forceful insertion of a thick or stiff brush can easily tear the silicone, ruining the spill-proof feature of the cup.
Avent straw cups, such as the Bendy series, feature a contoured, angled straw path designed to help toddlers drink naturally. The lower part of the Avent straw is bent to stay submersed in liquid until the very last sip. This angled path requires a brush handle with high elastic flexibility to round the bend without puncturing the straw wall. Additionally, Avent straws feature integrated anti-leak valves that require delicate, low-pressure cleaning to avoid stretching the silicone membrane.
To determine the exact compatibility before purchasing a brush, always check the manufacturer specifications printed on your bottle’s packaging or user manual. Look for the inner diameter measurement of the straw, which is typically listed in millimeters. Comparing this measurement to the brush head diameter is the most reliable way to ensure a safe, functional fit.
Key Straw Brush Features to Verify Before Buying
When shopping for a straw brush, relying on visual estimation is a common mistake that often leads to purchasing incompatible tools. Instead, carefully evaluate the product labels and specifications of the brush against your bottle’s requirements. The first and most critical feature to verify is the brush head diameter. A proper fit should offer slight resistance when inserted, allowing the bristles to compress and sweep the inner walls without requiring force that could stretch the silicone.

The choice of bristle material is equally important and should be matched to the specific component you are cleaning. Nylon bristles are stiff, dense, and highly effective at scraping away stubborn, dried milk fats or thick formula residue from rigid plastic tubes. However, nylon can be abrasive on soft silicone valves over time. Silicone bristles, on the other hand, offer a much gentler, scratch-free clean. While silicone is highly durable and hygienic, it may require more physical passes to clear heavy residue compared to nylon.
Handle ergonomics and construction play a vital role in how easily you can clean complex straw paths. Look for brushes made with food-grade stainless steel wire handles that offer a balance of stiffness and flexibility. A high-quality wire handle can be bent to navigate the angled paths of Avent straws and then straightened back out. Additionally, look for handles featuring comfortable plastic grips and integrated hanging loops, which allow the brushes to hang vertically for hygienic, mold-free air drying.
Finally, consider purchasing a multi-use cleaning kit rather than a single standalone brush. Many specialized kits include secondary detail brushes, which are tiny, tapered tools designed specifically to clean the narrow threads of bottle necks, air vents, and the delicate exterior crevices of anti-leak valves. Having these secondary tools on hand prevents you from using the main straw brush for tasks it was not designed to handle.
How to Match Brush Types to Your Bottle Setup
Selecting the right brush design depends entirely on the specific combination of bottles and cups currently in your feeding routine. By applying a conditional decision framework, you can narrow down the options to the most efficient and safe tools for your kitchen.
Choose a silicone straw brush if your primary gear consists of Avent Bendy cups or other soft silicone straws with integrated anti-leak valves. The soft, rounded silicone nubs will glide over the delicate cross-slits and internal membranes without any risk of tearing or scratching. This ensures the spill-proof valves remain completely intact and functional over months of daily use.
Choose a fine nylon bristle brush if you are primarily cleaning the narrow internal vent tubes of Dr. Brown’s bottles or if your child drinks thick formulas that leave a stubborn film. The stiffness of nylon is necessary to break down and sweep away milk fat deposits inside these rigid, narrow pathways. When using nylon on soft silicone straws, ensure the brush tip is capped with a protective plastic or rubber bead to prevent the sharp wire core from puncturing the silicone.
Choose a highly flexible wire brush with a rounded tip or an attached gravity ball cleaner if your child uses weighted straw cups like the Pigeon Mag Mag. The wire must be long enough to pass through the entire length of the straw, and the tip must be designed to clean around the connection point of the gravity ball without detaching it.
Before finalizing any purchase, verify if the brush kit includes a dedicated small detail brush for cross-slit valves. If your bottle setup relies heavily on anti-leak designs, having this specialized detail tool is essential for maintaining hygiene without compromising the structural integrity of the valves.
Step-by-Step Cleaning and Maintenance for Straws and Brushes
To maintain strict hygiene and prevent the buildup of bacteria or mold, you must establish a consistent, careful cleaning routine. Always begin by completely disassembling all parts of the bottle or cup. Remove the silicone straw from the plastic lid, detach any gravity balls or weighted components, and separate any removable silicone valves from their plastic housings. Attempting to clean a fully assembled cup will leave hidden pockets of moisture where mold can quickly develop.
Next, rinse all components under warm running water to flush out loose liquid. Prepare a basin of warm water mixed with a mild, baby-safe dish soap. Always refer to your bottle manufacturer’s instructions for the maximum safe water temperature; using boiling water on certain plastics or silicone components can cause warping, shrinking, or degradation.
When brushing, insert the straw brush slowly and gently. Push the brush through the straw in a straight, steady motion rather than twisting it aggressively, which can bend the wire core or damage the inner walls of the straw. For straws featuring cross-slit anti-leak valves, do not force the brush head completely through the slit unless the manufacturer’s manual explicitly states it is safe to do so. Instead, clean up to the base of the valve, then use a soft detail brush to gently clean the exterior of the slit.
After thoroughly scrubbing, rinse all parts under clean running water to remove all soap residue. Shake off excess water and place the straws, valves, and brushes on a clean drying rack in a well-ventilated area. Avoid storing brushes flat on countertops where moisture can pool. Perform a visual inspection of your straws and brushes regularly under bright light. If you observe persistent cloudiness, discoloration, permanent odors, or tiny tears in the silicone, stop using them immediately and replace the affected parts.
Frequently Asked Questions (FAQ)
Can I use a regular pipe cleaner instead of a dedicated straw brush?
No, you should not use craft pipe cleaners to clean baby bottle straws. Craft pipe cleaners often have sharp, exposed metal cores at both ends that can easily puncture or tear delicate silicone straws and anti-leak valves. Additionally, the synthetic or cotton fibers on craft pipe cleaners are not food-safe and can easily shed inside the straw, creating a serious choking or ingestion hazard for your baby. Dedicated straw brushes are manufactured with food-grade materials, secure bristles, and protective tips specifically designed to prevent damage and ensure safety.
How often should I replace my baby bottle straw brush?
You should generally replace your baby bottle straw brush every 3 to 4 months, or sooner if you observe clear signs of wear. Inspect the brush regularly for frayed, loose, or missing bristles, as worn bristles will no longer clean the inner walls of the straw effectively. You should also replace the brush immediately if the wire core becomes severely bent, rusted, or weakened, or if you notice any mold growth or persistent discoloration at the base of the bristles. Always check the brush manufacturer’s guidelines for specific replacement recommendations.

Community discussion
Share your experience or ask a question. Comments are reviewed before publication.