
To keep your baby safe from harmful pathogens, cleaning their feeding gear requires more than a quick rinse under the tap. The optimal method for washing and sterilising baby bottles depends entirely on the material they are made from—whether glass, polypropylene (PP), polyphenylsulfone (PPSU), or silicone. Each material reacts differently to heat, physical friction, and chemical exposure, meaning a one-size-fits-all approach can easily damage your bottles or leave behind hidden bacteria.
Washing removes physical residue like milk fats and proteins, while sterilisation targets microscopic pathogens. Understanding these material differences is key to extending the lifespan of your feeding equipment while protecting your infant’s developing immune system. Before cleaning, always check the applied product’s label and the treated item’s manufacturer instructions to ensure compatibility.
Essential Tools and Safe Detergents for Baby Dishwashing
To clean baby bottles effectively, you need a dedicated set of tools kept separate from your regular household dishwashing items. Using the same sponge that cleans family dinner plates risks cross-contamination, transferring grease, food particles, and resilient bacteria to your baby’s feeding gear.
Products mentioned in this guide
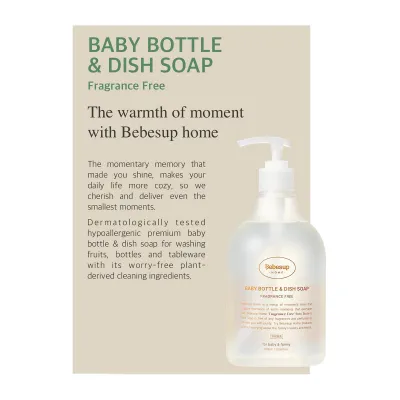
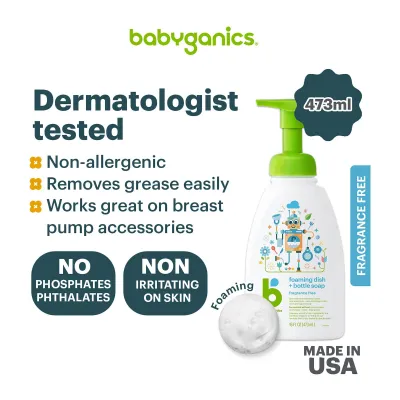
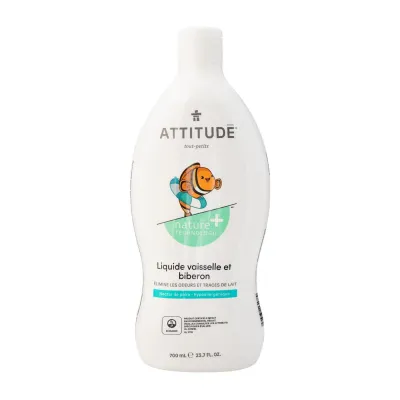

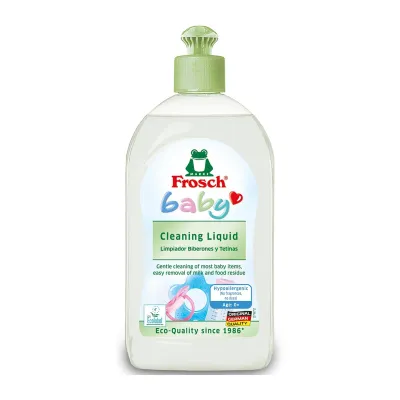
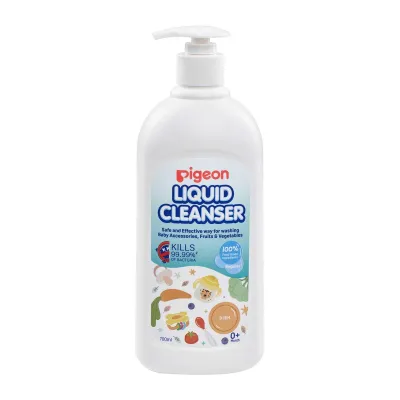
Prices are valid at publication and may change. Please refer to the product page for the latest price.
A high-quality bottle brush is your primary tool. Silicone-tipped bottle brushes are highly durable, dry quickly, and are less likely to harbour bacteria compared to traditional nylon bristle brushes. They are also gentler on delicate materials, reducing the risk of scratching plastic surfaces. Traditional bristle brushes, however, often produce more lather and can be highly effective at scrubbing stubborn, dried-on milk residue, but they must be replaced more frequently and sanitised regularly.
When selecting a soap, standard household dishwashing liquids are often too harsh, containing strong synthetic fragrances, artificial dyes, and chemical surfactants that leave a stubborn film or artificial scent behind. Instead, look for a dedicated baby dishwashing liquid. These formulas are typically plant-based, dermatologically tested, and free from parabens and synthetic perfumes. They are designed to rinse away completely, ensuring no chemical residues remain to contaminate your baby’s milk.
Beyond the brush and soap, you will eventually need a reliable method for sterilisation. The main categories of sterilisation equipment include boiling pots, electric steam sterilisers, and ultraviolet (UV) sterilisers. Each system offers distinct advantages in terms of convenience and speed, but their compatibility depends heavily on the materials of your bottles.
Before applying any heat, steam, or chemical sanitiser to a new bottle, always locate and read the manufacturer’s care label or instruction manual. If instructions conflict with general guidelines, or if the bottle’s material is unidentified, stop and consult the manufacturer directly to avoid damaging the product or compromising safety.
The Universal Washing Routine: Steps for Every Bottle
Before any sterilisation method can be effective, you must perform a thorough manual wash. Sterilising a bottle that still has milk residue on it is counterproductive; the heat will simply bake the proteins and fats onto the surface, creating a protective shield for bacteria.

Begin with an immediate post-feeding rinse. As soon as your baby finishes a feed, run warm water through the bottle and nipple. This simple step prevents milk proteins from drying, hardening, and sticking to the interior surfaces, making the subsequent deep clean significantly easier.
Next, completely disassemble the bottle. Remove the nipple from the collar, separate the cap, and take apart any internal anti-colic valves, vents, or straw systems. Skipping this step allows milk residue to remain trapped in the tight crevices between the collar and the bottle threads, creating a breeding ground for mould and bacteria.
Prepare a clean basin with warm, soapy water using your baby dishwashing liquid. Submerge all the disassembled parts. Use your dedicated bottle brush to scrub the interior walls of the bottle, paying close attention to the neck and the spiral threads where the collar screws on. Use a smaller, specialised nipple brush to gently clean the inside of the silicone nipple, taking care not to push the brush forcefully through the delicate nipple hole, which can tear the silicone or stretch the opening.
Rinse every component thoroughly under clean, running water. Ensure that all soap suds and slippery residue are completely gone. A proper rinse ensures that no detergent film is left behind to alter the taste of the milk or irritate your baby’s sensitive digestive system.
Finally, place all parts on a clean, elevated drying rack in a well-ventilated area. In Singapore’s highly humid climate, proper air-drying is a critical step in preventing microbial growth. Avoid using standard kitchen tea towels to dry the bottles, as these towels easily harbour household bacteria and can leave lint behind on clean surfaces. Allow everything to air-dry completely before reassembling or storing the bottles.
Material-Specific Sterilisation: Glass, PP, PPSU, and Silicone
Washing with soap and water removes visible dirt and grease, but sterilisation is the essential secondary step that eliminates microscopic pathogens, viruses, and fungal spores. However, because different bottle materials react uniquely to thermal and chemical environments, you must match your sterilisation method to the material’s specific physical limits.
The manufacturer’s specified maximum temperature and recommended sterilisation duration are the ultimate authority for any bottle or accessory. Never exceed these limits, as doing so can compromise the safety and structural integrity of the feeding gear.
Glass Bottles: High Heat Tolerance and Thermal Shock Risks
Glass is a traditional and highly durable material known for its exceptional heat tolerance. Because it does not degrade under high temperatures, glass bottles are highly compatible with almost all sterilisation methods, including prolonged boiling, electric steam sterilisation, and UV sanitisation. Glass is also completely non-porous, meaning it will not absorb odours, discolour, or scratch easily during the washing process.
Despite its durability, glass is highly susceptible to thermal shock. This physical phenomenon occurs when a rapid, extreme temperature change causes different parts of the glass to expand or contract at unequal rates, leading to sudden shattering or cracking. To prevent this, never place a cold glass bottle directly into boiling water, and avoid transferring a hot glass bottle immediately onto a cold stone countertop or submerging it in cold water.
When sterilising glass bottles in boiling water, place them in the pot before turning on the heat, allowing the temperature to rise gradually. Always use plastic-coated or silicone-tipped tongs to retrieve hot glass bottles from a steriliser, and place them on a dry wooden board or a clean, dry towel to cool down slowly at room temperature.
PP and PPSU Plastics: Temperature Limits and UV Safety
Plastic baby bottles are lightweight and shatterproof, making them a popular choice for active families, but they require careful temperature monitoring. The two most common plastics used are Polypropylene (PP) and Polyphenylsulfone (PPSU). PP bottles are typically semi-translucent or cloudy, budget-friendly, and have a lower heat resistance, usually around 110°C to 120°C. PPSU bottles, often recognisable by their natural honey-coloured tint, are highly durable, medical-grade plastics with a much higher heat resistance, often withstanding temperatures up to 180°C.
Regardless of whether you use PP or PPSU, you must strictly adhere to the manufacturer’s stated maximum boiling time and temperature. Exposing plastic bottles to temperatures beyond their threshold, or boiling them for too long, can cause the plastic to warp, cloud, or degrade structurally. This degradation can lead to the release of microplastics or chemical compounds over time.
UV sterilisation is highly convenient because it dry-sterilises without heat, but it carries specific trade-offs for plastic materials. Prolonged or excessive exposure to UV-C light can cause certain plastics to undergo photo-degradation, leading to discolouration, brittleness, and accelerated wear. Before placing plastic bottles into a UV steriliser, verify if the specific brand and plastic type are certified or approved by the manufacturer for UV use.
Silicone Components: Heat Resistance and Degradation Signs
Silicone is widely used for bottle nipples, anti-colic valves, and increasingly for entire bottle bodies due to its soft, flexible, and skin-like texture. Medical-grade or food-grade silicone is highly heat-resistant, often capable of withstanding temperatures up to 200°C or higher, making it exceptionally safe for boiling, steam sterilisation, and UV sanitisation.
However, silicone requires careful physical handling during heat exposure. Never expose silicone components to direct open flames, and ensure they do not rest directly against the hot metal base of a boiling pot, which can cause localised melting, scorching, or structural weakening. Using a sterilising basket or keeping the pot at a gentle rolling boil can prevent these issues.
While silicone handles heat well, frequent exposure to high-temperature sterilisation will eventually cause the material to expand, lose its elasticity, become sticky to the touch, or develop a cloudy appearance. Regular visual and tactile inspections are essential to ensure the silicone remains structurally sound and safe for your baby to latch onto.
Common Cleaning Mistakes That Damage Bottles or Risk Hygiene
Even with the best intentions, certain habitual cleaning errors can compromise your baby’s health or ruin expensive feeding gear. One of the most common mistakes is skipping full disassembly before washing. Leaving the silicone nipple inside the plastic collar traps milk fats in the overlapping seams, creating an invisible layer of organic matter where bacteria thrive, completely bypassing the sterilisation process.
Another frequent error is using abrasive cleaning tools. Scrubbing plastic or glass bottles with steel wool, harsh scouring pads, or abrasive sponges creates microscopic scratches on the inner surfaces. These micro-scratches act as perfect physical harbours for bacteria and milk proteins, making them nearly impossible to clean thoroughly during subsequent washes. Similarly, using harsh household bleach or chemical cleaners can degrade the bottle materials and leave toxic residues that are difficult to rinse away completely.
“Over-sterilising” is also a common pitfall. While keeping gear clean is vital, boiling plastic bottles or silicone nipples far beyond the manufacturer’s recommended duration does not make them “more sterile.” Instead, it rapidly accelerates material breakdown, causing plastics to leach compounds or become brittle and silicone to tear prematurely.
Finally, reassembling or capping bottles while they are still damp is a significant risk, particularly in Singapore’s humid tropical climate. Trapping residual moisture inside a closed bottle creates a warm, dark, and damp microclimate that is highly conducive to mould and bacterial growth. Always ensure every component is bone-dry before putting them back together or placing them in a closed cupboard.
How to Inspect Bottles and Know When to Replace Them
Rather than relying on arbitrary calendar timelines—such as replacing bottles every three months—it is safer and more practical to perform regular, condition-based assessments of all feeding equipment. The physical state of the bottle and its components should dictate when it is time to discard and replace them.
For plastic bottles (PP and PPSU), look out for persistent cloudiness that does not wash away, deep internal scratches, warping that prevents a tight seal with the collar, or a chalky, rough texture on the inside walls. These are clear indicators that the plastic polymers are breaking down, making the bottle difficult to sanitise and prone to harbouring bacteria.
Silicone nipples, valves, and straw components require even more frequent inspection due to the constant physical stress of sucking. Red flags include stretching, tearing, a sticky or tacky surface texture, swelling, discolouration, or any changes in the milk flow rate (such as milk dripping too quickly when the bottle is turned upside down). If a nipple shows any of these signs, or if your baby is collapsing the nipple frequently during feeds, replace it immediately to prevent choking hazards or feeding frustration.
For glass bottles, inspect the rim, threads, and base carefully. Any chips, cracks, or deep scratches—even if the bottle does not leak—compromise the structural integrity of the glass, making it highly susceptible to shattering under thermal stress. Furthermore, tiny glass particles could potentially break off into the milk, posing a severe safety hazard.
If you observe any of these physical warning signs on any component, dispose of and replace the item immediately, regardless of how recently it was purchased.
Frequently Asked Questions (FAQ)
Do I need to sterilise baby bottles after every single wash?
While meticulous washing with warm, soapy water and a dedicated baby dishwashing liquid is mandatory after every single feed, the frequency of full sterilisation depends on your baby’s age, health status, and local water safety. For newborns, premature infants, or babies with compromised immune systems, daily sterilisation is highly recommended to protect their developing bodies. For older, healthy infants who are already putting toys and other household items in their mouths, sterilising once or twice a week may be sufficient, provided they are washed thoroughly after each use. Always consult your paediatrician to establish a safe routine tailored to your child’s specific health needs.
Is it safe to wash baby bottles in a standard household dishwasher?
Many modern baby bottles are labelled as dishwasher-safe, but you must verify the specific manufacturer’s care instructions and look for the dishwasher-safe symbol before loading them. If safe, place the bottles on the top rack away from the heating element, and secure small components like nipples, collars, and valves in a dedicated dishwasher basket to prevent them from falling to the bottom and melting. Keep in mind that while a high-heat dishwasher cycle can clean effectively, it does not replace medical-grade sterilisation for newborns. Additionally, the harsh detergents and high heat of a dishwasher can accelerate the clouding and degradation of plastic bottles compared to gentle hand-washing with a mild baby dishwashing liquid.
Community discussion
Share your experience or ask a question. Comments are reviewed before publication.