
Using a breast pump efficiently requires a mix of proper technique, correct equipment sizing, and an understanding of how your body responds to milk expression. For mothers using a Spectra breast pump, achieving maximum milk output is not simply a matter of turning the suction to the highest setting. Instead, success depends on mimicking a baby’s natural feeding patterns, ensuring a precise flange fit, and maintaining a relaxed state to encourage your milk let-down reflex.
By mastering the dual-phase technology of your Spectra pump and establishing a structured routine, you can optimise your pumping sessions for both comfort and volume. Whether you are building a milk stash before returning to work or exclusively pumping, this comprehensive guide will help you navigate your Spectra pump settings and techniques for the best possible results.
Preparing for a Successful Pumping Session
Creating a clean, calm, and organised environment is the first step toward a highly productive pumping session. Before you handle any pump parts or touch your breasts, wash your hands thoroughly with soap and warm water for at least twenty seconds. Set up your pumping station on a clean, sanitised surface where you have easy access to a power outlet, your pump motor, and clean collection bottles.
Products mentioned in this guide
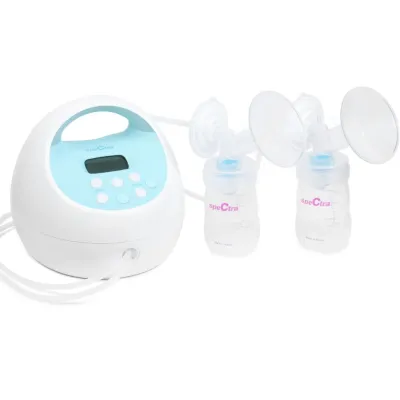

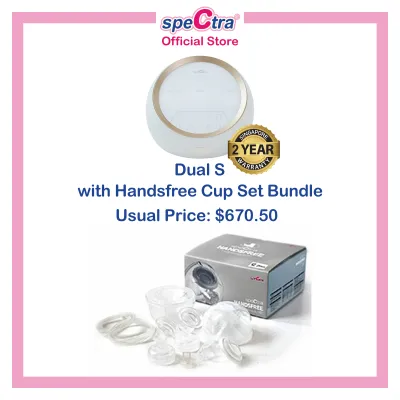




Prices are valid at publication and may change. Please refer to the product page for the latest price.
When assembling your Spectra breast pump kit, pay close attention to the backflow protector. This component is the heart of Spectra’s closed-system design, featuring a silicone membrane encased in a plastic casing that connects the tubing to the breast shield. The backflow protector acts as a physical barrier, preventing breast milk and moisture from entering the tubing or traveling into the pump motor. Correct assembly of this part is crucial; if the membrane is twisted or wet, it can compromise suction and create a hygiene risk.
Your physical and emotional state directly influences your milk output. The hormone oxytocin is responsible for the let-down reflex, which squeezes milk out of the milk ducts, and this hormone is easily inhibited by stress, cold, or fatigue. To encourage a swift let-down, establish a relaxing pre-pumping routine. Try taking a few deep diaphragmatic breaths, keeping a warm drink nearby, listening to calming music, or looking at photos or videos of your baby. Applying a warm compress to your breasts for five to ten minutes before you begin can also stimulate blood flow and encourage milk to flow more freely.
Finding the Right Flange Size for Comfort and Yield
Using the correct breast shield or flange size is essential for both your physical comfort and your total milk yield. A flange that is too small or too large can constrict milk ducts, rub against your skin, and prevent the breast from emptying fully. To find your starting size, measure the diameter of your nipple at the base, where it meets the areola, using a ruler or a printable nipple measuring tool. Always measure your nipple before a pumping session, and do not include the areola in your measurement.

Once you have your nipple base measurement in millimetres, add two to four millimetres to determine your starting flange size. For example, if your nipple base measures 20 mm, a 24 mm flange is generally the most appropriate starting point. Keep in mind that your left and right nipples may require different sizes, so it is important to measure both sides individually.
When pumping, you can easily verify if you have a correct fit by observing the movement of your nipple inside the tunnel. In a properly fitted flange, your nipple should move freely back and forth in the centre of the tunnel without rubbing against the sides. Only a tiny portion of your areola, if any, should be drawn into the tunnel, and the breast tissue should feel comfortable throughout the session.
Conversely, a poorly fitted flange will exhibit clear warning signs that require immediate adjustment. If the flange is too small, your nipple will rub continuously against the tunnel walls, causing friction, redness, swelling, or painful white blanching at the tip. If the flange is too large, an excessive amount of your areola will be pulled into the tunnel, which can pinch the milk ducts and block milk flow. Because breast and nipple sizes naturally change during the postpartum period, make it a habit to remeasure and re-evaluate your fit every few weeks.
Mastering Spectra Settings: Massage and Expression Modes
Spectra breast pumps feature two distinct operational phases designed to mimic how a baby naturally nurses: Massage mode and Expression mode. Understanding how and when to switch between these modes is the key to unlocking maximum milk expression. Massage mode, indicated by a symbol of three wavy lines on the digital screen, operates at a fast speed of 70 cycles per minute with gentle suction. This rapid, shallow pattern simulates the initial quick sucks a baby uses to stimulate your nerve endings and trigger the let-down reflex.
In contrast, Expression mode operates at a slower cycle speed with adjustable, stronger vacuum levels. Once your milk begins to flow, switching to Expression mode allows you to adjust the cycle speed (typically between 38 and 54 cycles per minute on models like the Spectra S1 and S2) to match your body’s natural flow rate. A slower cycle speed combined with a deeper suction level mimics the long, slow gulps a baby takes once milk is actively flowing from the breast.
A common misconception is that higher suction levels yield more milk. In reality, setting the vacuum too high can cause pain and breast tissue inflammation, which triggers a stress response that actively blocks milk release. To find your ideal setting, use the concept of the “Maximum Comfort Vacuum.” Start your pumping session at the lowest vacuum level and gradually increase it step by step; the moment you feel any discomfort or pinching, turn the suction down by one level. This slightly lower, pain-free setting is your personal maximum comfort vacuum and will yield the most efficient milk extraction.
To make your pumping sessions more manageable, take advantage of the auxiliary features built into your Spectra pump. The integrated night light, which offers multiple brightness levels, is invaluable for late-night sessions in a dark room, allowing you to adjust settings without waking your baby or partner. Additionally, the built-in timer automatically tracks the duration of your session, helping you monitor your progress without the stress of constantly checking a clock.
Step-by-Step Pumping Routine to Maximise Yield
To achieve the highest milk output during each session, follow a structured, step-by-step routine that aligns with your body’s physiological responses.
Phase 1: Stimulation Begin your session by turning on the pump and ensuring it is set to Massage mode (70 cycles per minute). Keep the vacuum level low, typically between level 1 and 3, to gently stimulate the breasts. Remain in Massage mode for approximately two to three minutes, or until you observe milk starting to drip or spray steadily into the collection bottles. If you do not see milk after three minutes, remain in this mode a little longer, focusing on deep breathing and relaxation.
Phase 2: Expression Once your milk is flowing steadily, press the three-wave button to transition into Expression mode. Start with a cycle speed of 54 cycles per minute and a comfortable vacuum level, such as level 4 or 5. As the milk flow stabilises, you can experiment with lowering the cycle speed to 46 or 38 cycles per minute while slightly increasing the vacuum, always staying within your comfort zone. If the milk flow slows down to a crawl before your session is complete, press the wave button again to return to Massage mode for a few minutes to trigger a second let-down, then switch back to Expression mode.
Phase 3: Hands-On Pumping To empty your breasts more thoroughly and increase the fat content of your expressed milk, integrate hands-on pumping techniques. While the pump is running, use your free hand to gently massage your breast tissue, starting from the chest wall and moving down toward the flange. Apply gentle, steady pressure with your fingers or the palm of your hand on any areas that feel firm or full. This physical compression helps release milk from deeper milk ducts that suction alone may not fully reach.
Phase 4: Completion A typical pumping session should last between 15 and 20 minutes, and should generally not exceed 30 minutes. You will know you are finished when the active flow of milk stops, your breasts feel soft and light, and an additional minute or two of pumping yields no further droplets. Avoid the temptation to pump for extended periods in search of a few extra drops, as prolonged sessions can cause nipple trauma, skin friction, and lead to an unmanageable oversupply.
Troubleshooting Low Milk Output and Discomfort
If you experience a sudden drop in your milk yield or feel discomfort while using your Spectra pump, take a systematic approach to identify the cause. First, evaluate your physiological well-being. Milk supply is highly sensitive to hydration, caloric intake, stress levels, and sleep deprivation. Ensure you are drinking enough water to satisfy your thirst and eating regular, nutrient-dense meals.
Next, perform a physical inspection of your pump’s wearable silicone components. Over time, duckbill valves and backflow protector membranes stretch, wear out, or develop microscopic tears that are invisible to the eye. Even a tiny tear in a duckbill valve can cause a dramatic drop in suction power, leading to poor breast emptying and a subsequent drop in milk supply. Replacing these parts regularly is often the simplest solution to restoring your pump’s performance.
If you experience physical discomfort during or after pumping, do not attempt to endure the pain. Pain is a clear signal that something is wrong. Immediately reduce the vacuum level on your pump and re-verify your flange size. You can also apply a tiny drop of food-grade pumping lubricant or coconut oil to the inside of the flange tunnel to reduce friction against your skin.
When to Seek Professional Help While minor adjustments can resolve many common pumping issues, certain symptoms require professional medical attention. If you experience severe, persistent pain that does not improve with a lower suction setting or a different flange size, stop pumping immediately. Seek guidance from an International Board Certified Lactation Consultant (IBCLC) or a healthcare provider if you notice cracked or bleeding nipples, deep breast pain, or signs of mastitis. Mastitis is a serious bacterial infection characterized by red streaks on the breast, localized heat, painful hard lumps, a high fever, or flu-like body chills.
Cleaning and Maintaining Your Spectra Pump Kit
Proper cleaning and regular maintenance of your Spectra pump parts are essential to protect your baby’s health and ensure your pump maintains its optimal suction power. After every pumping session, completely disassemble all parts that have come into contact with your breast milk, including the flanges, duckbill valves, backflow protectors, and collection bottles. Do not wash the long PVC tubing, as it should only carry air; if you ever see moisture or milk inside the tubing, replace it immediately.
Rinse the disassembled parts under cold, running water first to wash away residual milk proteins and fats, which can become stubborn and sticky if exposed to hot water first. Next, wash all parts thoroughly in warm, soapy water using a mild dish soap and a clean brush reserved exclusively for baby feeding items. If your specific Spectra model’s user manual permits, you may place the hard plastic parts on the top rack of a dishwasher, but hand washing is highly recommended for delicate silicone pieces to prevent premature wear.
In Singapore’s warm and humid tropical climate, proper drying is critical to prevent the growth of mould and bacteria. After washing, place all components on a clean, dedicated drying rack or a fresh paper towel in a well-ventilated area. Avoid wiping the parts with a cloth towel, as this can transfer lint, dust, or bacteria onto the clean surfaces. Ensure every part is completely dry before reassembling the kit or storing it in a clean, closed container.
To keep your Spectra pump operating at peak efficiency, establish a regular schedule for replacing your consumable parts. As a general guideline, replace duckbill valves every one to three months if you pump multiple times a day, or every three months if you pump less frequently. Backflow protector membranes should be replaced every three to six months, while flanges should be replaced if they show signs of cracking, clouding, or warping.
Frequently Asked Questions (FAQ)
How long should a typical pumping session last?
A standard pumping session typically lasts between 15 and 20 minutes, and should not exceed 30 minutes. Rather than strictly focusing on the timer, pay close attention to your milk flow and how your breasts feel. You should stop pumping once the milk flow has slowed to occasional drips and your breasts feel soft and empty. Pumping for excessively long periods does not guarantee more milk and can lead to nipple damage.
Can I use my Spectra pump while lying down?
No, you should not use your Spectra breast pump while lying completely flat. Although Spectra pumps utilize a closed-system design that prevents milk from entering the motor, gravity is still required to pull the expressed milk down into the collection bottles. Pumping while lying down can cause milk to pool inside the flange tunnel, leak onto your skin, or flow backward into the backflow protector, which can compromise the silicone membrane and reduce suction. Instead, sit upright or lounge in a comfortable, slightly reclined position.
Why is my Spectra pump losing suction?
A loss of suction is almost always caused by a minor assembly issue or a worn-out part. Begin by checking all physical connections: ensure the tubing is pushed firmly onto both the pump motor and the backflow protector, and that the backflow protector is securely attached to the flange. Next, inspect the silicone membrane inside the backflow protector to ensure it is dry, clean, and seated flat. Finally, check your duckbill valves for any stretching, tiny tears, or residue buildup, as these delicate parts are the most common cause of suction loss and should be replaced regularly.
Community discussion
Share your experience or ask a question. Comments are reviewed before publication.