
Establishing a successful breastfeeding and pumping routine is a deeply personal journey that requires the right combination of supportive technology, physiological understanding, and physical comfort. Wearable breast pumps, such as the Momcozy Wellness 1, offer modern parents the flexibility to express milk while managing daily tasks. However, achieving effective milk expression and maintaining a robust supply depends heavily on using the device correctly. Misalignment, incorrect settings, or an unsustainable schedule can lead to discomfort, reduced output, and physical strain. By mastering the fundamentals of flange fit, device settings, and lactation physiology, you can improve the efficiency of your wearable pump and confidently support your feeding goals.
Step 1: Finding the Right Flange Fit for Comfort and Efficiency
The foundation of comfortable and efficient pumping begins with selecting the correct flange size. A flange is the funnel-shaped piece that fits directly over your breast and nipple. Using a flange that is too large or too small can restrict milk flow, cause friction, and lead to tissue damage. Before assembling your pump, take the time to measure the diameter of your nipple base. This measurement should be taken when the nipple is not stimulated, using a dedicated sizing ruler or a standard measuring tape.
It is important to measure only the nipple itself, excluding the surrounding dark tissue of the areola. Many manufacturers, including Momcozy, provide official sizing guides and printable rulers to help you determine your exact measurement. If your nipple base measures 17 millimeters, for example, you will typically need a flange or insert that is slightly larger, usually around 19 to 21 millimeters, to allow for natural expansion during suction. Because breast anatomy is unique and can change throughout your postpartum journey, consulting a certified lactation consultant can provide personalized clarity.
Products mentioned in this guide
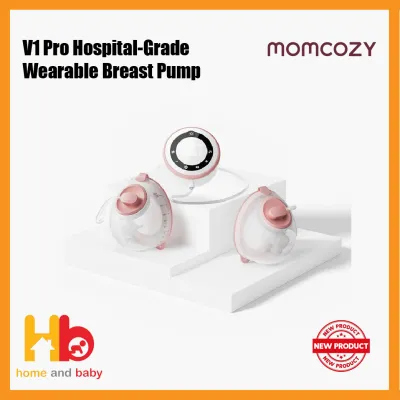


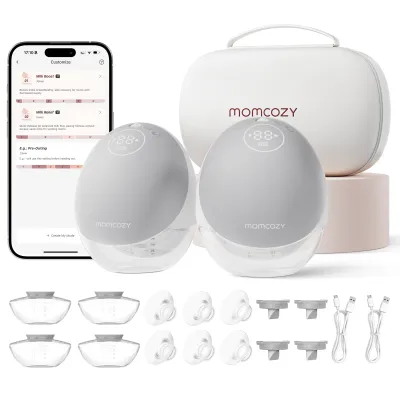
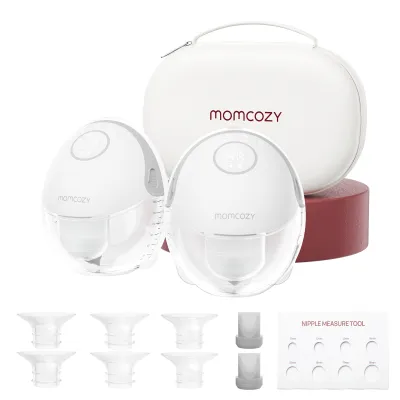
Prices are valid at publication and may change. Please refer to the product page for the latest price.
Once you begin pumping, perform regular visual and physical checks to evaluate the fit. Watch the movement of your nipple inside the flange tunnel. The nipple should move freely back and forth along the center of the tunnel without rubbing against the sides. If you notice that a significant portion of your areola is being pulled into the tunnel, the flange is likely too large. Conversely, if your nipple rubs against the walls of the tunnel, or if you experience a pinching sensation, the flange is too small.
Physical symptoms during and after a pumping session are clear indicators of fit quality. Your nipples should not appear white, blanched, or severely swollen when you finish pumping. Persistent redness, bruising, or skin chafing around the base of the nipple suggests that the friction is too high, which can impede the let-down reflex and lower your overall milk output. If you experience these symptoms, stop using that size immediately and adjust your setup.
Keep in mind that your flange size is not static. Postpartum swelling is common in the first few weeks after birth, and as this fluid retention subsides, your nipple size may decrease. Changes in your milk supply, hormonal fluctuations, or the natural progression of lactation can also alter how your breasts respond to suction. Regularly re-evaluating your comfort levels and measuring your nipples every few weeks will help your equipment continue to support your body efficiently.
Step 2: Setting Up Your Momcozy Wellness 1 for Effective Pumping
Proper assembly of the Momcozy Wellness 1 is essential to maintain the airtight seal required for effective suction. Before each use, ensure that all silicone components, including the diaphragm and the duckbill valve, are completely dry and free of tears. Press the silicone parts firmly into place to prevent air leaks, which can drastically reduce the pump’s vacuum strength. Align the collection cup with the motor unit according to the manufacturer’s instructions, listening for a secure click or checking the physical alignment to confirm it is locked.

Your physical posture while wearing the pump plays a significant role in both milk flow and physical comfort. Position the pump inside a supportive, full-coverage nursing bra that holds the device firmly against your breast without compressing the tissue too tightly. Sit in a comfortable, upright position, or lean slightly forward. This forward-leaning posture uses gravity to help milk flow down into the collection cup, reducing the risk of milk pooling around the flange tunnel and causing leaks. Avoid slouching or hunching your shoulders, as this can lead to back strain and restrict deep breathing, which is vital for relaxation.
Understanding the transition between the pump’s operating modes is key to mimicking a baby’s natural nursing rhythm. Most modern pumps feature a stimulation or massage phase characterized by fast, light suction cycles. This phase is designed to stimulate the nerve endings in the nipple, triggering the release of oxytocin and initiating the let-down reflex. Refer to your product manual to identify the specific button operations and LED indicators that signal this mode.
Once your milk begins to flow in steady drops or streams, transition the device to the expression phase. This mode utilizes slower, deeper suction cycles to efficiently empty the breast. Do not rush this transition; some parents require several minutes in the stimulation phase to achieve a let-down, while others may benefit from switching back to stimulation mode midway through a session if milk flow slows down. Pay close attention to your body’s response rather than relying solely on automated timers.
A common misconception is that higher suction levels yield more milk. In reality, excessive suction can cause physical trauma to the delicate breast tissue, leading to swelling that actually constricts the milk ducts and inhibits flow. Always start your pumping session at the lowest suction setting and gradually increase it to your personal comfort level. The most comfortable setting is the highest level that remains completely pain-free; if you feel pain, lower the suction immediately.
Step 3: Establishing a Pumping Routine to Protect Your Milk Supply
Establishing a consistent pumping routine is fundamental to signaling your body to produce and maintain an adequate milk supply. Lactation operates on a demand-and-supply feedback loop: the more frequently and thoroughly breasts are emptied, the more milk the body is signaled to produce. For parents who are exclusively pumping or working to build a low supply, consistency is far more important than the duration of any single session.
During the early postpartum weeks, when your milk supply is establishing itself, aim to pump approximately 8 to 12 times within a 24-hour period. This frequency mimics the feeding patterns of a healthy newborn. If you are supplementing direct nursing sessions, your pumping schedule will depend on your specific goals, but adding a session immediately after the first morning feed can be highly effective, as milk volume is typically highest during this time.
When determining how long to pump, focus on your body’s physical cues rather than a strict timer. A standard pumping session generally lasts between 15 and 20 minutes per breast. However, you should continue pumping for a few minutes after your milk flow has slowed to a crawl or stopped entirely. This extra time signals your brain that more milk is needed, helping to boost supply over time. Avoid pumping for prolonged periods exceeding 30 minutes, as this can cause unnecessary skin irritation and tissue fatigue.
Maintaining a pumping routine during the night is particularly crucial for protecting your long-term milk supply. Prolactin, the hormone responsible for milk production, naturally peaks during the early morning hours, typically between 2:00 AM and 5:00 AM. Skipping night sessions entirely during the early weeks can signal your body to slow down production, leading to a drop in daytime supply.
Managing the sleep deprivation associated with nighttime pumping requires practical strategies. Prepare your pumping gear, clean bottles, and a small cooler bag next to your bed before you go to sleep to minimize the time you spend awake. Keep the room dimly lit during the session to help you transition back to sleep quickly. Remember that your mental and physical well-being are directly linked to your lactation health, so coordinate with a partner or caregiver to secure blocks of uninterrupted sleep whenever possible.
Step 4: Maximizing Output and Troubleshooting Common Issues
To encourage milk flow, consider incorporating simple pre-pumping preparation techniques into your routine. Applying a warm compress to your breasts for five to ten minutes before a session can help dilate the milk ducts and encourage a faster let-down. Gently massaging your breasts in a circular motion, starting from the chest wall and moving toward the nipple, can also stimulate local circulation and help release thicker hindmilk that may be trapped in the ducts.
If you experience a sudden drop in milk output or notice that the pump’s suction feels weaker than usual, perform a systematic inspection of your device’s components. Wearable pump parts are subjected to significant wear and tear from daily use and cleaning. Inspect the duckbill valves for any tiny tears, warping, or gaps at the opening, as even a microscopic tear can cause a complete loss of vacuum pressure. Ensure that the silicone membranes and seals are seated completely flush against the plastic housing.
Consumable parts of your breast pump require regular replacement to maintain reliable performance. Depending on how frequently you pump, silicone components like valves and diaphragms should generally be replaced every 1 to 3 months. If you pump multiple times a day, these parts will degrade faster than if you only pump occasionally. Keep a spare set of replacement parts on hand—which typically cost around S$15 to S$30—to avoid unexpected disruptions to your pumping schedule.
While mild pulling sensations are normal, pumping should never be painful. If you experience sharp pain, skin breakdown, bleeding, or localized areas of intense heat and redness on your breast, stop using the pump immediately. These symptoms can indicate tissue damage, improper fit, or developing complications such as mastitis. Consult a qualified lactation consultant or healthcare provider promptly to address these issues and receive personalized guidance.
Frequently Asked Questions (FAQ)
How often should I clean and sterilize the pump parts?
To protect your infant’s health and maintain the integrity of your pump, clean all parts that come into contact with breast milk after every single use. Disassemble the pump completely and rinse the parts with cold water to remove milk residue. Wash them thoroughly in warm, soapy water using a dedicated basin and brush, then rinse them with clean water and allow them to air dry completely on a clean paper towel or drying rack.
In addition to daily washing, periodic sanitization is necessary to eliminate bacteria. You can sanitize parts by boiling them in water, using a steam sterilizer, or utilizing a UV sterilizer. However, you must refer to the manufacturer’s care instructions to verify which specific materials are safe for high-heat methods. Never expose the motorized pump unit to water, steam, or extreme heat, as this will permanently damage the electronic components and void the warranty.
Is it safe to use the breast pump while lying down?
Using a wearable breast pump while lying completely flat is not recommended due to the physical design of the collection cups. Wearable pumps rely on gravity to direct the expressed milk downward into the reservoir. When you lie down, the milk can flow backward toward the flange tunnel, increasing the risk of leaking onto your skin or clothing.
More importantly, reclining too far can cause milk to enter the suction mechanism or the motor unit, which can damage the device and create hygiene concerns. Always check your product manual for the manufacturer’s maximum recommended tilt angle. To rest comfortably while pumping, opt for a semi-reclined position supported by pillows, ensuring the pump remains upright enough to keep the milk safely contained within the collection cup.

Community discussion
Share your experience or ask a question. Comments are reviewed before publication.