
Using the Jevon breast pump correctly is essential for maintaining a consistent milk supply, ensuring physical comfort, and maximizing the efficiency of your expression sessions. Achieving an optimal pumping experience requires a combination of proper hygienic preparation, precise assembly of the pump components, and selecting the correct flange size. By understanding how to transition between the pump’s stimulation and expression modes, you can effectively mimic a baby’s natural nursing patterns to encourage a swift let-down reflex.
Every mother’s breastfeeding journey is unique, and learning to navigate your breast pump should not be a source of stress. Master the setup and operation of your equipment to help prevent common issues such as low suction, milk backflow, and nipple discomfort. This comprehensive guide outlines the step-by-step process for using your pump safely and effectively, ensuring you get the most out of every session while protecting your delicate breast tissue.
Preparing for Your Pumping Session
Creating a clean, calm, and organized environment before you begin pumping is a fundamental step that directly influences your milk output. Start by washing your hands thoroughly with soap and warm water for at least twenty seconds to prevent transferring bacteria to your pump parts or expressed milk. Wipe down the surface where you plan to place your pump components with a food-safe sanitising wipe or a clean damp cloth.
Products mentioned in this guide
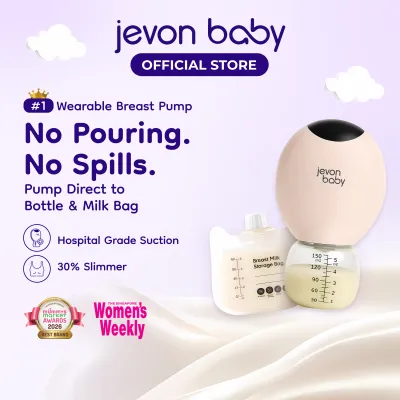
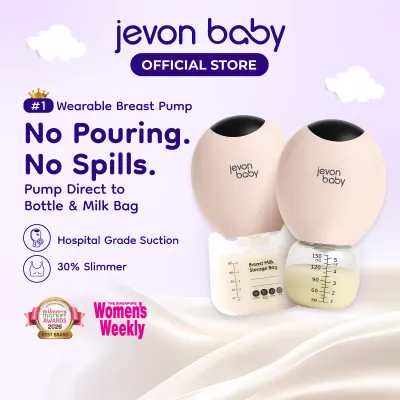
Prices are valid at publication and may change. Please refer to the product page for the latest price.
Physical comfort plays a significant role in triggering the release of oxytocin, the hormone responsible for the milk let-down reflex. Choose a supportive chair that offers good lower back and arm support, allowing you to sit upright without straining your shoulders. In Singapore’s warm and humid climate, setting up your pumping station in a cool, air-conditioned room or near a gentle fan can help you remain relaxed and comfortable throughout the session.
Keep a large bottle of water and a light, nutritious snack within arm’s reach so you do not have to interrupt your session once you begin. Hydration is vital for overall well-being and supports your body’s natural milk production processes. Additionally, having your phone, a book, or photos of your baby nearby can help distract your mind from the mechanical aspect of pumping, which often aids in a faster and more abundant milk flow.
Assembling the Jevon Breast Pump Correctly
Proper assembly of your breast pump is critical to establishing a secure vacuum seal and preventing milk leaks that can damage the motor. Before you begin putting the pieces together, inspect all silicone parts, including the duckbill valves, diaphragms, and tubing, for any signs of wear, stretching, or tiny tears. Even a microscopic tear in a silicone valve can drastically reduce the pump’s suction power and compromise its performance.

Begin assembly by inserting the silicone duckbill valve firmly into the underside of the breast shield or connector. Ensure it is pushed in completely and sits flush against the plastic housing, as a loose valve is the most common cause of sudden suction loss. Next, attach the collection bottle or milk storage cup to the bottom of the connector, turning it gently until it is secure without over-tightening, which can strip the plastic threads.
Position the silicone diaphragm or backflow protector into the top of the breast shield assembly, ensuring the edges are completely sealed around the rim. This component acts as a physical barrier that prevents moisture and milk from entering the tubing and reaching the pump motor. Finally, connect one end of the PVC tubing to the backflow protector and the other end to the pump motor’s air port, ensuring both connections are snug and airtight.
Positioning the Flange for Comfort and Efficiency
The breast shield, or flange, is the interface between your body and the pump, making its correct positioning and fit paramount for both comfort and milk drainage. To begin, center your nipple precisely within the tunnel of the flange before turning the pump motor on. The flange should be held gently but firmly against your breast to create an airtight seal without pressing so hard that you compress the milk ducts beneath the skin.
Once the pump is running, observe the movement of your nipple inside the tunnel to verify the fit. Your nipple should move freely back and forth along the center of the tunnel without rubbing against the plastic walls. A small amount of areola tissue will naturally be drawn into the tunnel, but if a significant portion of your breast skin is being pulled in, the flange is likely too large.
Conversely, if your nipple rubs against the sides of the tunnel or feels pinched, the flange is too small, which can lead to friction blisters, swelling, and blocked milk ducts. Signs of an incorrect fit include persistent pain during pumping, white rings or blanching on the nipple after a session, and breasts that still feel heavy or full after twenty minutes. Consult the manufacturer’s sizing guide or use a printable nipple ruler to measure your nipple diameter and select the appropriate flange or silicone insert.
Pumping Techniques to Maximize Milk Output
Maximizing your milk expression involves understanding how to work with your body’s natural physiology rather than simply turning the pump to its highest setting. Always begin your session by selecting the pump’s stimulation or massage mode, which features rapid, shallow suction cycles. This mode is designed to mimic the quick, light sucking action a baby uses at the start of a feed to stimulate the nerve endings in the nipple and trigger a let-down.
Once you observe milk starting to drip steadily or spray into the collection bottle, transition the pump to the expression mode. This mode utilizes slower, deeper suction cycles that mirror the active swallowing and gulping phase of a nursing infant. If the milk flow slows down significantly before your session is complete, you can switch back to the stimulation mode for a few minutes to encourage a second or third let-down.
Incorporating hands-on pumping techniques can substantially increase the volume of milk you express while reducing the time needed to empty your breasts. Gently massage your breasts from the chest wall toward the nipple using circular motions, or apply gentle compression to firmer areas of the breast while the pump is actively drawing suction. This physical manipulation helps mobilize milk from the deeper ducts and ensures more thorough drainage.
Always adjust the suction level of your pump based on your personal comfort threshold rather than aiming for the maximum setting. Pumping at a level that causes pain or physical tension triggers the release of adrenaline, which actively inhibits the oxytocin needed for milk release. Increase the suction gradually until you feel a strong but comfortable pull, and immediately lower it by one step if you experience any discomfort or pinching.
Cleaning and Maintaining Your Pump After Use
Maintaining strict hygiene standards when cleaning your breast pump is essential to protect your infant from harmful bacteria and ensure the longevity of your equipment. Immediately after completing your pumping session, switch off the motor, unplug the unit, and carefully disassemble all parts that have come into direct contact with breast milk. Do not wash the tubing or the pump motor, as these parts should remain completely dry to prevent mold growth and electrical damage.
Rinse the disassembled plastic and silicone parts under cool, running water first to wash away residual milk proteins, which can become sticky and difficult to remove if exposed to heat. Next, wash all parts thoroughly in warm, soapy water using a mild dishwashing liquid and a dedicated cleaning brush reserved solely for baby feeding items. Avoid using harsh abrasive pads or chemical sterilising agents that could degrade the silicone or scratch the plastic surfaces.
If permitted by the manufacturer’s instructions, you may wash the durable plastic components on the top rack of a dishwasher or use a steam steriliser bag for deep sanitisation. After washing, rinse the parts thoroughly in clean water and place them on a dedicated, clean drying rack in a well-ventilated area away from dust, cooking grease, or household pets. Allow all components to air-dry completely before reassembling them or storing them in a clean, closed container.
Troubleshooting Common Pumping Issues
Encountering technical issues during a pumping session can be frustrating, but most common problems can be resolved quickly with a few simple checks. If you experience a sudden drop in suction power, the first step is to inspect the physical connections between the pump motor, the tubing, and the breast shield. Ensure the tubing is pushed firmly onto the ports and that there are no visible kinks, bends, or condensation droplets inside the line.
If the connections are secure but the suction remains weak, examine the silicone duckbill valves and backflow membranes for signs of stretching or damage. Over time, regular washing and sterilization cause silicone to lose its elasticity, which directly impacts the pump’s ability to hold a vacuum. Replacing these small silicone consumables every one to three months, depending on how frequently you pump, is a standard maintenance practice that usually restores full suction.
Should you experience sharp, burning, or lingering pain during or after a session, stop pumping immediately and assess your setup. Check that your nipple is centered in the flange and that you are not using a suction level that is too high for your body. If adjusting the flange size and lowering the suction does not resolve the pain, or if you notice bleeding, cracked skin, or signs of a breast infection such as localized redness and fever, consult a lactation consultant or a qualified healthcare professional.
Frequently Asked Questions (FAQ)
How long should a single pumping session last?
A standard pumping session typically lasts between 15 and 20 minutes per breast, which is generally sufficient to stimulate milk production and empty the breasts without causing tissue fatigue. You will know your breasts are adequately drained when the milk flow slows down to occasional drops and your breasts feel noticeably softer and lighter to the touch. Avoid pumping for longer than 20 to 25 minutes at a time, as prolonged suction can cause swelling, skin irritation, and nipple soreness without yielding additional milk.
Can I use the breast pump if I have cracked or sore nipples?
You can continue to use your breast pump if you have cracked or sore nipples, provided you make immediate adjustments to protect your skin and promote healing. Lower the pump’s suction to a gentle setting that does not cause pain, and double-check that your flange size is correct to prevent further friction damage. Applying a thin layer of a safe, pump-compatible nipple balm, such as medical-grade lanolin or a recommended organic alternative, before and after pumping can help soothe the skin and create a protective barrier. If your nipples are bleeding, severely cracked, or showing signs of infection, temporarily pause pumping and seek professional medical advice to ensure safe healing.

Community discussion
Share your experience or ask a question. Comments are reviewed before publication.