
Achieving a successful breastfeeding and pumping journey requires the right tools and proper technique. The eufy breast pump s1 pro is designed to offer a hands-free, efficient pumping experience, but maximizing its potential depends heavily on how you set up, wear, and operate the device. To get the most milk in the most comfortable way, you must focus on three core pillars: achieving a perfect flange fit, mastering the device’s dual-phase expression modes, and maintaining meticulous hygiene.
Using a wearable pump effectively involves a learning curve. Unlike traditional plug-in pumps, wearable models require precise positioning and assembly to maintain consistent suction while you move. By understanding the mechanics of your device and aligning them with your body’s natural lactation cues, you can establish a highly efficient pumping routine that fits seamlessly into your daily life.
Preparing and Assembling the Eufy Breast Pump S1 Pro for a Secure Fit
Before you begin any pumping session, hygiene must be your top priority. Always wash your hands thoroughly with soap and water for at least 20 seconds before handling any pump components or your breasts. Prior to your very first use, and after every subsequent pumping session, you must clean and sanitize all parts that come into direct contact with breast milk to protect your infant from harmful bacteria.
Products mentioned in this guide
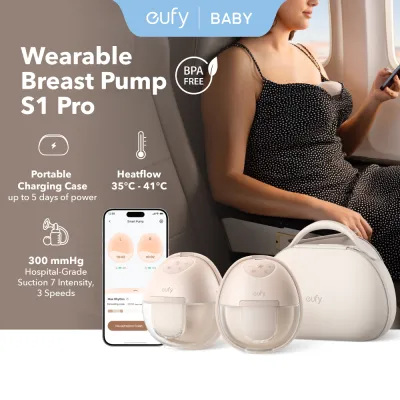
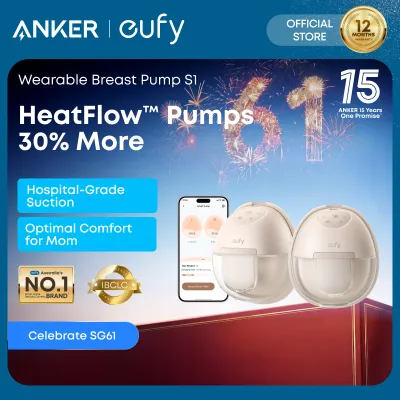

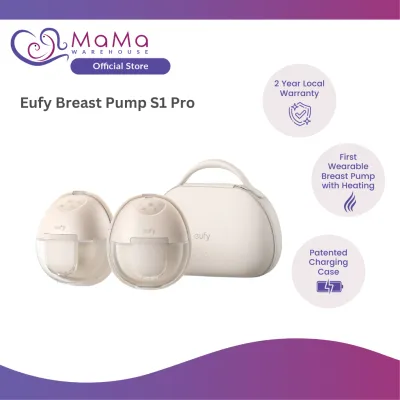
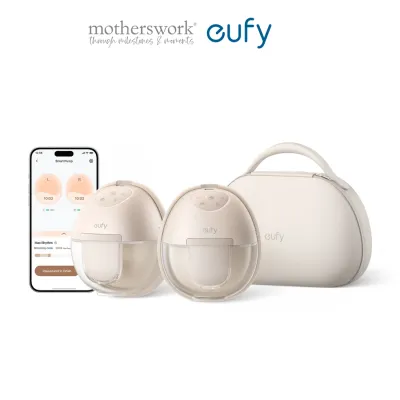
Prices are valid at publication and may change. Please refer to the product page for the latest price.
To assemble the pump, start by inserting the silicone diaphragm or membrane into the linker, ensuring it sits completely flush against the edges. Next, attach the silicone valve to the underside of the linker, pushing it firmly into place without tearing the delicate material. Secure the flange onto the pump body, making sure there are no gaps along the rim where air could escape.
Once the internal components are secure, align the milk collection cup or bottle with the main assembly. Twist or snap the collection cup into place according to the locking mechanism, ensuring a tight seal. Finally, align the main motor unit with the assembled collection kit and press them together until they are fully engaged.
An incomplete seal is the most common cause of sudden suction loss. Inspect all connection points, valves, and membranes before turning the device on to ensure there are no micro-gaps or trapped debris. Always consult the official Eufy manufacturer manual for specific assembly diagrams, troubleshooting schematics, and safety warnings tailored to your exact model variation.
Finding the Right Flange Size for Comfort and Efficiency
Finding the correct flange size is the single most important factor in determining both your comfort and your overall milk yield. A flange that is too large or too small will compress your milk ducts, restrict flow, and cause friction-induced pain or tissue damage. Because nipple sizes change throughout pregnancy and the postpartum period, you should measure your nipples periodically to ensure you are still using the correct size.

To determine your starting size, measure the diameter of your nipple base (excluding the areola) using a ruler, calipers, or a printable sizing tool. Perform this measurement before a pumping session when the nipple is at rest. Add one to three millimeters to your measurement to find your ideal flange or insert size, which allows room for the nipple to expand slightly during suction.
Signs of a Correct Fit
- The nipple moves freely back and forth in the flange tunnel without rubbing against the sides.
- Minimal to no areola tissue is drawn into the tunnel during suction.
- The breast feels soft, light, and empty at the end of a typical session.
- Pumping feels like a firm tugging sensation but does not cause pain.
Signs of a Poor Fit
- The nipple rubs against the walls of the tunnel, causing redness, irritation, or blisters.
- Large portions of the areola are pulled deep into the tunnel, compressing the surrounding ducts.
- The nipple turns white (blanching) or purple during or immediately after a session.
- You experience a low milk yield despite feeling full or engorged.
If you fall between standard sizes, use the specific millimeter sizing inserts provided by the manufacturer to customize the fit. If you continue to experience discomfort, friction, or low output despite adjusting your sizing, consult an International Board Certified Lactation Consultant (IBCLC) for personalized guidance.
Step-by-Step Pumping Techniques to Maximize Milk Output
Once your pump is correctly assembled and fitted, your physical setup and settings will dictate how efficiently you can express milk. Following a systematic approach helps mimic a baby’s natural nursing patterns to optimize your body’s response.
Setting Up and Positioning for a Proper Seal
Your physical posture plays a significant role in how easily milk flows from your breasts. Sit in a comfortable, upright position with adequate back support, relaxing your shoulders and chest. Leaning too far forward or slouching can compress your milk ducts and hinder the gravity-assisted flow of milk into the collection cups.
Align the center of the flange tunnel directly over your nipple before activating the pump. To ensure perfect centering, you may find it helpful to look down into the flange or use a mirror during your first few sessions. Once aligned, press the pump firmly against your breast to create an airtight seal.
Avoid pressing the pump too tightly against your chest wall. Excessive pressure can compress the superficial milk ducts located just beneath the skin, which actually blocks milk flow and reduces output. Your nursing bra should hold the pump securely in place without causing deep indentations in your skin.
Using Massage and Expression Modes Effectively
To initiate milk flow, start your session using the massage or stimulation mode. This mode uses fast, light, and shallow suction cycles designed to mimic the rapid suckling a baby uses to trigger the milk let-down reflex. Continue in this mode for one to three minutes, or until you see milk begin to drip or spray into the collection cup.
Once your milk starts flowing consistently, switch the device to the expression mode. This mode features slower, deeper suction cycles that mimic the active swallowing phase of a nursing infant. If your pump features an automatic transition setting, you can rely on that, but always feel free to manually override the settings based on your immediate flow.
Adjust the suction level gradually until you reach your highest comfortable setting. Do not increase the suction to a level that causes pain or pinching, as pain triggers the release of adrenaline, which actively inhibits oxytocin and blocks your let-down reflex. Maximum suction does not equal more milk; comfort is the true key to output.
Managing Session Duration and Frequency
Keep your pumping sessions within a standard window of 15 to 20 minutes per breast. This timeframe is typically sufficient to empty the breasts thoroughly without causing unnecessary nipple fatigue or tissue wear. If your milk is still flowing steadily at the 20-minute mark, you can extend the session by a few minutes, but stop once the flow slows to a drip.
Avoid dry pumping—continuing to pump for extended periods after your milk flow has completely stopped—in an effort to force out more milk. This practice can cause localized swelling, tissue bruising, and fluid retention (edema) in the breast, making subsequent sessions more painful and less productive.
Always listen to your body throughout your session. If you experience sharp, pinching, or burning pain at any point, pause the pump immediately. Re-evaluate your positioning, check your flange alignment, and lower the suction intensity before resuming.
Troubleshooting Low Yield and Discomfort During Pumping
If you experience a sudden drop in milk yield or find that pumping has become uncomfortable, run through a systematic troubleshooting checklist. Most issues stem from minor mechanical faults or temporary physical blocks that are easy to resolve.
Suction and Mechanical Checklist
- Inspect the Valves: Look closely at the silicone duckbill valves for tiny tears, warping, or stretched openings. Even a microscopic tear can ruin the vacuum seal.
- Check the Threading: Ensure the collection bottle or cup is threaded perfectly and tightened securely to the pump body.
- Clear the Air Vents: Check for any moisture, lint, or hair blocking the small air vents or vacuum paths on the motor unit.
- Verify Assembly Dryness: Ensure all silicone parts are completely dry before assembly, as moisture can cause parts to slip or lose their seal.
If the machine is functioning perfectly but your yield is still low, try incorporating physical techniques to stimulate flow. Gently massage your breasts or apply a warm compress for a few minutes before you begin pumping. During the expression phase, you can perform gentle breast compressions—squeezing the breast tissue slightly behind the flange—to help empty stubborn milk ducts.
Your psychological state directly influences your milk expression. Stress, anxiety, and fatigue can suppress oxytocin, the hormone responsible for releasing milk. Create a calm pumping environment by dimming the lights, practicing deep breathing, or looking at photos and videos of your baby to encourage a faster let-down.
If you experience persistent pain, notice bleeding or cracked skin on your nipples, or find that your milk output remains consistently low despite troubleshooting, stop using the pump. Seek professional assistance from an IBCLC or your healthcare provider to protect your physical health and support your breastfeeding goals.
Cleaning and Maintaining Your Pump for Long-Term Hygiene
Establishing a strict cleaning routine is vital to protect your baby from pathogens and to preserve the lifespan of your pump components. Milk fat and proteins can quickly build up in hard-to-reach crevices, creating a breeding ground for bacteria if not cleaned promptly.
Immediately after you finish pumping, disassemble all parts that came into contact with breast milk. Rinse these parts under cold, running water first; cold water prevents milk proteins from coagulating and sticking to the surfaces. Never skip this initial rinse, as it makes the subsequent washing step much more effective.
Wash the disassembled parts in warm, soapy water using a mild, baby-safe dish soap. Use a dedicated washbasin and a soft-bristled brush reserved exclusively for your pump parts to avoid cross-contamination from family dishes. Rinse the parts thoroughly under clean, running water to remove all soap residue.
Place the clean parts on a dedicated drying rack in a well-ventilated area. In warm, humid environments like Singapore, ensuring complete air-drying is crucial to prevent mold and bacterial growth. Avoid wiping the parts with cloth towels, which can transfer lint and bacteria back onto the clean surfaces.
Before sanitizing, verify which parts of your pump are heat-resistant. Most silicone and hard plastic parts can be boiled for five minutes or processed in a steam sterilizer, but you must check your manufacturer instructions to avoid warping. Never submerge the main motor unit or any electronic components in water; instead, wipe the exterior of the motor unit with a clean, damp cloth to keep it clean.

Community discussion
Share your experience or ask a question. Comments are reviewed before publication.