
Using the Medela collection cup effectively requires a balance of proper physical positioning, correct bra adjustment, and meticulous hygiene practices. To get the most out of your hands-free pumping or let-down collection, you must ensure your nipple is centered within the tunnel, your bra provides adequate support without compressing the breast tissue, and the components are cleaned immediately after each use to prevent milk residue buildup. By mastering these steps, you can maximize your milk yield, prevent uncomfortable friction, and maintain a safe, hygienic feeding routine for your baby.
Proper usage begins before you even assemble the parts, starting with a clean environment and a thorough inspection of your equipment. Cleaning the cup involves a two-step approach: a thorough daily wash to remove milk fats and proteins, followed by regular sanitization to eliminate potential pathogens. Because these cups sit directly against your skin and collect milk that your baby will consume, keeping them free of bacteria is paramount to your child’s health and your own comfort.
Preparing Your Medela Collection Cup for Use
Before handling any part of your collection cup, wash your hands thoroughly with soap and warm water for at least twenty seconds. Dry your hands with a clean, single-use paper towel or a dedicated clean hand towel to avoid transferring bacteria back onto your skin. Prepare a clean, dry workspace by wiping down the countertop or table where you will assemble the pump parts, ensuring no food residue or household dust can contaminate the sterilized components.
Products mentioned in this guide
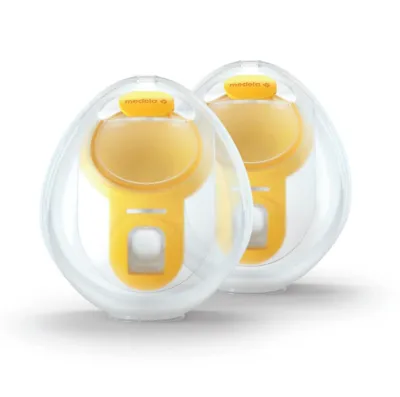
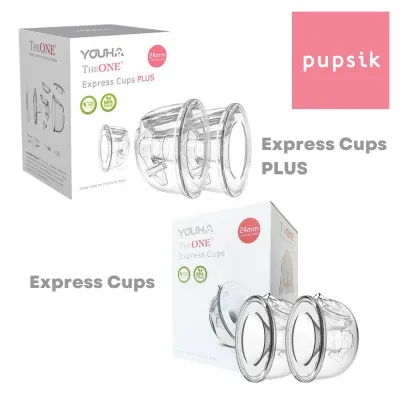
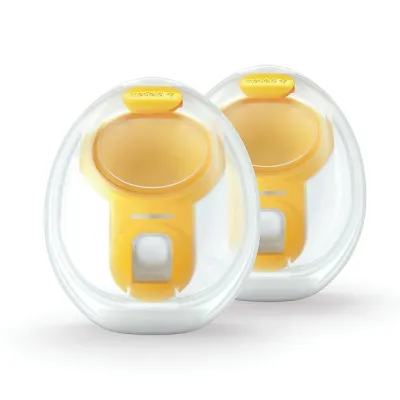
Prices are valid at publication and may change. Please refer to the product page for the latest price.
Carefully inspect each component of the collection cup before assembly. Examine the silicone membrane and the outer plastic shell for any signs of wear, such as tiny tears, cracks, warping, or persistent cloudy residue. Even a microscopic tear in the silicone can compromise the vacuum seal, leading to reduced suction efficiency or sudden leaks during your session. If you notice any damage or structural changes, set those parts aside and replace them before proceeding.
Ensure your breast pump unit and any necessary tubing are clean and ready for connection. If you are using the cups for hands-free pumping, verify that the tubing is free of moisture or condensation, as wet tubing can damage the pump motor and harbor mold. Keep your nursing bra or pumping bra nearby, ensuring it is clean and adjustable so you can achieve the correct tension once the cups are in place.
How to Position and Use the Collection Cup
Positioning for Hands-Free Pumping
To begin your hands-free pumping session, gently place the assembled collection cup over your breast, ensuring your nipple is precisely centered within the tunnel of the breast shield. Leaning forward slightly while placing the cup can help your breast tissue settle naturally into the shield, preventing the nipple from rubbing against the sides. A misaligned nipple not only causes discomfort and friction but can also restrict milk flow by compressing the milk ducts.

Once the cup is in position, secure it by pulling your bra cup up and over the unit. The bra must be tight enough to hold the cup firmly against your breast to maintain a consistent vacuum seal, yet loose enough to avoid compressing your breast tissue. Excessive compression from a tight bra can restrict the natural flow of milk, lead to clogged ducts, or cause the cup to shift out of alignment. If your bra does not have adjustable straps, consider using a dedicated pumping bra or a bra extender to customize the fit.
Throughout your pumping session, monitor the fill level of the cup periodically. Most collection cups feature a clear outer shell with a marked fill line to help you track the volume of collected milk. Avoid filling the cup past the maximum capacity indicated by the manufacturer, as overfilling can cause milk to back up into the tubing, damage the pump mechanism, or spill out when you remove the cup.
Catching Let-Down While Nursing
Using the collection cup on the opposite breast while nursing your baby is an excellent way to save milk that would otherwise be lost to a nursing pad. To do this, secure the cup inside your nursing bra on the non-nursing side before you bring your baby to the breast. The stimulation from your baby nursing on one side will naturally trigger the let-down reflex on both sides, allowing the cup to catch the escaping milk passively.
Ensure the cup is positioned securely so it does not slip when your baby moves or shifts position during feeding. You may need to adjust your posture or hold the cup gently with one hand if your nursing bra does not provide enough support on the open side. Keep a close eye on the baby’s hands and feet, as an active infant can easily kick or pull at the bra, potentially breaking the seal of the collection cup.
When your baby finishes nursing, or when the cup has caught the initial let-down, remove the cup carefully to prevent spills. Lean forward slightly, gently slip a clean finger under the edge of the silicone rim to break the vacuum seal, and lift the cup upward and away from your breast. Keep the cup upright as you transfer it to a flat surface, ready to pour the collected milk into a sterile storage bottle or bag.
Cleaning and Sanitizing Your Collection Cup
Daily Washing Steps
Immediately after completing your pumping or collection session, disassemble all parts of the cup. Rinse each component under cold, running water to wash away loose milk residue. Cold water is essential for this initial rinse because hot water can cause milk proteins and fats to coagulate and stick to the silicone and plastic surfaces, making them much harder to clean later.
After the initial rinse, wash all parts in warm, soapy water. Use a mild, fragrance-free dish soap or a dedicated baby bottle cleanser, and scrub the parts gently with a clean, soft brush or sponge reserved exclusively for baby feeding items. Avoid using harsh abrasive pads or stiff brushes, which can scratch the plastic and silicone, creating microscopic grooves where bacteria can easily multiply. Wash the parts in a dedicated washbasin rather than directly in the kitchen sink to prevent contamination from food particles and sink bacteria.
Rinse each part thoroughly under warm, running water to ensure all soap residue is completely removed. Place the clean components on a dedicated bottle drying rack or a clean paper towel in a well-ventilated area. In humid tropical climates, ensuring adequate airflow is crucial to prevent mold and bacterial growth on damp surfaces. Allow all parts to air-dry completely before reassembling or storing them, and avoid using dish towels to dry the parts, as towels can transfer lint and bacteria.
Sanitizing and Sterilization Methods
In addition to daily washing, you must sanitize the collection cup components regularly to eliminate any remaining pathogens. Before sanitizing, always consult the manufacturer’s instruction manual to verify the specific temperature limits and approved sterilization methods for your cup’s materials. Some components may be sensitive to extreme heat, and using unapproved methods can cause warping or premature degradation.
Commonly approved sanitizing methods include boiling the parts in water, using an electric steam sterilizer, or utilizing microwave steam bags. If you choose to boil the parts, fill a deep pot with enough water to fully submerge all components, bring it to a rolling boil, and place the parts inside for the duration recommended by the manufacturer—typically around five to ten minutes. Ensure the plastic and silicone parts do not touch the bottom or sides of the pot, as direct contact with the hot metal can melt or warp the material.
Remove the sanitized parts carefully using clean tongs and place them on a clean, dry surface to cool and air-dry. Inspect the components closely after sterilization; if you notice any signs of heat damage, such as warping, stickiness, or a change in the flexibility of the silicone, stop using those parts immediately and replace them. Regular sanitization is especially critical during your baby’s first few months or if your infant has a compromised immune system.
Troubleshooting Leaks and Spills
If you experience leaks or spills while using your collection cup, the first step is to evaluate your bra fit. A bra that is too loose will fail to hold the cup firmly against your breast, allowing the vacuum seal to break whenever you move. Conversely, a bra that is too tight can compress the silicone membrane, causing it to warp and break contact with your skin. Adjust your bra straps or switch to a different bra style to find a balance that offers firm, even support without excessive pressure.
Another common cause of leaking is nipple misalignment. If your nipple is not centered within the tunnel, milk may pool around the edges of the breast shield instead of flowing directly into the collection chamber. This pooling can eventually overflow or seep past the silicone seal. If you feel any pinching, rubbing, or notice milk accumulating outside the central area, pause your pump, break the seal, and reposition the cup carefully.
Always keep track of the volume of milk in the cup and empty it before it reaches maximum capacity. When the cup is full, any sudden movement or change in posture can cause milk to spill through the pour spout or ventilation holes. If you have a high milk supply, you may need to pause your session halfway through to empty the cup into a storage container before resuming.
Regularly inspect the physical integrity of the silicone membrane and the plastic shell. Over time, frequent washing and sterilization can cause the silicone to stretch, lose its elasticity, or develop micro-cracks along the edges. If the silicone seal is compromised, the cup will not be able to maintain the vacuum pressure required for efficient pumping, leading to leaks and reduced milk expression. Replace any worn or stretched components promptly to restore proper function.
Storage and Replacement Guidelines
Once all components of your collection cup are completely dry, store them in a clean, dry, and dust-free environment. A dedicated plastic storage container with a secure lid or a clean zip-top bag is ideal for keeping the parts protected from household dust, pet hair, and airborne contaminants. Avoid storing damp parts in closed containers, as the trapped moisture can promote the growth of mold and mildew.
Keep a close eye on the physical condition of your collection cup parts over weeks of regular use. Over time, exposure to breast milk fats, dish soaps, and heat sterilization will cause the materials to degrade. Look for observable signs of wear, such as persistent cloudiness, yellowing, a sticky texture, or micro-cracks in the plastic. If the silicone parts feel unusually soft, stretched out, or fail to snap securely onto the plastic shell, it is time to replace them.
Consult the manufacturer’s guidelines for the recommended lifespan of your specific feeding accessories. Generally, silicone membranes and valves require more frequent replacement than hard plastic shells, often every one to three months depending on how often you pump. Replacing these parts on schedule ensures your pump continues to operate at peak efficiency and maintains a hygienic environment for your breast milk.
Frequently Asked Questions (FAQ)
Can I use the Medela collection cup with any breast pump?
Compatibility depends heavily on the specific design of your breast pump, its tubing connections, and the flange setup. While some collection cups are designed to integrate seamlessly with specific models from the same manufacturer, they may not connect properly or safely to pumps from other brands. Always consult your Medela product manual or the official manufacturer website to verify compatible pump models and connection requirements before attempting to use the cups with a different system.
Is it safe to leave the collection cup in my bra for hours?
It is not recommended to leave the collection cup in your bra for extended periods after you have finished pumping or collecting milk. Prolonged contact with trapped moisture and breast milk against your skin can create an ideal environment for bacterial and fungal growth, increasing the risk of skin irritation, nipple soreness, or thrush. To maintain optimal skin health and milk hygiene, remove the cup immediately after your session, transfer the milk to a proper storage container, and clean your skin and the cup components.

Community discussion
Share your experience or ask a question. Comments are reviewed before publication.