
Using a pigeon nipple shield correctly requires a combination of proper sizing, careful positioning, and a structured latching technique to ensure your baby feeds efficiently. While a nipple shield is an invaluable temporary aid for overcoming initial breastfeeding hurdles, achieving a deep latch remains the foundation of successful milk transfer. By mastering the application process and learning to recognize the signs of active swallowing, you can support your baby’s growth while protecting your comfort and milk supply.
When to Use a Pigeon Nipple Shield and Setting Expectations
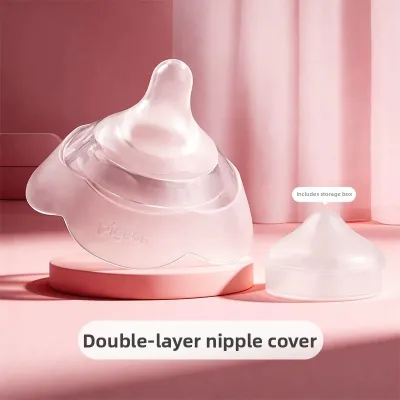
A silicone nipple shield is a thin, flexible cover worn over the nipple and areola during breastfeeding. While it is a highly effective tool when used correctly, it is designed to address specific breastfeeding challenges rather than serve as a permanent fixture of your feeding routine. Understanding when to introduce a pigeon nipple shield helps ensure that both you and your baby transition smoothly through different stages of your breastfeeding journey.
Common, valid reasons for introducing a nipple shield include assisting newborn babies who experience severe latch difficulties, supporting mothers who have flat or inverted nipples that make it difficult for a baby to grasp the breast directly, or helping premature infants who lack the suction strength to draw the nipple into their mouth. In these scenarios, the structured shape of the silicone shield provides a firm physical target for the baby, stimulating their palate and encouraging a more active sucking reflex.
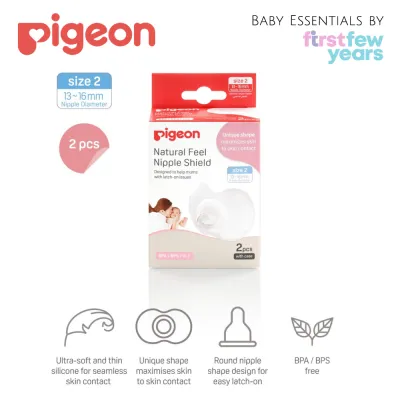
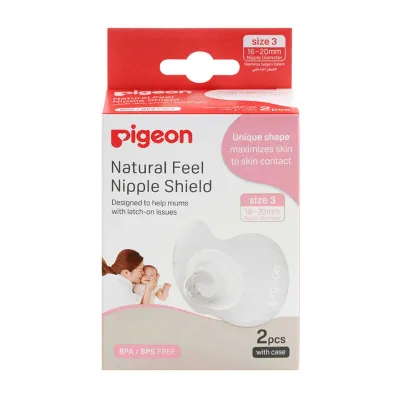
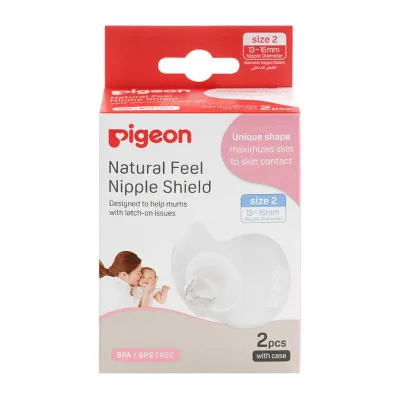
Products mentioned in this guide
![[2-Pack] Pigeon Natural Feel Nipple Shield (16-20 mm) - Size 3 (L)](https://img.lazcdn.com/g/p/629e51f9d64ea3c4bdaee485f0f746f6.png_400x400q80.png_.webp)
Prices are valid at publication and may change. Please refer to the product page for the latest price.
However, a nipple shield is generally a temporary tool. It is highly recommended to introduce a shield only under the direct guidance of a certified lactation consultant (such as an IBCLC) or a qualified healthcare provider. Introducing a shield without professional assessment can sometimes mask underlying issues. For instance, using a shield as a first resort for general nipple soreness or pain is discouraged; while it may offer temporary relief, it does not address the root cause of a poor latch, which could lead to further complications like damaged breast tissue or reduced milk transfer.
Sizing Your Pigeon Nipple Shield and Pre-Feed Preparation
Finding the correct size of your nipple shield is critical to ensuring comfort, maintaining your milk supply, and supporting efficient milk transfer. Pigeon nipple shields are available in different sizes, and using a shield that is too small or too large can lead to complications such as nipple friction, poor milk flow, or the shield constantly slipping off during a feed.

To determine the correct size, you should measure the diameter of your nipple at the base after a feed or when the nipple is erect. Compare this measurement with the specific sizing guide provided on the Pigeon product packaging, as sizing standards vary significantly across different brands and models. A properly fitted shield should allow your nipple to fit comfortably into the central tunnel without rubbing against the sides, while leaving a small gap at the tip to accommodate the nipple’s natural expansion during feeding.
Before you begin a feeding session, proper preparation of both your hands and the feeding equipment is essential.
- Wash your hands thoroughly with soap and water before handling your breast or the silicone shield.
- Inspect the shield to ensure it is clean and free of any dust, lint, or residue from previous cleanings.
- Clean your breast gently with water if necessary, avoiding harsh soaps that can dry out the skin.
- Express a few drops of breast milk directly into the tip of the shield. This simple step serves a dual purpose: it provides an immediate taste of milk to entice your baby to latch, and it helps initiate your let-down reflex more quickly once suction begins.
Step-by-Step Guide to Applying the Shield and Latching
Applying a silicone shield requires a specific technique to ensure it adheres securely and does not pinch your skin.
Positioning the Shield on the Breast
To apply the shield, start by turning the brim or flange partially inside out, creating a slight cone shape. Gently stretch the silicone base outward. Center the shield’s central tunnel directly over your nipple, ensuring your nipple is aligned in the middle without being forced or pinched. Once centered, roll the brim down flat against your areola.
As the silicone returns to its original shape, it will draw a portion of your nipple slightly into the tunnel, creating a gentle, secure seal. The brim must sit completely flat against your skin without trapping air pockets or folding over. Many Pigeon nipple shields feature a unique cut-out section at the top of the brim. If your model has this cut-out, position the shield so that the open space is at the top, where your baby’s nose will rest. This design allows for direct skin-to-skin contact between your baby’s nose and your breast, helping them smell your skin and feel secure during the feed.
Achieving a Deep Latch with the Shield
Once the shield is securely in place, you can bring your baby to the breast. It is a common misconception that the baby should only latch onto the narrow silicone tip of the shield. To feed effectively, your baby must achieve a deep latch that encompasses both the shield’s tip and a significant portion of the base and your areola.
To encourage a deep latch, position your baby so their nose is aligned with the tip of the shield. Tickle your baby’s upper lip gently with the tip of the shield to stimulate their natural rooting reflex. Wait for a wide, yawning mouth before quickly but gently bringing your baby to the breast, leading with their chin. Ensure the lower jaw takes in a large mouthful of the shield’s base, which allows their tongue to compress the milk ducts beneath your areola.
If you feel a sharp, pinching, or biting pain during the feed, this indicates that the latch is too shallow or the shield is misaligned. In this situation, do not let the baby continue sucking. Gently break the suction by inserting a clean finger into the corner of your baby’s mouth, remove the shield, and reposition it before trying again.
How to Tell if Your Baby is Latching and Drinking Effectively
When using a nipple shield, you cannot rely solely on the sensation of your nipple being pulled to confirm that milk is flowing. You must actively observe your baby’s feeding behavior to ensure they are transferring milk effectively rather than engaging in non-nutritive sucking.
Look for these positive indicators of effective milk transfer:
- Rhythmic suck-swallow-breathe pattern: You should observe a deep, slow sucking motion followed by a visible or audible swallow. This pattern typically starts fast to trigger the let-down and then slows down to a steady rhythm.
- Wide jaw movements: The baby's jaw should move deeply down to their ears, indicating they are using their tongue and jaw muscles to draw milk.
- Milk visible in the shield: You should see milk pooling slightly inside the tip of the silicone shield during pauses in sucking.
- Relaxed hands and body: As the feed progresses, your baby's hands should relax from tight fists into open, soft palms, and they should appear satisfied after the feed.
Conversely, be alert to signs of an ineffective latch or poor milk transfer. If you hear persistent clicking sounds, notice your baby’s cheeks dimpling deeply inward with every suck, or find that the shield is constantly slipping off the breast, the latch is likely too shallow. Furthermore, if you experience persistent pain throughout the feeding session, the shield may be the wrong size or positioned incorrectly.
For long-term peace of mind, monitor your baby’s overall hydration and growth. Track their daily output of wet and dirty diapers, and ensure you attend regular check-ups with your pediatrician or healthcare provider to monitor their weight gain. Steady weight gain is the most reliable indicator that your baby is receiving sufficient nutrition while using the shield.
Cleaning, Storage, and Knowing When to Transition Off the Shield
Silicone is a durable but delicate material that requires meticulous care to prevent the buildup of bacteria and maintain its structural integrity.
Always wash the nipple shield immediately after every feed. Rinse it under cold water first to remove any remaining milk residue, then wash it thoroughly in warm, soapy water using a mild dishwashing liquid. Rinse the shield again under running water to remove all soap residue. To sterilize the shield, refer to the manufacturer’s manual for specific instructions, as methods such as boiling, steam sterilizing, or chemical sterilization have different temperature and time limits. Avoid using abrasive brushes or harsh chemical cleaners that could degrade the silicone.
Inspect the shield regularly before each use. Look closely for any signs of wear, such as stickiness, discoloration, micro-tears, or a loss of elasticity. If you notice any damage, discard the shield immediately and replace it with a new one, as compromised silicone can harbor bacteria or tear further during a feed. Store the dry shield in a clean, covered container away from direct sunlight and heat.
Transitioning off the nipple shield should be a gradual process managed in consultation with a lactation professional. You should consider weaning off the shield when the initial challenges—such as flat nipples or latch issues—have resolved, and your baby has developed a stronger, more mature suck. If you notice your baby is not gaining weight adequately, or if you suspect your milk supply is dropping, stop using the shield as a standalone solution and consult a lactation consultant or healthcare provider immediately to develop a structured feeding and weaning plan.
Frequently Asked Questions (FAQ)
Can I use a nipple shield for every feed?
Yes, you can use a nipple shield for every feed if it is clinically necessary and recommended by your lactation consultant. However, because a shield can sometimes reduce the direct stimulation your breast receives, it is important to monitor your milk supply closely. If your baby is not fully emptying the breast during feeds, you may need to use a breast pump after feeding sessions to maintain your supply. Always work with a healthcare professional to create a personalized feeding plan that balances your baby’s nutritional needs with your milk production.
Will using a nipple shield decrease my milk supply?
A properly fitted nipple shield used with a deep, correct latch should not inherently decrease your milk supply. The primary driver of milk production is the frequent and thorough removal of milk from the breast. However, if the shield is sized incorrectly or if the baby has a shallow latch, milk transfer may be inefficient, which can lead to a gradual decrease in your milk supply over time. To safeguard your supply, monitor your baby’s wet diapers and weight gain, and seek professional guidance if you suspect your breasts are not feeling softer after feeds.
Community discussion
Share your experience or ask a question. Comments are reviewed before publication.