
To set up and use the Spectra Dual S breast pump for efficient milk expression, you must correctly assemble its closed-system components, select a properly fitting breast shield, and customize the independent dual-motor settings to match your body’s natural flow. Unlike single-motor pumps, this double electric pump allows you to adjust the suction strength for each breast individually, optimizing comfort and maximizing output.
By understanding how to transition between massage and expression modes, maintaining a strict hygiene routine, and troubleshooting common suction issues, you can establish a seamless and comfortable pumping routine. This guide provides step-by-step instructions to help you master your device and support your breastfeeding journey.
Preparing for Your Pumping Session
Establishing a clean and organized routine before you begin pumping is essential for protecting your milk from contamination and encouraging a swift let-down reflex. Always start by washing your hands thoroughly with soap and warm water for at least twenty seconds. Clean your pumping station or table with a food-safe sanitizer, ensuring you have a clean surface to place your pump parts and bottles.
Products mentioned in this guide

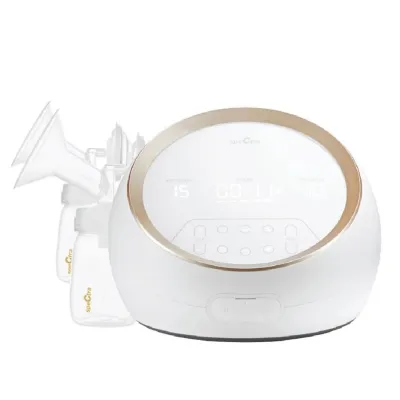


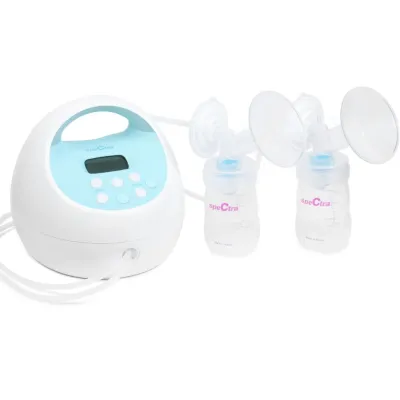
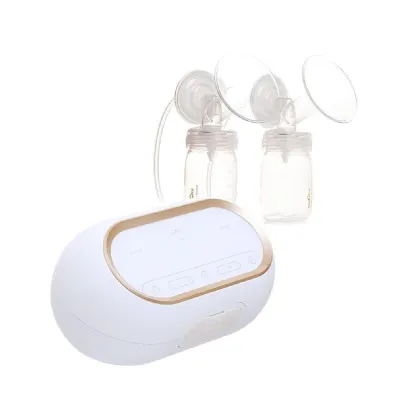

Prices are valid at publication and may change. Please refer to the product page for the latest price.
Your physical comfort plays a direct role in how easily your milk flows. Stress and cold temperatures can inhibit the release of oxytocin, the hormone responsible for the let-down reflex. Choose a quiet, comfortable chair where you can sit upright without straining your back. Keeping a warm beverage nearby, wrapping yourself in a comfortable blanket, or looking at photos of your baby can help stimulate milk flow.
Before assembling the device, inspect every component carefully. Ensure that all silicone parts, including the backflow protectors and duckbill valves, are completely dry and free from tears, cracks, or warping. Even a tiny tear in a silicone membrane can significantly reduce suction or compromise the hygienic barrier. If you notice any damage, replace the affected part before starting your session.
Assembling the Spectra Dual S Correctly
Proper assembly is critical to achieving airtight suction and ensuring the closed-system barrier functions correctly. Begin by assembling the backflow protectors, which prevent milk from entering the tubing and the pump motor. Insert the white silicone membrane into the lower case, then snap the upper case securely on top. Ensure the membrane is flat and completely sealed along the edges of the plastic casing.

Next, push the duckbill valve firmly onto the underside of the breast shield. The valve must point straight down to allow milk to flow smoothly into the bottle. Avoid twisting or forcing the valve too hard, as this can stretch the silicone and cause leaks. Once the valve is in place, screw the breast shield onto your collection bottle until it is snug, taking care not to overtighten and strip the plastic threads.
Connect the tubing to the assembled parts. Push one end of the tubing onto the small nozzle on the backflow protector, and insert the other end into the air port on the front of the main pump unit. Ensure the connection is firm but do not force it. If you are double pumping, repeat this process for the second set of parts and connect both tubes to their respective ports on the machine.
Before turning on the pump, verify that your breast shield (flange) size is correct. The flange must accommodate your nipple comfortably without pulling too much of the surrounding areola into the tunnel. A poorly fitting flange can cause friction, block milk ducts, and reduce the volume of milk expressed. Keep in mind that your flange size may change throughout your breastfeeding journey, requiring periodic adjustments.
Finding Your Ideal Settings for Comfort and Output
One of the primary advantages of this device is its dual-motor system, which allows you to control the suction level for each breast independently. This is particularly helpful if you experience asymmetrical milk production or have different sensitivity levels on each side. You can adjust the vacuum strength on the left and right sides to find the exact balance that feels comfortable for you.
Always begin your session in massage mode, which is represented by a three-wave symbol on the screen. This mode uses fast, shallow cycles to mimic the rapid sucking motion a baby uses to initiate milk flow. Start at a low vacuum level and gradually increase it until you feel a gentle, non-painful tugging sensation. Remain in massage mode for two to three minutes, or until you see milk begin to drip or spray.
Once your milk starts flowing, switch to expression mode by pressing the mode button. Expression mode features slower, deeper cycles designed to draw out milk efficiently. You can adjust both the cycle speed (how many times the pump suctions per minute) and the vacuum strength. Do not assume that higher suction leads to more milk; excessive suction can cause pain, which triggers adrenaline and actually slows down your milk release.
Pay close attention to how your body responds during the session. If you feel pinching, pulling, or discomfort, immediately lower the vacuum level. If your milk flow slows down significantly before your breasts feel soft, you can switch back to massage mode for a few minutes to trigger a second let-down before returning to expression mode.
Step-by-Step Pumping Technique and Best Practices
To begin pumping, sit comfortably and center the breast shields over your nipples. Ensure your nipples are aligned directly in the middle of the flange tunnels to prevent painful friction against the sides. Press the shields gently against your breasts to create an airtight seal; pressing too hard can compress your milk ducts and restrict flow.
Incorporating gentle breast massage and hands-on compression during your session can significantly improve milk removal. Use your free hand to gently massage your breast from the chest wall toward the flange, focusing on any areas that feel firm or full. Applying a warm compress to your breasts for a few minutes before you start can also encourage faster milk flow.
Determine the length of your pumping session by monitoring your milk flow and how your breasts feel, rather than relying solely on a timer. A typical double pumping session lasts between fifteen and twenty minutes. You should stop pumping once your milk flow has slowed to a very slow drip and your breasts feel soft and light. Pumping for too long past this point can cause tissue irritation.
Stop the pump immediately if you experience sharp pain, bruising, or skin damage. Pumping should never be painful. If you cannot find a comfortable setting or if you notice persistent soreness after pumping, discontinue use and consult a lactation consultant or healthcare professional to evaluate your technique and flange fit.
Cleaning, Sterilizing, and Maintaining Your Pump
Maintaining a strict cleaning routine is vital to protect your infant from harmful bacteria. After every pumping session, disassemble all parts that come into direct contact with breast milk, including the breast shields, duckbill valves, bottles, and the silicone membranes of the backflow protectors. The tubing does not need to be washed unless milk or moisture accidentally enters it.
Wash the disassembled parts in warm, soapy water using a dedicated basin and a soft brush reserved only for baby feeding items. Avoid washing pump parts directly in the sink, as household sinks can harbor bacteria. Rinse each part thoroughly under running water to remove all soap residue, then sanitize them according to the instructions in your manufacturer’s manual.
In warm and humid environments, such as Singapore, proper drying is crucial to prevent mold and bacterial growth. Place all washed parts on a clean, dedicated drying rack in a well-ventilated area. Allow them to air-dry completely before storing them in a clean, dust-free container. Never use a damp cloth to dry the parts, as this can reintroduce bacteria.
Regularly inspect your pump accessories for signs of wear and tear. Silicone parts like duckbill valves and backflow membranes stretch and degrade over time with frequent washing and sterilization. If you notice a drop in suction power, inspect these parts first. Depending on how often you pump, valves may need replacement every one to three months, while backflow membranes typically last three to six months.
Troubleshooting Common Pumping Issues
If you experience weak or inconsistent suction, start by checking all physical connections. Ensure the tubing is pushed firmly into both the pump motor and the backflow protectors. Check that the backflow protector casings are snapped tightly together and that the duckbill valves are pushed securely onto the breast shields. A loose connection anywhere in the system will cause air to escape and reduce suction.
If you notice moisture or milk inside the tubing, turn off the pump immediately. This indicates that a backflow protector membrane may be torn, improperly assembled, or worn out. Remove the tubing, wash it if necessary, and allow it to dry completely before using the pump again. Replace any damaged silicone membranes to prevent moisture from reaching the motor, which can damage the internal electronics.
Persistent nipple pain or low milk output is often a sign of an incorrect flange fit or improper positioning. If the flange tunnel is too small, your nipple will rub against the sides, causing swelling and blocking milk flow. If the tunnel is too large, too much of your areola will be drawn inside, causing bruising. Re-measure your nipple base and adjust your flange size accordingly.
If you have verified that your assembly is correct, your parts are in good condition, and your flange size is accurate, but you still experience pain or low output, stop troubleshooting on your own. Reach out to a certified lactation consultant or contact the manufacturer’s customer support for professional guidance tailored to your specific situation.
Frequently Asked Questions (FAQ)
Can I use the Spectra Dual S as a single pump?
Yes, you can easily configure the device for single pumping. To do this, simply connect one tube to your preferred side and ensure the unused air port on the front of the pump is closed or capped, depending on your specific model’s design. You can then adjust the settings for that active side individually. Single pumping is highly useful if you want to nurse your baby on one breast while expressing milk from the other, or if you only need to relieve fullness on one side.
How do I know if my flange size is correct?
Your flange size is correct if your nipple centers easily in the tunnel and moves back and forth freely during pumping without rubbing against the walls. Only a minimal amount of your areola should be drawn into the tunnel. If you experience friction, pain, swelling, or if your nipple turns white or red during a session, your flange is likely too small or too large. Remember to measure your nipple base periodically, as breast tissue and nipple size can change during postpartum recovery.

Community discussion
Share your experience or ask a question. Comments are reviewed before publication.