
Setting up and using your Momcozy M6 breast pump correctly is the most effective way to ensure a comfortable, efficient, and highly productive pumping experience. While wearable and hands-free pumps offer incredible convenience, maximizing your milk expression requires a clear understanding of proper assembly, precise flange fitting, and customized setting adjustments.
By taking the time to understand how the components interact and how to align the pump with your body’s natural lactation responses, you can avoid common pitfalls such as low suction, physical discomfort, or decreased milk yield. This guide provides a comprehensive, step-by-step approach to mastering your pump from your very first session.
Preparing for Your First Pumping Session
Establishing a clean and organized routine before you begin pumping is essential for maintaining hygiene and supporting your body’s natural milk-ejection reflex. Before touching any part of the pump or handling your breast tissue, perform strict hand hygiene by washing your hands thoroughly with soap and warm water for at least 20 seconds. This simple step is critical to prevent the introduction of bacteria or pathogens into your expressed milk or onto your skin.
Products mentioned in this guide
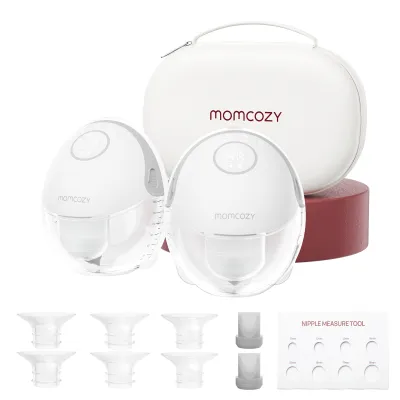

Prices are valid at publication and may change. Please refer to the product page for the latest price.
Once your hands are clean, unbox your pump and carefully inspect all components against the parts list in the included user manual. Ensure that every silicone valve, diaphragm, collector cup, and motor unit is present and free from visible defects, cracks, or tears. If you notice any damaged parts, do not use the pump; instead, contact the manufacturer for replacements to ensure safe operation.
Your physical environment plays a significant role in how easily your milk flows. Create a dedicated, comfortable space where you can relax without distractions. In tropical climates like Singapore, setting up in a cool, air-conditioned room or next to a gentle fan can make a substantial difference in your comfort. Keep a large bottle of water, a nutritious snack, and your phone or a book within arm’s reach so you do not have to interrupt your session.
Reducing stress is not just about comfort; it is a physiological necessity for successful pumping. Stress triggers adrenaline, which actively inhibits the release of oxytocin, the hormone responsible for the milk let-down reflex. Finally, before your very first use, take a few minutes to read through the manufacturer’s safety warnings and contraindications to ensure you are using the device safely and in accordance with professional guidelines.
Step-by-Step Assembly of the Momcozy M6
Correct physical assembly is paramount to maintaining optimal suction power and protecting the pump’s motor from damage. A minor misalignment in any of the silicone components can break the vacuum seal, leading to weak suction or complete loss of pressure.

Before assembling, ensure that every single component is completely dry. In humid environments, moisture can easily cling to silicone parts even after hours of air-drying. Any residual water on the connection points can compromise the vacuum seal or, worse, travel into the motor unit, which can cause permanent electrical damage and void your warranty.
To assemble your pump correctly, follow this logical sequence:
- Insert the Silicone Valve: Push the valve firmly into the bottom of the linker or connector piece. Ensure it sits completely flat and snug without any gaps.
- Position the Backflow Protector: Fit the silicone diaphragm (the backflow membrane) into the linker. It is critical to install this membrane in the correct orientation as detailed in your manual. This part acts as a physical barrier; if it is misaligned, inverted, or damaged, milk can easily bypass the barrier and enter the motor unit.
- Attach the Flange: Press the silicone flange or breast shield firmly onto the front of the collector cup. Ensure the outer edges of the flange wrap securely around the rim of the cup to create an airtight seal.
- Secure the Milk Collector: Align the assembled linker and flange with the milk collection bottle or cup. Press them together firmly, checking that there is no cross-threading or uneven sealing. Avoid over-tightening, as this can warp the plastic threads or damage the silicone seals over time.
- Mount the Motor Unit: Align the main motor unit with the top of the collection cup assembly. Press down gently until it clicks or seats firmly into place. Double-check that all connection points are perfectly flush before turning the device on.
Finding the Right Flange Size for Comfort and Output
Using the correct flange size is the single most important factor in preventing nipple pain and ensuring efficient milk expression. A flange that is too large or too small will not only cause physical trauma to your breast tissue but will also fail to stimulate your milk ducts effectively, leading to a sudden drop in milk yield.
To find your correct size, you must measure the diameter of your nipple at the base. Use a physical ruler, a measuring tape, or a printable sizing tool specifically designed for breast pump fitting.
- Measure the Base: Measure only the diameter of the nipple itself, excluding the surrounding dark skin of the areola.
- Measure Before Pumping: For the most accurate measurement, measure your nipple before you begin a pumping session, rather than immediately after when the tissue may be temporarily swollen.
- Add a Buffer: Generally, you should select a flange size that is 2 to 3 millimeters larger than your measured nipple diameter to allow room for the nipple to expand and move freely within the tunnel during suction.
Compare your measurement to the sizing chart provided in your product manual to select the appropriate flange or silicone insert. Do not assume your size will remain constant; nipple size and tissue elasticity naturally change throughout your postpartum journey, meaning you may need to re-measure and adjust your flange size periodically.
Using an improperly fitting flange will quickly manifest through clear physical symptoms. If the flange is too small, you will experience rubbing, friction, sharp pain, or nipple blanching (where the tip of the nipple turns white due to restricted blood flow). If the flange is too large, excessive amounts of your areola will be pulled deep into the tunnel, which can cause swelling, bruising, and blocked milk ducts. If you experience any of these symptoms, stop using that size immediately and re-evaluate your measurements.
Pumping Techniques and Mode Selection
Once your pump is assembled and fitted, your physical positioning and setting selection will dictate how effectively you can mimic a baby’s natural nursing rhythm.
Start by positioning the pump over your breast, ensuring your nipple is perfectly centered within the flange tunnel. If the nipple is off-center, it will rub against the walls of the tunnel, causing friction and reducing the efficiency of the suction. Once centered, lean forward slightly as you secure your bra. This slight forward lean uses gravity to help milk flow downward into the collection cup, preventing milk from pooling around the silicone seal and causing leaks.
To maximize your milk output, utilize the pump’s two-phase expression technology systematically:
- Phase 1: Stimulation (Massage) Mode: Always begin your session in this mode. It uses fast, light, and shallow suction cycles designed to mimic the rapid sucking a baby employs at the start of a feed. This rapid stimulation triggers your nerves to release oxytocin, initiating the milk let-down reflex.
- Phase 2: Expression Mode: Once you see milk beginning to drip or spray consistently into the collection cup, switch the pump to expression mode. This mode features slower, deeper, and stronger suction cycles designed to draw out the milk efficiently once it is flowing.
When adjusting the suction levels, always start at the lowest setting and gradually increase the vacuum pressure one level at a time. Stop increasing when you reach your “maximum comfortable” level. This is the highest setting you can use while feeling a firm, pulling sensation without any sensation of pain.
Never use the highest suction setting simply because you assume it will extract more milk. High vacuum pressure does not equate to a higher milk yield; in fact, excessive suction causes physical pain, which triggers adrenaline, restricts your let-down reflex, and can cause severe tissue damage or swelling that blocks your milk ducts entirely.
Troubleshooting Common Pumping Issues
Even with careful preparation, you may occasionally encounter minor issues during your pumping journey. Understanding how to troubleshoot these problems quickly will save you time and prevent unnecessary stress.
Weak or No Suction
If you experience a sudden drop in suction power, first turn off the pump and check the physical seals. Ensure that the backflow membrane is completely dry, lying flat, and correctly positioned within the linker. Inspect the silicone valve for any tiny tears or gaps, as even a microscopic tear can ruin the vacuum. Verify that the motor unit is seated firmly on the cup and check that the battery is sufficiently charged; a low battery can cause the motor to operate at a lower efficiency.
Low Milk Output
If your milk output is lower than expected, do not immediately assume you have a low milk supply. First, evaluate your physical comfort, hydration levels, and stress. Ensure you have eaten and are drinking enough fluids to support lactation. Double-check your flange size, as a poor fit is the most common culprit behind a sudden drop in yield. Pumping in a warm room or applying a warm compress to your breasts for a few minutes before pumping can also help stimulate flow.
Pain or Discomfort
If pumping causes sharp pain, skin cracking, or bleeding, you must observe a strict stop-condition. Stop pumping immediately. Lower the suction setting, re-verify your flange size, and inspect your skin for damage. Do not attempt to “push through” the pain, as this can lead to mastitis or permanent tissue damage. Consult an International Board Certified Lactation Consultant (IBCLC) or your healthcare provider before resuming use to ensure your safety and physical well-being.
Cleaning, Sterilizing, and Storing the Pump
Maintaining a strict hygiene routine for your breast pump is vital to protect your baby’s developing immune system and ensure the longevity of your device’s components.
Immediately after you finish pumping, disassemble all parts that have come into contact with breast milk. Rinse these parts under cold, running water to wash away residual milk. Skipping this step allows milk proteins and fats to stick to the silicone and plastic, creating a film that is difficult to remove and can harbor bacteria.
After rinsing, wash all washable parts thoroughly in warm, soapy water. Use a mild dishwashing liquid and a dedicated cleaning brush reserved exclusively for your baby’s feeding equipment. Avoid using harsh chemical cleaners or abrasive scrubbing pads, which can scratch the plastic and create microscopic grooves where bacteria can multiply. Once washed, rinse the parts thoroughly under clean running water and place them on a clean, dedicated drying rack to air-dry completely in a well-ventilated area.
Before sterilizing your pump components, check the manufacturer’s manual to confirm which specific plastic and silicone parts are safe for boiling, steam sterilization, or UV sterilization. High heat can degrade silicone valves and membranes faster, so only sterilize parts as recommended by the manufacturer.
Never submerge the main motor unit or any electronic components in water, and never place them inside a sterilizer. To clean the motor, simply wipe the exterior surface with a clean, damp cloth or a sanitizing wipe, and allow it to air-dry completely before your next use.
Frequently Asked Questions (FAQ)
How long should a typical pumping session with the Momcozy M6 last?
A typical pumping session should last between 15 and 20 minutes per breast. This timeframe is generally sufficient to empty the breasts thoroughly without causing unnecessary tissue fatigue. If your milk stops flowing entirely for several consecutive minutes, stop the session early; continuing to pump dry can cause friction, swelling, and nipple damage.
Is it safe to use the Momcozy M6 while lying down or sleeping?
No, you should never use the pump while lying completely flat or sleeping. Lying down increases the risk of milk leaking past the backflow protector and entering the motor, which can destroy the electronics. Additionally, sleeping while pumping can lead to over-pumping, skin damage, or potential choking hazards if milk overflows. Always maintain an upright or slightly semi-reclined position to allow gravity to assist the collection process safely.

Community discussion
Share your experience or ask a question. Comments are reviewed before publication.