
Setting up and using your Eufy S1 Pro pump correctly is the key to achieving a comfortable, efficient, and stress-free milk expression routine. To get the most out of this wearable breast pump, you must focus on three core pillars: ensuring a precise flange fit, assembling the silicone components to create an airtight seal, and navigating the settings to mimic your baby’s natural nursing rhythm. By mastering these steps, you can optimize your daily milk output while fully protecting your delicate breast tissue from friction or discomfort.
Preparing for Your Pumping Session
Before you begin, establishing a clean and calm environment is essential for supporting the hormonal triggers required for milk let-down. Wash your hands thoroughly with warm water and soap for at least twenty seconds to prevent introducing bacteria to your pump parts or collected milk. Find a comfortable, supportive seat where you can relax, as stress and physical discomfort can actively hinder your milk flow.
Next, gather all the necessary components and perform a quick visual inspection. Check the silicone membranes, duckbill valves, and breast shields for any signs of wear, such as tiny tears, stretching, or cloudiness. Even a microscopic tear in a silicone valve can cause a dramatic drop in suction power, rendering your session inefficient. Keep a clean, dry surface nearby to lay out your assembled parts.
Products mentioned in this guide


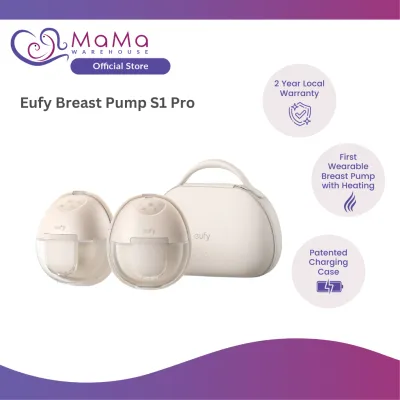
Prices are valid at publication and may change. Please refer to the product page for the latest price.
Finally, verify the power status of your pump’s main motor unit. Look at the device’s indicator lights or digital display to ensure the battery has sufficient charge for a complete session. If you are planning to pump while multitasking or away from home, starting with a fully charged battery prevents the inconvenience of a mid-session shutdown.
Assembling the Eufy S1 Pro Pump
Correct physical assembly is the foundation of reliable suction and leak prevention. Begin by pressing the silicone membrane firmly into the connector housing, ensuring the edges sit completely flush within the designated groove to prevent air from escaping.

Next, install the duckbill valve onto the bottom of the connector. Hold the valve by its thick base rather than the delicate tip, and push it upward until it is securely seated. The slit at the tip of the duckbill valve must close completely when at rest; if it gapes open, the pump will struggle to build vacuum pressure.
Once the internal valves are secure, align the breast shield with the front of the connector and push it in firmly until it clicks into place, ensuring there are no gaps along the perimeter.
Attach the assembled connector unit to the milk collection bottle by twisting it carefully. Ensure the threads are aligned straight to avoid cross-threading, which can cause leaks, and tighten until snug without over-tightening.
Lastly, mount the main pump motor onto the top of the assembled collection kit. Ensure the motor port aligns precisely with the air inlet on the connector. Press down firmly until the motor clicks securely into place, confirming that the physical connection is stable and airtight before you place the pump on your breast.
Adjusting Suction and Massage Modes
Operating your breast pump effectively requires understanding how to transition between different stimulation and expression settings. When you first turn on the device, it typically defaults to a fast, shallow rhythm known as massage or stimulation mode. This rapid pulsing mimics a hungry baby’s initial quick sucks, which signal your body to release hormones and trigger the milk let-down reflex.
Remain in this stimulation mode for approximately two minutes, or until you observe milk beginning to drip or flow steadily into the collection bottle. Once your milk starts flowing, transition the pump into the slower, deeper expression mode. This mode uses longer, stronger vacuum draws to efficiently empty the breast.
When adjusting the suction levels in expression mode, always prioritize personal comfort over the maximum setting. Increasing the suction to a painful level does not yield more milk; instead, pain triggers adrenaline, which can actively block your let-down reflex and reduce your overall output. Gradually increase the suction level one step at a time until you feel a firm but comfortable tug, then back it down one level if you experience any pinching or discomfort.
Familiarize yourself with the specific button layout and display icons of your device by reviewing the manufacturer’s user manual. Knowing exactly how to toggle between modes and adjust levels without looking directly at the pump makes it much easier to manage your sessions discreetly, especially when wearing the pump under your clothing.
Pumping Techniques for Effective Expression
Achieving optimal milk expression depends heavily on how you position the pump against your body. Start by centering your nipple precisely within the tunnel of the breast shield before turning the motor on. If the nipple is off-center, it will rub against the plastic walls of the tunnel, leading to painful friction, swelling, and restricted milk ducts.
If you feel rubbing or pinching, turn off the pump immediately, break the vacuum seal with your finger, and reposition the shield. You may need to measure your nipple diameter to ensure you are using the correct flange size. A flange that is too large will draw too much of your areola into the tunnel, while a flange that is too small will compress your nipple and block milk flow.
Keep your pumping sessions within a reasonable timeframe to protect your breast tissue. Most lactation professionals recommend pumping for fifteen to twenty minutes per session. Pumping past thirty minutes rarely yields significantly more milk and can cause tissue inflammation or soreness that makes subsequent sessions painful.
To encourage a faster and more complete milk release, consider applying a warm compress to your breasts for a few minutes before you begin pumping. Gentle breast massage—starting from the chest wall and moving toward the nipple—before and during your session can also help stimulate the milk ducts and ensure the breasts are thoroughly emptied.
Cleaning and Maintaining the Pump Parts
Maintaining strict hygiene standards is vital for protecting your baby’s health and ensuring your pump components function correctly over time. As soon as you finish your pumping session, carefully disassemble all parts that have come into contact with breast milk. Leaving milk residue on silicone valves and plastic connectors allows bacteria to multiply rapidly and can cause the parts to degrade.
Rinse all disassembled parts with cool water first to remove residual milk proteins, which can bake onto the plastic if exposed to hot water immediately. Next, wash the parts in warm, soapy water using a dedicated basin and a soft brush reserved solely for baby feeding items. Avoid washing pump parts directly in the kitchen sink, as the sink surface can harbor harmful pathogens.
If the manufacturer’s instructions permit, you may wash certain hard plastic components on the top rack of a dishwasher. However, delicate silicone parts like membranes and duckbill valves should always be washed gently by hand to prevent tearing or warping.
After washing, rinse the parts thoroughly under running water to remove all soap residue. Place them on a clean, dedicated drying rack or a fresh paper towel in a well-ventilated area, allowing them to air-dry completely. In humid environments like Singapore, ensuring adequate airflow is crucial to prevent mold growth. Refer to your user manual for specific sterilization guidelines, which may include boiling or using a steam sterilizer for designated components.
Troubleshooting Common Setup and Usage Issues
If you experience a sudden drop in suction or find that the pump is not drawing milk effectively, the issue is often related to assembly or wear. Begin by turning off the device and checking the silicone duckbill valve and membrane. Ensure they are completely dry, as moisture on these parts can break the vacuum seal, and verify that they are pressed firmly into place without any gaps.
If the physical assembly is correct but suction remains weak, inspect the silicone parts closely for microscopic tears or stretching. Over time, regular washing and sterilization will cause silicone to lose its elasticity. Replacing these consumable parts according to a regular schedule will restore the pump’s original performance.
When pumping causes physical pain or results in very low milk output despite active let-down, re-evaluate your breast shield size. Nipple size can change throughout your breastfeeding journey, meaning a flange that fit perfectly in the first week may become too small or too large a month later. Using a printable sizing ruler can help you verify your current measurements.
If the pump motor makes unusual grinding noises, vibrates excessively, or fails to power on even after being connected to a functional charger, do not attempt to open or repair the motor housing yourself. Doing so can void your warranty and compromise electrical safety. Stop using the device immediately and contact the manufacturer’s customer support team for professional assistance.
Frequently Asked Questions (FAQ)
How often should I replace the silicone pump parts?
Silicone components such as duckbill valves, membranes, and breast shield inserts are consumable items that naturally wear out with regular use. For optimal performance, visual checks should be performed weekly to look for stretching, tearing, or cloudiness. If you pump multiple times a day, you should generally replace the duckbill valves every one to three months, and the silicone membranes every three to six months. Always refer to the replacement schedule outlined in your product manual, as worn parts are the most common cause of lost suction.
Can I use the pump while it is plugged in and charging?
You must consult your specific user manual to verify if your device supports operation while connected to a power source, as charging configurations vary by model. For safety reasons, electronic breast pumps should never be used near water sources, such as in the bath or near a filled sink, regardless of whether they are plugged in. If your manual permits pumping while charging, ensure you use only the manufacturer-approved charging cable and adapter to protect the internal battery from voltage damage.

Community discussion
Share your experience or ask a question. Comments are reviewed before publication.