
Installing a mosquito net baby canopy or cover on a crib requires a precise balance of physical security and tight, gap-free draping. The primary goal is to establish an impenetrable barrier against flying insects while ensuring the fabric remains entirely out of your infant’s reach. To achieve this, you must secure the net to a stable, out-of-reach anchor point, drape the fabric evenly over the crib rails, and tuck the excess material firmly beneath the mattress or secure it to the outside of the frame.
Failing to secure the netting properly can turn a protective accessory into a serious hazard. A loose net can easily sag into the sleeping area, creating a risk of entanglement or suffocation. By following a structured installation process, verifying the stability of your hardware, and performing routine safety checks, you can maintain a comfortable, insect-free sleep environment for your child.
Why Proper Installation Matters for Crib Safety
Singapore’s tropical, humid climate makes year-round mosquito protection a practical necessity for infant health. With dengue transmission being a persistent local concern, parents naturally seek reliable ways to shield their infants from bites. While chemical repellents have age limitations and room sprays require careful ventilation, a physical barrier over the crib offers a non-toxic, continuous line of defense.
Products mentioned in this guide
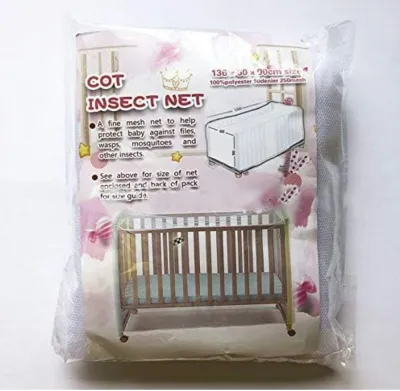
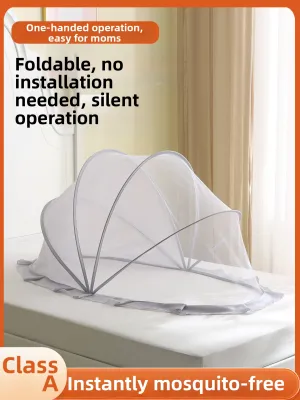
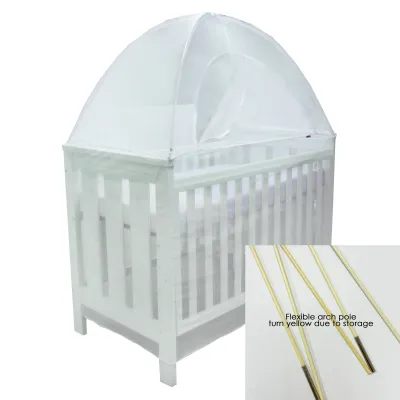
Prices are valid at publication and may change. Please refer to the product page for the latest price.
However, the protective benefits of a mesh cover are entirely dependent on how safely it is installed. Loose fabric, dangling adjustment strings, or poorly secured metal hoops in or around a crib pose severe safety risks. If a baby pulls the fabric into the crib, they face immediate hazards of strangulation or suffocation. Infant sleep spaces must remain completely free of soft bedding, loose objects, and reachable fabrics.
Safe sleep guidelines and your specific crib manufacturer’s instructions must always take precedence over general installation hacks or aesthetic styling trends. Never compromise structural stability for a visually pleasing drape. If a netting accessory conflicts with the safety warnings of your crib, do not attempt to modify either product; instead, prioritize the crib’s native safety guidelines.
Tools and Materials Needed for Installation
Before beginning the installation, gather all necessary tools and inspect your equipment to ensure a smooth, uninterrupted setup. Having the correct, manufacturer-approved components on hand prevents the temptation to use unsafe workarounds midway through the process.

- Crib-Specific Mosquito Net: Ensure the net is specifically designed and sized for your exact crib model or standard dimensions. Standard utility nets or adult-sized bed canopies are not safe substitutes.
- Manufacturer-Provided Mounting Hardware: This includes rigid hoops, specialized floor stands, pop-up frames, or secure crib-rail brackets designed to support the weight of the mesh.
- Measuring Tape: Useful for verifying that the height of the mounting bracket or ceiling anchor keeps all suspension elements completely out of your child's reach.
Do not use makeshift strings, household rubber bands, safety pins, or unapproved adhesives to secure the net to the crib. These temporary fixes can easily snap, detach, or degrade under tension, presenting immediate choking and physical hazards to an active infant.
Step-by-Step Guide to Installing Your Mosquito Net Baby Shield
Setting up your protective canopy requires a systematic approach to ensure every attachment point is load-bearing and every fold of fabric is secure. Always perform this installation when your baby is out of the crib and in a safe, supervised play area. Taking your time during assembly ensures you will not overlook small gaps or loose fittings.
Step 1: Inspect the Net and Crib Frame
Begin by laying the netting flat on a clean surface to inspect its overall structural integrity. Carefully check the entire mesh surface for small holes, tears, or loose threads that could snag tiny fingers or allow mosquitoes to slip through. Examine the seams and borders to ensure the stitching is robust and free of fraying.
Next, evaluate your crib frame. Ensure the wooden or metal rails are sturdy, clean, and free of sharp edges, splinters, or protruding screws that could snag and tear the delicate netting fabric during installation or daily use. If you discover any structural compromises in the crib, address them before mounting any accessories.
Finally, review the manufacturer’s manual for both the crib and the mosquito net. Verify the specific weight limits, age recommendations, and crib size compatibility. Some nets are designed exclusively for stationary cribs and should not be used on convertible toddler beds or portable playards.
Step 2: Secure the Mounting Point or Hoop
If your setup utilizes a ceiling mount or a crib-attached hoop stand, you must establish a highly stable, rigid anchor. For crib-mounted brackets, clamp the hardware tightly to the outer frame of the crib according to the manufacturer’s instructions, ensuring the bracket cannot wobble or slide when pulled gently.
For pop-up models or built-in frame nets, expand the structure fully and ensure all joints, plastic hubs, and tension rods lock securely into their designated positions. A partially locked joint can collapse unexpectedly under the weight of the fabric or during routine crib adjustments.
Most importantly, position the anchor point, suspension cords, and adjustment mechanisms completely out of your baby’s physical reach. This means the highest point of the canopy structure must be elevated significantly above the maximum reach of your baby when they are lying down, sitting, or eventually standing in the crib.
Step 3: Drape, Tuck, and Secure the Edges
Carefully drape the net evenly over the crib frame, hoop, or support stand. The fabric should cascade symmetrically down all sides of the crib, ensuring equal coverage on the front, back, and ends. Avoid pulling the fabric too tightly across one side, as this can create tension that warps the frame or pulls the mounting hardware out of alignment.
Once draped, tuck the excess fabric securely beneath the mattress, ensuring a deep, tight fold that cannot be easily kicked loose. If your specific net model features integrated securing straps or clips, fasten them tightly to the outside of the crib rails or lower frame. Never route straps or ties through the interior of the crib where your baby could access them.
Inspect the interior of the sleeping space to ensure absolutely no fabric rests inside the crib. The mesh must form a taut wall on the exterior of the rails, leaving the inner sleep environment completely clear. If the fabric sags inward or touches the mattress surface within the sleep zone, adjust the tension from the outside immediately.
Critical Safety Checks: Ensuring a Gap-Free and Hazard-Free Setup
Before placing your baby back into the crib, you must perform a rigorous post-installation safety inspection. Treat these checks as a mandatory routine every time you change the crib sheets or adjust the netting.
The Gap Check
Run your hands slowly along the entire perimeter of the mattress, paying close attention to the corners and the spaces between the mattress and the crib rails. Ensure there are no gaps larger than two fingers between the mattress, the wooden rails, and the tucked netting. Mosquitoes can navigate incredibly small openings, and more importantly, a baby can trap their limbs or face in loose folds of fabric if a gap exists.
The Sagging Check
Stand back and visually inspect the canopy from multiple angles. Verify that no portion of the net sags or droops toward the interior of the crib. The fabric must remain taut enough to stay clear of the baby’s reach, yet have enough natural play that it does not strain the mounting hardware. If you notice any dipping in the center of the canopy, adjust the suspension height or tighten the external anchor straps.
The Strangulation Check
Double-check that all ties, strings, zippers, and mounting hardware are positioned entirely outside the crib and are completely unreachable. If your net design includes internal ties, they must comply with local child safety standards—meaning they must be extremely short or non-existent inside the sleeping area. Any cord longer than a few centimeters poses a severe hazard and must be safely tucked away or trimmed if the manufacturer’s instructions permit.
The Stop Condition
If at any point during your inspection you find that the net cannot be secured tightly without sagging, or if the mounting hardware feels unstable or wobbles, stop using the product immediately. Do not attempt to reinforce an unstable setup with tape, extra ropes, or DIY modifications. Remove the net from the crib and contact the manufacturer for assistance or explore alternative insect-control options.
Maintenance and When to Stop Using the Net
Keeping your baby’s mosquito net clean and knowing when to retire it are just as important as the initial installation. Regular upkeep ensures the fabric remains breathable and free of structural weaknesses.
Cleaning and Fabric Care
Over time, fine mesh can accumulate dust, lint, and household allergens, which can restrict airflow. Wash the net regularly according to the manufacturer’s care label. Most nets require gentle hand washing in cool water with a mild detergent, followed by air drying. Avoid high-heat machine dryers, as excessive heat can shrink the synthetic fibers, warp the shape, and ruin the precise fit required for a gap-free setup.
Monitoring Developmental Milestones
You must permanently remove the mosquito net from the crib as soon as your baby reaches key developmental milestones. Specifically, stop using the net the moment your baby can pull themselves up to a standing position, push up on their hands and knees, or actively reach out to grab the netting. At this stage of mobility, the risk of your child pulling the net down, becoming entangled, or using the fabric to climb out of the crib increases dramatically.
Safe Alternatives for Older Babies
Once your child outgrows the safe usage window for a crib net, transition to environmental mosquito control methods. Installing high-quality insect screens on your nursery windows allows for natural ventilation while keeping pests out. Alternatively, utilizing air conditioning to keep the room cool, running a ceiling fan to disrupt mosquito flight patterns, or consulting your pediatrician about age-appropriate, baby-safe insect repellents can provide excellent protection without introducing physical hazards to the sleep space.
Frequently Asked Questions (FAQ)
Can I use a mosquito net if my baby pulls themselves up?
No. You must remove the mosquito net immediately once your baby can pull themselves up, stand, or reach the top of the crib rails. At this developmental stage, the child can easily grab, pull, and tear the fabric, creating a severe risk of entanglement, strangulation, or falls if they attempt to use the net to climb.
Are pop-up crib mosquito nets safer than draped ones?
Pop-up nets featuring rigid, self-supporting frames are generally safer than traditional draped nets because they eliminate the need for overhead suspension cords and ceiling anchors, which significantly reduces the risk of sagging. However, they are only safe if they are designed to fit your specific crib dimensions perfectly; an ill-fitting pop-up net can still collapse or leave dangerous gaps along the mattress edges.
Community discussion
Share your experience or ask a question. Comments are reviewed before publication.