
Baby nails are incredibly thin, sharp, and grow surprisingly fast, making regular grooming essential to prevent self-scratching. Using a specialized tool like Pigeon nail scissors, which are designed specifically for delicate infant nails, provides the control and precision needed to trim safely. The key to a tear-free experience lies in proper timing, a secure grip, and understanding the specific cutting techniques for tiny fingers and toes. By mastering these techniques, you can confidently protect your baby’s soft skin from scratches while keeping the grooming process calm and efficient.
Preparing for a Safe Nail Trimming Session
Timing is everything when it comes to baby nail care. Attempting to trim the nails of a squirming, active infant increases the risk of accidental nicks. The absolute best time to trim a baby’s nails is when they are fast asleep. Specifically, wait about twenty minutes after your baby falls asleep, as this is typically when they enter a deep sleep phase and their limbs go completely limp. Alternatively, some parents find success during quiet feeding sessions when the baby is relaxed, stationary, and distracted. Avoid trimming when your baby is hungry, overtired, or in an active play mood, as sudden movements can make the task highly challenging.
Your physical environment plays a crucial role in ensuring a safe grooming session. Choose a spot with excellent lighting, such as next to a large window with natural daylight during the day, or directly under a bright, focused reading lamp in the evening. You must be able to clearly see the tiny separation between your baby’s nail edge and the delicate skin of the nail bed. Position yourself comfortably, whether sitting on a supportive chair or on the floor, ensuring your arms are steady and you have a clear, unobstructed view of the baby’s hand. Set up a flat surface nearby to keep your grooming tools within easy reach so you never have to look away or stretch to grab them.
Products mentioned in this guide
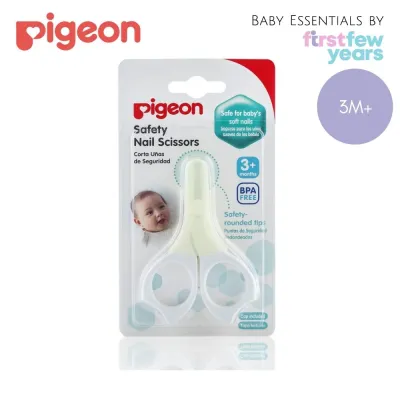
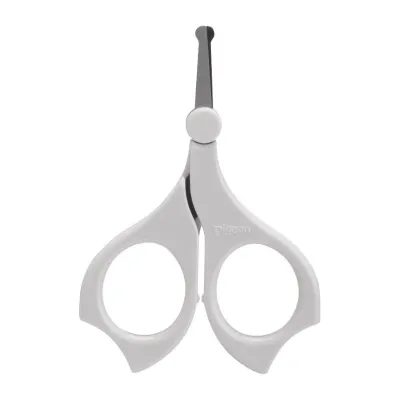

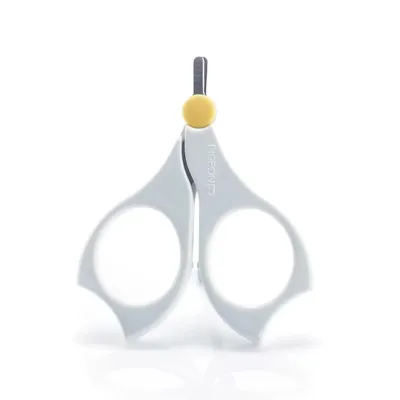
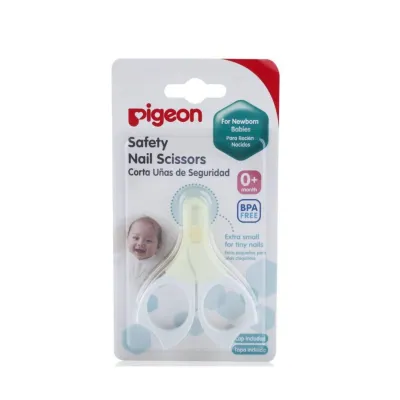
![[Kawaii Kiddy] Pigeon Newborn Baby Nail Scissors & Nail Clipper (NB - 9m+)](https://img.lazcdn.com/g/p/75970d3011c4d2d0270fb46299ee31cb.png_400x400q80.png_.webp)
Prices are valid at publication and may change. Please refer to the product page for the latest price.
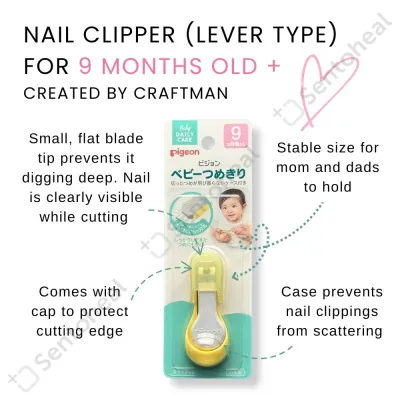
Before you begin, take a moment to familiarize yourself with your specific Pigeon nail scissors. Pigeon offers different models tailored to different developmental stages, so always check the product packaging for the manufacturer’s age recommendations. For example, the newborn model features extremely thin, short blades designed for soft, paper-thin nails from birth, while the model for babies over three months has slightly thicker blades to handle stronger nail structures. Observe the safety design features of these scissors: the rounded tips prevent accidental punctures, the short blades offer high cutting precision, and the ergonomic finger loops are designed to give caregivers a stable, slip-free grip.
Step-by-Step Guide to Trimming with Pigeon Nail Scissors
Approaching this task with a calm, patient, and confident demeanor is essential, as babies can easily pick up on parental anxiety. Before you start, wash your own hands thoroughly with soap and water to maintain hygiene. By breaking the process down into simple, controlled steps, you can turn what seems like a daunting chore into a quick and stress-free routine.

Positioning and Grip
To maintain complete control, you must secure the baby’s hand gently but firmly. A highly effective position is to hold your baby in your lap, facing away from you. This allows you to hold their hand in a natural direction, mimicking how you look at your own hands when trimming your nails. Isolate one finger at a time between your thumb and index finger. Use your thumb to gently press the sensitive finger pad down and away from the nail edge. This simple action pulls the skin back, exposing the nail clearly and creating a safe gap between the blade and the delicate nail bed. Never try to hold the entire hand loosely, as a sudden startle reflex can cause the baby to jerk their hand away.
Your grip on the Pigeon nail scissors determines your level of control and cutting precision. Insert your thumb and index finger into the loops of the scissors. The compact design of these scissors is meant to sit snugly in your fingers, allowing for micro-adjustments with minimal hand movement. Rest the side of your hand or your pinky finger against the baby’s hand or your own knee to create a stabilizing pivot point. This physical contact minimizes shaking, anchors your hand, and ensures a steady, controlled movement throughout the trimming process.
The Cutting Technique
When trimming fingernails, always follow the natural curve of the nail. Avoid trying to cut the entire nail in a single, swift chop, as this can squeeze the nail bed or result in jagged edges. Instead, make several small, controlled, incremental snips from one side of the nail to the other. This piecemeal approach allows you to adjust the angle of the blade continuously, ensuring you do not accidentally clip the skin at the corners of the finger. Pay extra attention to the thumb nail, which is often wider and may require three or four small snips to trim completely.
Toenails require a different approach because they grow slower and have a flatter shape than fingernails. Always cut toenails straight across rather than rounding the corners. Rounding the edges of toenails can encourage the nail to grow into the surrounding skin, potentially leading to painful ingrown toenails or localized irritation. Keep the cuts clean and straight, leaving the corners intact but neat. Inspect the skin around the toenails before cutting to ensure there is no pre-existing redness or swelling.
Regardless of whether you are trimming fingers or toes, always leave a small white margin of nail. Trying to cut the nail too close to the skin increases the risk of cutting the quick, which is the highly sensitive, blood-vessel-rich tissue beneath the nail plate. A safe rule of thumb is to leave about one millimeter of the white nail tip visible. This small buffer zone provides maximum protection against accidental cuts while still keeping the nails short enough to prevent scratching.
Even with precise cutting, the newly trimmed edges can sometimes feel sharp or jagged. To prevent your baby from scratching their delicate face, use a soft baby-specific nail file or emery board to gently smooth out any rough edges. Hold the file at a slight angle and stroke in a single direction rather than sawing back and forth, which can split the thin nail. This final smoothing step ensures that the nail edges are completely safe and rounded.
Safety Precautions and Handling Accidental Nicks
Establishing clear safety boundaries is vital for preventing injuries during grooming. If a nail does not cut through completely on the first try, never pull, tug, or tear it off. Tearing can rip the nail down into the quick, causing pain and bleeding. Instead, reposition the scissors and make another clean snip. Furthermore, keep the scissors strictly out of your baby’s reach at all times, even during a brief pause in the session. If your baby becomes restless, starts crying, or squirms excessively, stop the session immediately; it is far safer to finish the remaining nails later when the baby has calmed down.
Despite your best efforts and careful preparation, minor accidents can happen. If you accidentally nick the skin and cause bleeding, the most important first step is to remain completely calm. Babies take their cues from their caregivers, and panicking or gasping will only startle and frighten your baby, making them cry. Take a deep breath and reassure your baby in a soft, soothing voice while you address the cut.
To manage a minor nick, apply gentle, continuous pressure directly to the cut using a clean, sterile gauze pad or a clean cloth. Avoid using cotton wool or cotton balls, as the loose fibers can stick to the wet wound and irritate the skin or interfere with clotting. Hold the pressure steadily for a couple of minutes until the bleeding stops completely. Do not use chemical styptic pencils or liquid bandages, as these products can contain harsh chemicals that are not suitable for sensitive baby skin.
Do not apply standard adhesive bandages or plasters to a baby’s fingers or toes. Babies frequently put their hands and feet into their mouths, and a loose bandage presents a severe choking hazard. If the bandage slips off while the baby is sucking on their fingers, they could easily inhale it. Leaving the minor nick open to the air after the bleeding has stopped is generally the safest approach for rapid healing.
While most minor nicks heal quickly on their own, you must know when to seek professional medical advice. If the bleeding does not stop after several minutes of continuous, gentle pressure, consult a healthcare professional. Additionally, monitor the finger or toe over the next few days for any signs of localized infection. If you notice increasing redness, swelling, warmth, or pus around the nail area, seek medical attention promptly to ensure proper care.
Cleaning and Maintaining Your Pigeon Nail Scissors
To keep your grooming tools hygienic and performing at their best, establish a post-trim cleaning routine. After every use, wipe the stainless steel blades thoroughly with an alcohol wipe, or wash them gently with warm, soapy water to remove accumulated nail dust, natural skin oils, and moisture. In Singapore’s warm and humid climate, moisture can easily build up, making it even more important to dry the scissors immediately and completely with a clean towel to prevent rust or corrosion from forming on the blades or pivot joint. Avoid submerging the entire scissors in boiling water or placing them in steam sterilizers unless explicitly permitted by the manufacturer, as extreme heat can damage the plastic handles or affect the tension of the screw joint.
Proper storage is equally critical for maintaining the sharpness of the blades and ensuring household safety. Once the scissors are completely dry, slide them back into their original protective cap or store them inside a dedicated baby grooming case. This protects the delicate blades from getting nicked or dulled by other items. Always store the grooming kit in a secure cabinet or high shelf that is completely out of reach of children.
Frequently Asked Questions (FAQ)
How often should I trim my baby's nails?
Baby fingernails grow incredibly fast due to their high metabolic rate and typically require trimming one to two times a week to prevent them from becoming sharp claws that can scratch their face. In contrast, baby toenails grow much slower and generally only need to be trimmed once a month. However, because every infant’s nail growth rate is unique, you should regularly observe your baby’s hands and feet and trim whenever the nails extend past the fingertips or feel sharp. While some parents use scratch mittens to protect their baby’s face, keeping the nails trimmed is preferred as it allows babies to explore their environment freely with their hands, which is crucial for sensory development.
Can I use Pigeon nail scissors on a newborn?
Yes, Pigeon nail scissors are specifically designed with thin, delicate blades that make them suitable for use on newborns. However, during the first few weeks of life, a newborn’s nails are exceptionally soft, paper-thin, and closely adhered to the surrounding skin, making cutting difficult. Many pediatricians and experienced parents prefer to use a soft baby emery board to gently file down the nails during these early weeks until the nail separates more clearly from the skin. Always check the specific age recommendation printed on your Pigeon scissors’ packaging before use to ensure the model is appropriate for your baby’s current developmental stage.
Community discussion
Share your experience or ask a question. Comments are reviewed before publication.