
Trimming a newborn’s nails can feel like a high-stakes task for new parents. A baby’s tiny, delicate fingers seem incredibly fragile, and their constant, unpredictable movements make the prospect of using any sharp tool daunting. However, keeping these nails short is essential to prevent babies from scratching their sensitive facial skin. Using specialized pigeon scissors designed specifically for infants is one of the safest and most effective ways to manage this grooming task. By understanding the anatomy of newborn nails, mastering a secure holding technique, and using the right tools with patience, you can turn a potentially stressful chore into a calm, routine bonding moment.
Understanding Your Newborn's Nails and the Right Tools
Newborn nails are fundamentally different from adult nails. In the first few weeks of life, a baby’s nails are extremely soft, thin, and pliable. They grow rapidly, often appearing paper-thin, and are tightly integrated with the underlying nail bed. Because the boundary between the nail edge and the sensitive skin of the fingertip is highly obscured, it is very easy to misjudge where the nail ends and the skin begins. This delicate anatomy requires a gentle touch and specialized tools to prevent painful nicks.
Using standard adult nail clippers or household scissors on a newborn carries a high risk of injury. Adult clippers are designed for thick, rigid nails and lack the precision required for tiny fingers. The straight, wide blades of adult tools can easily trap and snip the fleshy pad of a baby’s finger. Furthermore, adult clippers obscure your line of sight, making it nearly impossible to see exactly where the cutting edge meets the nail.
Products mentioned in this guide

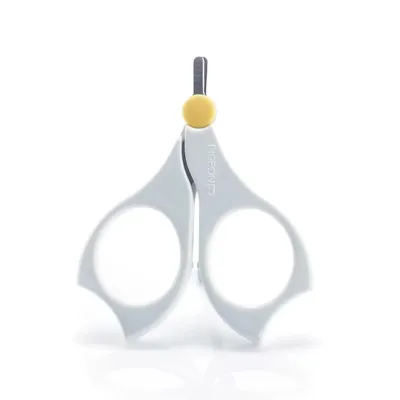
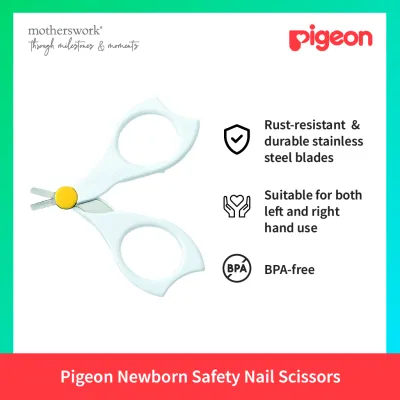
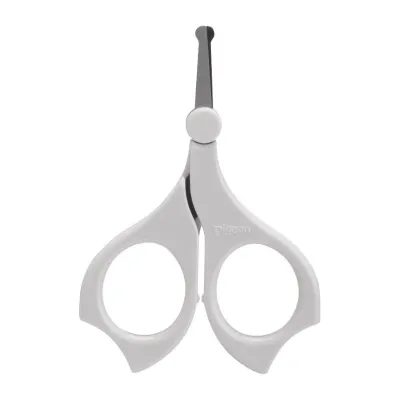

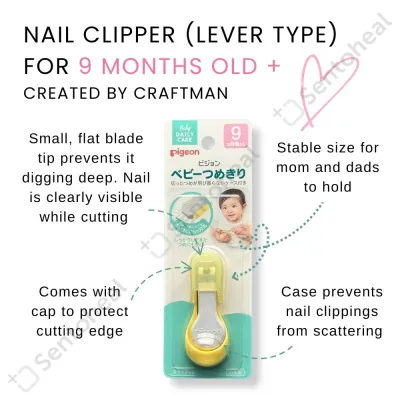
Prices are valid at publication and may change. Please refer to the product page for the latest price.
Specialized pigeon scissors are engineered specifically to address these anatomical challenges. These scissors feature exceptionally short, thin blades that allow for maximum visibility and precision during use. The tips of the blades are rounded to prevent accidental puncture wounds if the baby makes a sudden movement. Additionally, the handles are designed with ergonomic loops that provide adult fingers with a stable, slip-free grip, ensuring complete control over every micro-movement.
Parents often wonder when they should begin trimming their baby’s nails. While some newborns are born with long, sharp nails that require immediate attention, others may not need their first trim for several weeks. A reliable indicator is observing whether your baby is scratching their face or body. Because newborns lack motor control, their hands frequently move toward their faces, making timely grooming necessary to prevent painful scratches and potential skin infections.
Preparing for a Safe Nail Trimming Session
Preparation is key to a successful and stress-free nail trimming session. Before you pick up the scissors, you must ensure that your environment is optimized for safety and that you have chosen the most opportune moment. Adequate preparation minimizes the risk of sudden starts and ensures you have the focus required to work on such a small scale.

Lighting is the most critical environmental factor when grooming a newborn. You must have bright, direct light to clearly distinguish the translucent nail edge from the pink nail bed. Natural daylight near a large window is ideal, but if you are trimming indoors or in the evening, a focused, adjustable desk lamp or a bright overhead light is essential. Never attempt to trim your baby’s nails in dim lighting or shadow, as this significantly increases the risk of cutting the skin.
Timing your session strategically can make a profound difference in your baby’s cooperation. Many experienced parents find that the best time to trim nails is when the baby is in a deep sleep. During this state, their muscles are relaxed, and their startle reflex is minimized. Alternatively, trimming immediately after a bath is highly effective because the warm water softens the nails even further, making them easier to cut cleanly. A calm feeding session can also serve as an excellent opportunity, provided you have a partner to assist with positioning.
Before you begin, gather all necessary items and place them within arm’s reach. Your preparation checklist should include:
- Your sterilized Pigeon baby nail scissors
- A clean, soft muslin cloth or sterile gauze pad
- A mild, baby-safe antiseptic or clean water for pre-cleaning
- A stable surface for the baby to rest on
Ensure your own hands are thoroughly washed with soap and water, and take a moment to compose yourself; babies can sense parental tension, so maintaining a calm, steady demeanor is vital.
Step-by-Step Guide to Trimming with Pigeon Scissors
Executing the actual trim requires a combination of physical control, precise tool handling, and a clear understanding of nail geometry. By breaking the process down into distinct steps, you can maintain safety and efficiency throughout the session.
Positioning the Baby and the Hand
Securing your baby’s body is the first step in preventing sudden movements that could lead to injury. Place your baby in a highly stable position, such as in a secure baby bouncer, flat on a padded changing mat, or held snugly against your chest. If you are working alone, holding the baby in your lap while supporting their arm with your non-dominant elbow can provide excellent stability.
Once the baby is positioned, you must master the “isolation grip” to secure the target finger. Hold the baby’s hand gently but firmly in your non-dominant hand. Isolate the single finger you intend to trim by holding it between your thumb and index finger. Gently press the fleshy pad of the baby’s fingertip downward and away from the nail. This physical displacement pulls the sensitive skin out of the path of the blades, exposing the free edge of the nail clearly and creating a safe buffer zone for the scissors.
Executing the Cut Safely
Holding the Pigeon scissors correctly is essential for maintaining control. Slip your thumb and middle finger into the handle loops, using your index finger along the shaft of the scissors to stabilize your aim. This grip allows you to make micro-adjustments with minimal effort. Keep your wrist flexible but your hand steady as you position the blades.
When trimming fingernails, always follow the natural, rounded curve of the fingertip. Rather than attempting to cut the entire nail in one single, sweeping motion, make several small, controlled snips. This incremental approach prevents the nail from tearing and allows you to constantly monitor your proximity to the skin. Work slowly, moving from one side of the nail to the other.
For toenails, the technique differs slightly to prevent painful physical complications. Always cut toenails straight across rather than rounding the edges. Cutting the corners of toenails too deeply can cause the nail to grow into the surrounding skin as it matures, leading to painful ingrown toenails and potential infections. Keep the cut straight, and gently smooth any sharp corners with a soft emery board if necessary.
A fundamental rule of infant nail care is to “leave a little white.” You should never attempt to cut the nail flush with the skin line. Leaving a tiny margin of the white, free edge of the nail ensures that you remain well away from the highly sensitive nail bed (the quick). This small buffer protects the delicate tissue from friction, irritation, and accidental cuts.
Crucial Safety Precautions and Mistakes to Avoid
While using specialized pigeon scissors significantly reduces the risks associated with baby grooming, parents must remain vigilant against common mistakes. Understanding what not to do is just as important as mastering the correct technique.
One of the most dangerous and common practices is biting or tearing a newborn’s nails. Some parents believe this is safer than using metal tools, but it carries severe health risks. An adult’s mouth is filled with bacteria that can easily be transferred to the baby’s microscopic skin tears, leading to localized infections such as paronychia. Furthermore, biting or peeling the nail with your fingers can easily tear the delicate nail bed, causing pain, bleeding, and uneven nail growth.
You must strictly avoid using adult-sized grooming tools, even in a temporary pinch. Adult clippers and scissors exert too much pressure and lack the fine-tuned control required for a newborn’s micro-anatomy. If you do not have your specialized infant scissors available, it is far safer to wait until you can access them rather than risking a severe cut with inappropriate household tools.
Exposing the sensitive nail bed by cutting too short is another frequent error. When nails are trimmed excessively close to the skin, the exposed nail bed becomes vulnerable to friction from clothing, blankets, and toys. This exposure can cause persistent discomfort, making your baby fussy, and increases the likelihood of environmental pathogens entering the delicate skin barrier.
Always adhere to the “stop and wait” rule. If your baby becomes overly fussy, starts thrashing their limbs, or shows signs of distress, immediately cease the trimming session. Forcing the process increases the likelihood of a slip. Similarly, if you feel tired, frustrated, or anxious, put the scissors down and try again later. Nail grooming should never be rushed or performed under stress.
First Aid: What to Do If You Accidentally Snip the Skin
Despite your best efforts and the safety design of your tools, minor accidents can happen. If you accidentally nick your baby’s skin, it is crucial to remain calm. Children take cues from their caregivers; if you panic, your baby is more likely to become distressed. Minor nicks are highly common, bleed easily due to rich capillary networks in the fingers, and typically heal very quickly without long-term consequences.
Your immediate priority is to control any minor bleeding and keep the area clean. Follow these structured first-aid steps:
- Apply Pressure: Place a clean, sterile gauze pad or a clean muslin cloth directly over the nick. Apply gentle, continuous pressure for a few minutes until the bleeding stops.
- Avoid Blowing: Do not blow on the wound to "soothe" it. Blowing transfers oral bacteria from your mouth directly into the open cut, raising the risk of infection.
- Clean the Area: Once the bleeding has stopped, gently clean the surrounding skin with cool water. Avoid using harsh rubbing alcohol or strong chemical antiseptics, which can sting and cause unnecessary pain.
Critical Safety Warning: Never apply adhesive bandages, plasters, or liquid bandages to a newborn’s fingers or toes. Newborns frequently put their hands in their mouths. An adhesive bandage can easily become saturated with saliva, loosen, detach, and present a severe choking hazard. Instead, keep the wound clean and dry, and let it heal naturally in the open air.
You should monitor the finger closely over the next few days for any signs of complications. Seek professional medical help from a pediatrician or visit a local clinic in Singapore if:
- The bleeding does not stop after several minutes of continuous, firm pressure.
- The wound appears deep or gaping.
- You notice signs of localized infection, such as worsening redness, swelling, warmth to the touch, or the presence of pus.
Tips for Trimming Nails on a Fussy or Moving Baby
Not all babies will sleep through a nail trim, and some may remain highly active even during quiet moments. If your baby is prone to fussing or constant movement, you can employ several practical strategies to complete the task safely without causing distress.
The “sleeping baby” technique requires gentle maneuvering to avoid waking your infant. Wait until the baby has been asleep for at least twenty minutes, as this is typically when they enter a deeper, non-REM sleep cycle. Gently lift their hand, supporting the wrist with your palm. If the baby stirs, pause immediately and wait for them to settle before resuming. Keep your movements slow, fluid, and deliberate.
Distraction is a highly effective tool for awake babies. If you are trimming while your baby is awake, enlist the help of a partner or family member. Have them stand in your baby’s line of sight and use high-contrast toys, gentle singing, or expressive facial movements to capture the infant’s attention. This distraction keeps the baby’s head and eyes focused away from their hands, reducing their urge to pull away.
You do not need to complete the entire grooming session in one sitting. Pacing the task is an excellent way to reduce stress for both you and your baby. If your baby tolerates having only two or three nails trimmed before becoming restless, stop the session. You can easily trim the remaining fingers later in the day or on the following day. Breaking the task into manageable intervals ensures that each session remains safe and positive.
Frequently Asked Questions (FAQ)
How often should I trim my newborn's nails?
Newborn fingernails grow surprisingly fast and typically require trimming once or twice a week to prevent accidental scratching. In contrast, baby toenails grow at a much slower rate and usually only need to be trimmed once a month. Rather than adhering to a strict calendar schedule, observe your baby’s nails daily and trim them whenever they appear long, sharp, or if you notice any minor scratches on their face.
Can I use a nail file instead of Pigeon scissors for a newborn?
While a soft emery board or baby nail file is excellent for smoothing out rough edges, newborn nails are often too soft, thin, and pliable for filing to be highly effective on its own. Attempting to file down significant length can cause friction heat and irritate the surrounding skin. Precision tools like Pigeon baby nail scissors are generally more efficient for safely reducing length, after which a file can be used to smooth any remaining sharp corners.
Is it safe to use Pigeon nail scissors on premature babies?
Premature babies have exceptionally fragile skin, highly delicate nail beds, and underdeveloped nails that may still be fused to the surrounding tissue. Before using any grooming tools at home on a premature infant, you should consult your neonatal care team or pediatrician. They can provide specialized guidance, assess your baby’s skin readiness, and recommend the safest grooming method for their specific developmental stage.
Community discussion
Share your experience or ask a question. Comments are reviewed before publication.