
Trimming a newborn’s nails can feel incredibly daunting for new parents. A baby’s tiny fingers seem so delicate, and their constant, unpredictable movements make the task feel like a high-stakes operation. However, keeping those nails short is essential to prevent babies from scratching their own sensitive faces. By using a dedicated baby nail cutter, choosing a quiet moment when your baby is relaxed or asleep, and employing a careful, step-by-step technique, you can safely trim their nails without causing any harm.
To make this process as stress-free as possible, it is vital to understand the unique structure of infant nails and select tools specifically designed for their tiny hands. With the right preparation and a calm approach, nail care will quickly become a manageable part of your weekly routine.
Why Newborn Nail Care Requires Extra Caution
Newborn nails are structurally very different from adult nails. They are paper-thin, soft, and flexible, which means they do not always grow straight out. Instead, they often curve tightly around the contours of the delicate fingertip. This unique shape makes it difficult to distinguish where the nail edge ends and the sensitive nail bed begins, significantly increasing the risk of accidental nicks if you are not careful.
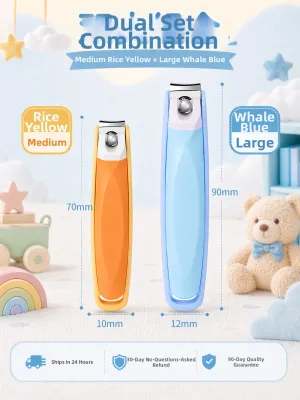
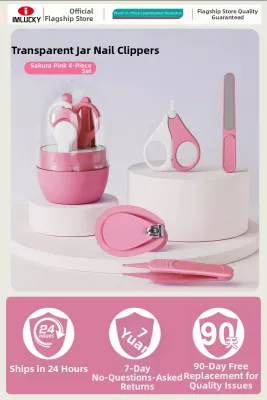
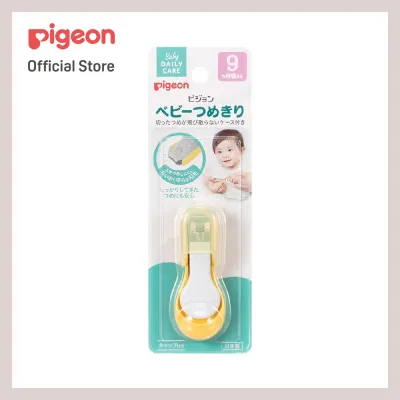
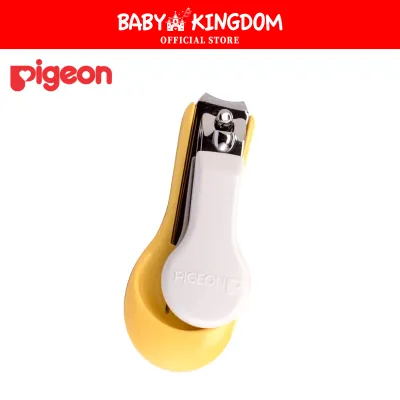
Products mentioned in this guide
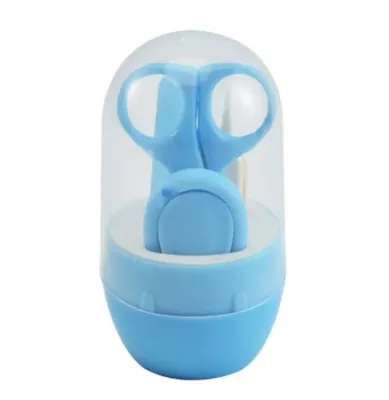
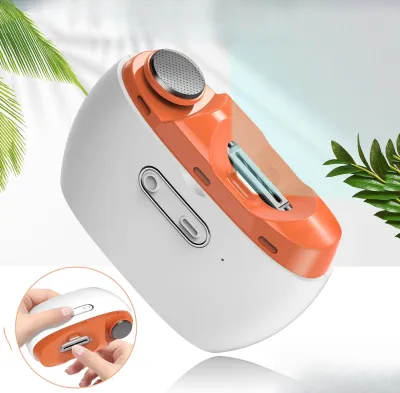
![[SG SELLER] Electric Baby Nail Trimmer with LED Light 6 in 1 Baby Nail File Kit No Claws Hurt for Newborn Toddler](https://img.lazcdn.com/g/p/02552c6b2758eefb2cb6fa7e9c4e898d.jpg_400x400q80.jpg_.webp)
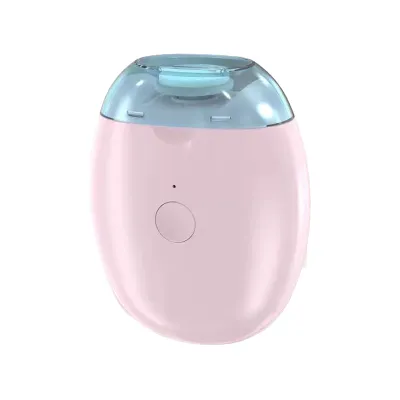
Prices are valid at publication and may change. Please refer to the product page for the latest price.
The physical proximity of the nail bed to the surrounding skin poses another challenge. Because a newborn’s fingers are so small, the margin of error when cutting is virtually non-existent. A standard clipper can easily catch the soft skin of the fingertip, leading to painful pinches or bleeding that can distress both you and your baby.
Additionally, babies do not possess voluntary motor control in their first few months. They are prone to sudden, jerky movements, such as the startle reflex, which can occur without warning. A sudden twitch while you are holding a sharp tool near their fingers can easily lead to an injury. Their lack of cooperation and natural tendency to clench their fists mean you must use specialized tools and precise physical techniques to keep them safe.
Choosing the Right Baby Nail Cutter and Tools
Selecting the correct tool is the most critical decision you will make for your infant’s nail care. A dedicated baby nail cutter is specifically engineered to accommodate the tiny size and soft texture of a newborn’s nails. When shopping at local baby specialty stores or online marketplaces, look for essential safety features that minimize risk.

An ideal baby nail cutter should feature rounded safety tips on the blades to prevent accidental puncture wounds. Look for models with ergonomic, slip-resistant handles that allow you to maintain a firm grip, even if your hands are slightly damp. Some advanced models come equipped with built-in magnifying glasses or small LED lights, which are incredibly helpful for illuminating tiny fingertips and ensuring you can clearly see the boundary between the nail and the skin.
There are three main types of nail tools designed for infants:
- Baby Nail Clippers: These resemble miniature versions of adult clippers but feature a much smaller cutting arc and a guard to prevent cutting too close to the skin. They are highly effective but require a steady hand. Basic models are very budget-friendly, typically costing under S$5.
- Baby Nail Scissors: These have thin, curved blades with blunt, rounded tips. They offer excellent control and visibility, allowing you to make precise, gradual cuts. High-quality safety scissors generally range from S$8 to S$15.
- Electric Nail Files (or Trimmers): These battery-operated devices use rotating, cushioned pads covered in fine sandpaper to gently file down the nail. They are highly popular because they stop rotating if they touch the skin, virtually eliminating the risk of cuts. These kits often range from S$15 to S$40, depending on the brand and included attachments.
You must explicitly avoid using adult nail clippers or standard household scissors. Adult tools are far too large, and their straight or heavily curved blades are designed for much thicker, tougher nails. Using them on a newborn makes it almost impossible to see what you are doing, posing an extremely high risk of snipping the baby’s delicate skin. Always read the manufacturer’s packaging to verify the recommended age range and usage instructions for any tool you purchase.
Preparing Your Baby and the Environment
Creating a calm environment and choosing the right timing are essential steps to minimize sudden movements and ensure a successful trim. Attempting to cut a baby’s nails when they are awake, active, or hungry is a recipe for frustration and potential injury.
The absolute best time to trim a newborn’s nails is when they are in a deep sleep. During this phase, their muscles relax, their fists open naturally, and they are far less likely to startle or pull away. Alternatively, you can trim their nails while they are calm and feeding, as their attention is entirely focused elsewhere. Another excellent window is immediately after a bath, when the warm water has made their already soft nails even more pliable and easier to cut.
Your physical setup is just as important as the timing. Choose a room with bright, direct lighting so you can see every detail of the tiny fingertip. Sit in a stable, comfortable position, such as a supportive armchair. If you are trimming while the baby is awake, having a second adult assist you can make a massive difference. One person can gently hold the baby’s arm and distract them with a toy or soft singing, while the other focuses entirely on the precise movements of the baby nail cutter.
Step-by-Step Guide to Trimming Newborn Nails Safely
Before you begin, wash your hands thoroughly and clean your chosen baby nail cutter with an alcohol wipe. Situate yourself in your prepared, well-lit space and take a deep breath to ensure your own hands are steady.
First, establish a secure but gentle grip on your baby’s hand. Hold their hand firmly in yours, and use your fingers to isolate a single digit at a time. Keep the other fingers tucked away gently so they do not accidentally get in the way of your tool.
The most critical safety technique is to press the finger pad—the soft skin at the tip of the finger—down and away from the nail. By gently pulling this skin backward, you create a clear gap between the nail edge and the delicate skin beneath it. This simple action ensures that the blades of your baby nail cutter only make contact with the nail itself.
When cutting, always make small, controlled snips rather than attempting to clip the entire nail in a single, swift motion. Taking multiple small cuts gives you much greater control and prevents the tool from sliding or catching the skin.
Trimming the Fingernails
When addressing the fingernails, follow the natural curve of the fingertip. Cut slowly, starting from one side of the nail and working your way across to the other. Once you have finished clipping, run your own clean finger gently over the edge of the baby’s nail to check for any sharp corners or jagged edges. If you find any rough spots, use a soft baby emery board to gently smooth them out, filing in a single downward direction to avoid tearing the delicate nail layers.
Trimming the Toenails
Trimming toenails requires a slightly different approach. Always cut toenails straight across rather than following a curved line. Curving the edges of toenails can cause them to grow into the surrounding skin, leading to painful ingrown toenails. Keep in mind that newborn toenails grow much slower and are often thicker than fingernails, meaning they will require less frequent attention, but they still demand the same level of care and precision.
First Aid: What to Do If You Accidentally Nick the Skin
Even with the utmost care, accidental nicks can happen to the most experienced parents. If you do clip the skin, the most important first step is to remain completely calm. Babies quickly pick up on parental anxiety; if you panic or gasp loudly, your baby is far more likely to start crying from fear rather than the actual minor injury.
Immediately apply gentle pressure to the cut using a clean, sterile gauze pad or a fresh tissue. Hold the pressure steadily for a couple of minutes until the bleeding stops completely. Because a baby’s blood volume is small, even a tiny nick can look like it is bleeding heavily, but it usually stops very quickly with simple pressure.
There are several unsafe practices you must strictly avoid during first aid. Never put the baby’s bleeding finger into your own mouth to clean it. Human saliva contains a high concentration of bacteria, which can easily introduce an infection into the fresh wound. Additionally, do not apply standard adhesive bandages to a newborn’s fingers. Babies constantly put their hands in their mouths, and a small bandage can easily become wet, detach, and present a severe choking hazard.
Keep a close eye on the finger over the next few days. If the bleeding does not stop after several minutes of continuous, direct pressure, or if you notice signs of infection—such as localized redness, swelling, warmth, or pus—consult a qualified healthcare professional or visit a local clinic immediately.
Alternatives and Ongoing Nail Care Tips
If the thought of using a metal baby nail cutter still makes you anxious during your baby’s first few weeks, there are highly effective alternatives. A simple, soft baby emery board can be used to file down the nails gently without any cutting tools. Because newborn nails are so soft, filing them down once or twice a week is often more than enough to keep them short and prevent scratching.
An electric nail file is another excellent alternative that offers peace of mind. These devices gently buff away the nail edge and stop automatically if they touch the skin, making them incredibly safe for nervous parents. Always supervise your baby closely during any grooming routine, and store all nail care tools safely out of reach of children.
As your baby grows, establish a regular routine of checking their nails every few days. Monitor the nail beds consistently for any signs of redness, swelling, or unusual growth patterns. If you notice any persistent redness around the edges of the nails, or if the nail appears to be growing deeply into the skin, consult your pediatrician or a qualified healthcare professional for professional advice rather than attempting to perform deep cuts yourself.
Frequently Asked Questions (FAQ)
How often should I trim my newborn's nails?
A newborn’s fingernails grow surprisingly fast and typically require trimming up to twice a week to keep them short and smooth. In contrast, their toenails grow at a much slower rate. You will generally only need to trim their toenails once or twice a month, though you should still check them weekly to ensure they are not catching on socks or sleepsuits.
Is it safe to bite my baby's nails to keep them short?
No, you should never bite or peel your baby’s nails to shorten them. Biting introduces harmful oral bacteria from your mouth directly into any micro-tears in the baby’s delicate skin, which can lead to painful infections like paronychia. Furthermore, because a newborn’s nails are so tiny and closely attached to the nail bed, biting them makes it incredibly easy to accidentally tear the skin or bite the fingertip itself, causing unnecessary pain and injury.
Community discussion
Share your experience or ask a question. Comments are reviewed before publication.