
Setting up a baby cot mosquito net correctly is one of the most effective ways to protect your infant from insect bites while they sleep. To install it properly, you must identify your specific netting style, use secure and manufacturer-approved mounting hardware, and conduct a rigorous safety inspection to ensure no loose fabric can enter the sleeping area. In Singapore’s tropical climate, where mosquitoes are active year-round, keeping your nursery safe requires a balance of physical protection and strict adherence to infant sleep safety standards.
While a physical barrier offers excellent defense against pests, an improperly installed net poses severe risks, including entanglement, choking, and suffocation. Every step of the installation process must prioritize structural stability and keep all components entirely out of your baby’s reach. By following systematic setup procedures and performing daily safety checks, you can maintain a secure, comfortable, and insect-free sleeping environment for your child.
Preparing for Installation: Tools and Baseline Safety Rules
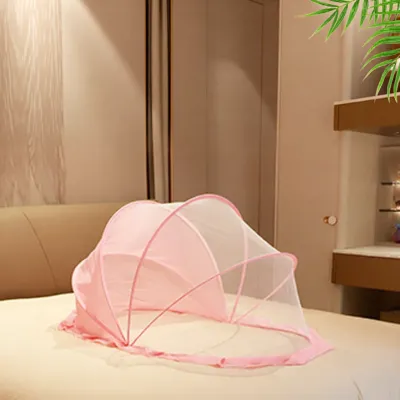
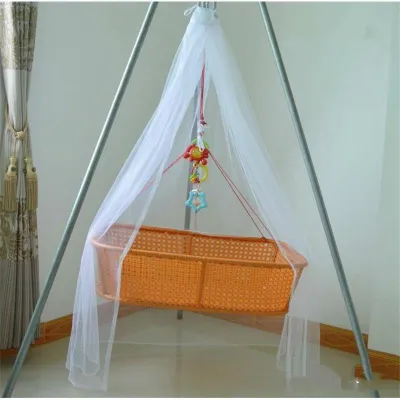
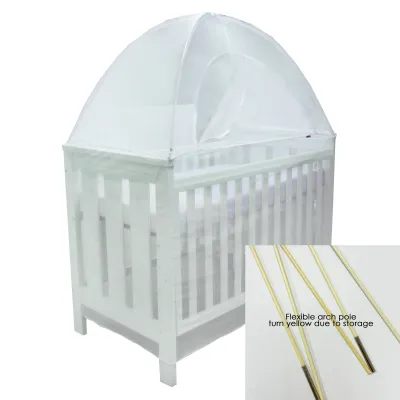
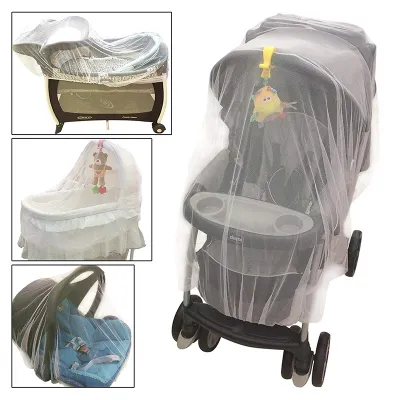
Before beginning the installation process, you must identify the exact design of your baby cot mosquito net. The three most common configurations are hoop or canopy-style nets, box or frame-supported nets, and pop-up or fitted nets. Each type requires a distinct mounting method, and mixing hardware or guessing the setup can lead to structural failure. Locate the manufacturer’s instruction manual for both your baby cot and the netting system, as these documents contain critical weight limits, mounting specifications, and compatibility warnings.
Products mentioned in this guide




Prices are valid at publication and may change. Please refer to the product page for the latest price.
Next, gather the basic, safe tools required for your specific net type. Depending on the design, you may need a sturdy step stool, a measuring tape, and non-damaging mounting hardware such as wall anchors or specialized clips. Only use tools and fasteners that are explicitly permitted by the cot manufacturer. If you are mounting a canopy net to a ceiling or wall, ensure you have the correct drill bits and wall plugs suitable for your home’s wall material, such as concrete or drywall.
Establish a non-negotiable safety boundary before you begin: never drill into, alter, or compromise the structural integrity of the baby cot itself. Modifying the wooden or metal rails of a cot can weaken the frame, void the manufacturer’s warranty, and create hazardous gaps or sharp edges. All brackets, poles, and attachment points must rely on clamp-on mechanisms or independent wall mounts designed specifically for nursery use without damaging the cot.
Finally, eliminate any makeshift securing materials from your workspace. Never use loose strings, ribbons, heavy household hardware, or adhesive tape to secure the netting to the cot. These materials can easily fail under tension, creating immediate strangulation or choking hazards if they fall into the sleeping area. Every fastener used must be a dedicated, manufacturer-approved component designed to withstand a baby’s pulls and shifts.
Step-by-Step Installation Guide by Baby Cot Mosquito Net Type
Different designs of baby cot mosquito nets require unique approaches to ensure they remain stable and secure. Whether you are suspended a canopy from above or securing a fitted cover directly to the mattress frame, following the correct sequence prevents dangerous sagging and structural collapse.

Installing a Hoop or Canopy-Style Net
Hoop or canopy-style nets suspend from a single overhead point, draping fabric downward to cover the entire cot. Because this style relies on gravity and suspension, the mounting point must be incredibly secure and positioned carefully relative to the cot’s layout.
- Step 1: Locate the mounting point. Identify a secure position on the ceiling or wall directly above the center or the head of the cot. Ensure this point is high enough that the hoop hangs well out of the baby's reach, even when they stand up or stretch their arms upward. Never position the mounting point directly over the center of the sleeping surface if there is any risk of the hardware falling.
- Step 2: Install the mounting hardware. Use a measuring tape to mark the exact spot, then install the mounting hook. For concrete ceilings or walls common in Singapore apartments, use high-quality masonry wall plugs and screws to ensure the hook can support several times the weight of the net. Test the hook's stability by giving it a firm downward tug before hanging any fabric.
- Step 3: Hang and drape the net. Suspend the hoop from the installed hook using the provided high-strength loop or chain. Let the netting drape naturally over the sides of the cot, ensuring it covers all four sides evenly without any gaps. The fabric should flow smoothly down the exterior of the cot rails.
- Step 4: Secure the excess fabric. To prevent the net from blowing inward or being pulled into the cot, tuck the excess fabric securely under the mattress. Alternatively, use manufacturer-approved, child-safe exterior clips to fasten the netting to the outer legs or base of the cot. Ensure no loose fabric pools inside the sleeping enclosure.
Installing a Box or Frame-Supported Net
Box or frame-supported nets utilize a rigid structure of metal or plastic poles that attach directly to the cot’s frame, creating a rectangular canopy that keeps the netting taut and away from the baby.
- Step 1: Assemble the frame poles. Lay out all frame segments on a clean floor. Connect the poles according to the manufacturer's diagram, ensuring all joints, spring-loaded buttons, and locking mechanisms click firmly into place. A partially locked joint can collapse under the weight of the fabric.
- Step 2: Attach the support poles to the cot. Align the mounting brackets of the frame with the designated slots or rails on the baby cot. Tighten the clamp-on brackets securely, ensuring they grip the cot rails tightly without warping the wood or metal. Double-check that the vertical poles do not wobble and are perfectly perpendicular to the floor.
- Step 3: Drape and align the rectangular net. Carefully lift the rectangular net over the assembled frame. Align the corners of the netting with the corners of the frame to distribute tension evenly. If the net is misaligned, it may sag in the center, bringing the fabric dangerously close to the sleeping surface.
- Step 4: Fasten the bottom edges. Secure the bottom edges of the netting to the base of the cot or tuck them under the mattress. Use the integrated fasteners, such as velcro straps or ties, to secure the net to the lower frame of the cot. Ensure these fasteners are tied on the outside of the cot, completely out of the baby's reach.
Setting Up a Pop-Up or Fitted Net
Pop-up or fitted nets use flexible, integrated wire frames or elastic borders to hold their shape, making them highly portable and relatively simple to deploy over a cot mattress.
- Step 1: Unfold the pop-up net safely. Remove the pop-up net from its storage sleeve in a clear, open area away from children and fragile objects. Hold the frame firmly and allow the flexible wire to expand slowly and fully. Avoid letting the frame snap back rapidly, which can damage the internal wires or cause injury.
- Step 2: Position the net over the mattress. Place the expanded net directly over the cot mattress. If the net features a fitted skirt or elastic bands, stretch them over the corners of the mattress just like a fitted sheet. Ensure the elastic sits deep beneath the mattress corners so it cannot slip off.
- Step 3: Secure the integrated fasteners. If the net design includes zippers, buckles, or straps that attach to the cot's wooden slats, secure them tightly. The net must sit flush against the mattress and the inner sides of the cot, leaving no gaps where a baby's head or limbs could become wedged.
- Step 4: Verify tension and alignment. Inspect the top and sides of the pop-up net. The flexible frame must hold the mesh taut and upright, preventing any portion of the fabric from sagging or collapsing inward toward the sleeping area.
Post-Installation Safety Checks: Preventing Entanglement and Suffocation
Once the installation is complete, you must perform a rigorous safety inspection before placing your baby in the cot. A single loose component or misplaced cord can turn a protective net into a serious hazard. Walk through the following checklist systematically:
- The Reach Test: Kneel down next to the cot and assess the setup from your baby's perspective. Ensure that no part of the netting, including ties, hooks, hoops, or excess fabric, can be reached by your baby from any position inside the cot. Consider every developmental milestone: can they reach it while lying flat, rolling over, sitting up, or standing and stretching their arms to their absolute limit? If any part of the net can be grasped, it must be raised or adjusted immediately.
- Strangulation Hazard Check: Inspect the entire installation for loose cords, long strings, or loops. If the net relies on ties to secure it to the cot frame, these ties must be trimmed short or secured completely flat against the cot's exterior. Never leave dangling cords or excess ribbon length that a baby could wrap around their neck or fingers.
- Suffocation and Airflow Check: Verify that the netting is pulled completely taut across its frame or suspension points. The fabric must not sag or drape loosely into the sleeping space, where it could collapse onto a baby's face if they roll against the side of the cot. Additionally, check that the mesh size is small enough to block insects but large enough to allow free, unobstructed airflow. Ensure the mesh pattern does not have openings large enough to trap a baby's fingers or toes.
- Structural Integrity Check: Gently shake the cot to simulate a baby shifting, bumping, or pulling against the rails. The net's frame, mounting hardware, or suspension hoop must remain completely secure, without shifting, sliding, or wobbling. If any bracket slips or the overhead hook sways excessively, tighten the connections or reinstall the mounting hardware.
- Stop Condition: If the mosquito net continues to sag, requires makeshift repairs, or cannot be secured without leaving loose fabric inside the cot, stop using it immediately. Remove the net from the nursery and consult the manufacturer for guidance, or transition to an alternative baby-safe insect protection method.
Routine Maintenance and Cleaning for Long-Term Safety
To ensure your baby cot mosquito net remains safe and effective over time, establish a regular inspection and maintenance routine. Environmental factors, normal wear, and washing can affect the structural integrity of the mesh and its attachments.
Before every nap and nighttime sleep, perform a quick visual inspection of the net. Check for small tears, holes, frayed edges, or broken seams. Even a tiny opening can allow mosquitoes to enter, defeating the purpose of the net, while larger tears can trap a baby’s fingers or limbs. Examine the frame joints and mounting brackets to ensure no plastic has cracked and no screws have loosened over time.
When cleaning the net, always follow the manufacturer’s care label instructions precisely. In general, mosquito netting is delicate and should be hand washed or laundered on a gentle machine cycle inside a mesh laundry bag. Use a mild, fragrance-free, baby-safe detergent to prevent skin irritation or respiratory discomfort for your infant. Avoid using bleach or harsh fabric softeners, as these chemicals can degrade the synthetic fibers of the mesh, making it brittle and prone to tearing.
After washing, air dry the net completely before reinstalling it on the cot. In humid environments, reinstalling a damp net can quickly lead to the growth of mold or mildew, which poses respiratory risks to your baby. Hang the net in a well-ventilated indoor area or a shaded outdoor spot. When the net is not in use, store it in a clean, dry storage bag away from direct sunlight to prevent the fabric from weakening and yellowing over time.
Frequently Asked Questions (FAQ)
Is it safe to use a mosquito net for a newborn?
A mosquito net is safe for a newborn only when it is installed perfectly according to the manufacturer’s instructions, with zero loose fabric, strings, or hardware inside the cot. Pediatric safe sleep guidelines emphasize that a baby’s crib must remain completely bare of loose items, including loose blankets, pillows, toys, and sagging fabric, to prevent suffocation. If you choose to use a net, it must be pulled completely taut and kept entirely out of the newborn’s reach, ensuring excellent ventilation and a clear view of the baby at all times.
Can I use a mosquito net if my baby can stand up in the cot?
Once a baby reaches the developmental stage where they can sit up, pull themselves up, stand, or climb, the risk of entanglement increases significantly. At this stage, babies can easily grab, pull down, or wrap themselves in hanging netting, even if it was previously out of reach. Check your net’s manual for specific age, height, or developmental limits. If your baby can reach or grab any part of the netting, you should stop using the cot net immediately and transition to room-wide insect control methods, such as installing window screens or using air conditioning.
Do I need to treat the mosquito net with insect repellent?
You should not apply chemical insect repellents, essential oils, or aerosol sprays directly to a baby cot mosquito net. These substances can leave concentrated chemical residues that your baby might inhale or ingest if they touch the fabric, potentially causing respiratory irritation or skin reactions. Instead, rely entirely on the physical barrier provided by a high-quality, clean, and intact mesh. If additional protection is needed in your home, utilize safe, room-wide mosquito control measures located far away from the baby’s immediate sleeping environment.
Community discussion
Share your experience or ask a question. Comments are reviewed before publication.