
Properly installing a mosquito guard on your baby’s crib is a vital step in protecting your infant from insect bites. In tropical regions like Singapore, where mosquito-borne illnesses such as dengue are a constant concern, a physical barrier provides reliable protection. However, a mesh cover must be set up with absolute precision to remain safe. If installed incorrectly, loose fabric, unstable frames, or dangling cords can quickly transform a protective shield into a serious safety hazard.
Your primary objective when setting up a mosquito guard is to create a secure, bug-free sleeping environment without introducing risks of suffocation, entanglement, or entrapment. Achieving this balance requires choosing compatible gear, following step-by-step assembly rules, and conducting regular safety checks. By prioritizing structural stability and clear space around the mattress, you can keep your baby both comfortable and safe throughout the night.
Preparation and Safety Checks Before Installation
Before purchasing or installing any mosquito guard, you must consult both the netting product’s documentation and your crib manufacturer’s instructions. If the instructions conflict, or if you cannot verify the compatibility of the netting with your specific crib model, stop immediately and contact the manufacturers for professional guidance. Never assume a product fits safely simply because of a generic category label.
Products mentioned in this guide
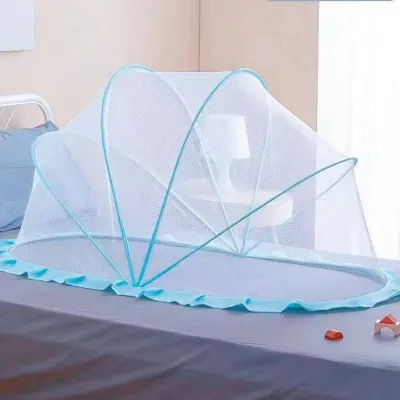
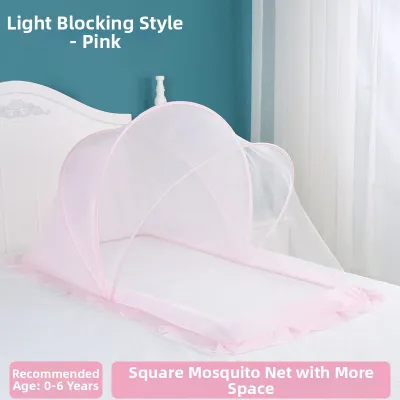
Prices are valid at publication and may change. Please refer to the product page for the latest price.
You must verify the age, weight, and developmental limits specified by the manufacturer of the mosquito guard. Many crib nets are designed only for infants who cannot yet push up on their hands and knees or pull themselves up to a standing position. Using a net once your baby has reached these active milestones increases the risk of them pulling the fabric or frame down into the sleep space.
Depending on the mounting design, you may need a few basic household tools. A standard screwdriver is often required to secure mounting brackets to the crib rails. If the manufacturer explicitly recommends them for added stability, soft zip ties can help secure excess cords or frame joints. Avoid using makeshift materials like household string, sewing thread, or tape, as these can easily degrade, snap, or create dangerous loops.
Establish strict safety boundaries by avoiding ceiling-hung canopies with long, sweeping fabric and dangling pull cords. These designs are highly hazardous for cribs because a baby can easily reach through the crib slats, pull the fabric inward, and become entangled. Stick to structured, crib-specific mosquito guards that keep the netting taut and completely out of the child’s reach.
Finally, verify that the product has not been subject to any recent safety recalls. You can check official consumer safety portals or manufacturer registration pages to ensure your specific model meets current safety standards. Taking a few minutes to verify these details before assembly prevents avoidable risks later on.
Step-by-Step Installation Guide
Installation methods vary depending on whether you choose a frame that attaches directly to the crib or a self-supporting freestanding structure. Regardless of the style, meticulous physical stability is the universal requirement during assembly.

Installing a Rail-Mounted or Frame Mosquito Guard
First, lay out all the frame or hoop components on a clean, flat floor. Assemble the support rods and the top hoop according to the manufacturer’s manual, ensuring that every joint clicks, snaps, or locks securely into its designated position. A partially locked joint can collapse under the weight of the net or if bumped, creating a falling hazard over the crib.
Next, position the mounting brackets or clamp attachments onto the crib rails. Carefully tighten the screws or clamps so the connection is firm enough to prevent any wobbling or sliding along the rail. Take care not to overtighten to the point of stripping the hardware or cracking the crib’s wooden or plastic frame. Check that the clamp design matches the thickness and shape of your crib’s rails, as some round or extra-thick rails require specialized adapters.
Once the frame is secure, gently drape the netting over the assembled structure. The net must fall completely outside the crib’s perimeter to prevent the baby from grabbing it. If your specific model is designed to tuck under the mattress, ensure it is pulled tight and tucked deeply beneath the mattress base. There must be absolutely no gaps between the netting and the crib sides where a baby’s head or limbs could become wedged.
Finally, carefully inspect the exterior of the net for any loose fabric, long ties, or dangling adjustment straps. Secure these tightly using the manufacturer’s provided fasteners. Never leave loose loops hanging inside or near the sleeping area, as any cord longer than 18 centimeters poses a severe strangulation risk.
Setting Up a Freestanding or Pop-Up Crib Net
First, unpack and unfold the pop-up frame or assemble the freestanding structure on a flat, stable surface well away from the crib. Pop-up nets use flexible, spring-like frames that can open rapidly with significant force. Assembling them at a safe distance prevents accidental bumps or sudden spring-open actions near your baby or the crib.
Next, carefully lift and position the assembled structure over or around the crib. If you are using a floor-standing model with an independent base, adjust the legs so the base sits completely flush with the floor. Verify that the stand does not wobble or tilt. If the floor surface is uneven, relocate the crib and net to a flat area of the room to ensure stability.
Check the clearance between the netting material and the baby’s sleeping zone. The netting must remain highly taut across the entire frame. It should never sag, droop, or hang low over the mattress. If your baby rolls over or reaches upward, they should not be able to touch or pull the fabric down into the crib.
Finally, close the entry zipper or fastening panels completely. Double-check that the zipper pull is positioned on the exterior of the net, entirely out of your baby’s reach. The zipper teeth and pull tab must not have sharp edges that could scratch your baby’s skin during placement or removal.
Post-Installation Safety Verification
Before leaving your baby to sleep under the newly installed mosquito guard, you must perform a rigorous safety check. This verification process ensures that no hidden hazards were introduced during assembly.
- The "Tug Test": Gently but firmly pull on the frame, brackets, and netting from multiple angles. The structure must remain rigid and secure. If the frame shifts, slides, or feels loose, do not leave your baby in the crib; remove the guard immediately.
- Gap and Sag Check: Inspect the entire perimeter of the crib. Look for any openings, especially near the corners or bottom edges, where insects could enter or where a baby's limb could get trapped. Ensure the mesh is completely taut with zero sagging.
- Cord and Tie Audit: Verify that no strings, ribbons, or electrical cords (such as baby monitor cables) are touching or near the netting. Keep all cords at least three feet (about 0.9 meters) away from any part of the crib and netting to prevent strangulation hazards.
- Visibility and Airflow: Ensure the mesh density allows for clear, unobstructed airflow. In Singapore's warm and humid climate, adequate ventilation is crucial to prevent overheating. The mesh must also be transparent enough that you can easily monitor your baby's movements from across the room.
If the frame wobbles, the net sags into the crib, or any component appears loose or damaged, stop using the mosquito guard immediately. Remove it from the crib and consult the manufacturer or a qualified professional before attempting to use it again.
Maintenance, Cleaning, and When to Replace
Keeping the mosquito guard clean and structurally sound is essential for long-term safety and hygiene. Over time, dust, lint, and humidity can affect both the fabric and the frame.
Perform a weekly inspection of the entire setup. Look closely for tiny tears, run threads, or holes in the mesh. Even a small hole can let mosquitoes in or snag a baby’s tiny fingers and toes. Check the frame joints and mounting clamps to ensure they have not loosened over time due to daily crib use.
When cleaning is required, follow the care label instructions precisely. Most nets require a gentle hand wash in cool water or a delicate machine wash inside a mesh laundry bag. Avoid harsh detergents, bleach, or fabric softeners. Ensure the net is completely, 100% dry before reinstalling it. Damp netting in Singapore’s humid climate will rapidly develop mold or mildew, which can pose respiratory risks to your infant.
Immediately replace the mosquito guard if the frame is bent, cracked, or fails to lock securely. Discard the net if the mesh has tears that cannot be safely repaired according to manufacturer guidelines. Most importantly, stop using any crib-mounted netting as soon as your baby reaches the developmental milestone of sitting up, pulling up, or standing, as they can easily pull the structure down.
Frequently Asked Questions (FAQ)
Can I use a regular bed canopy net over a baby crib?
No, you should not use a regular bed canopy net over a baby crib. Regular bed canopy nets often feature long hanging cords, heavy fabric, and loose drapes that pose severe strangulation and suffocation risks to infants. Always use nets specifically designed, sized, and safety-tested for baby cribs.
Are mosquito repellent patches or sprays safe to attach to the net?
No, you should avoid attaching chemical repellent patches or spraying insect repellents directly onto the crib net. These products can release strong vapors that are unsafe for your baby to inhale closely, and your baby might touch or ingest the chemical residue. Rely on the physical barrier of the net and consult a pediatrician for safe repellent options.
Community discussion
Share your experience or ask a question. Comments are reviewed before publication.