
Trimming a newborn’s or infant’s nails can feel incredibly daunting for new parents. A baby’s hands are constantly in motion, and their tiny fingers seem far too delicate for standard grooming tools. However, keeping these nails short is essential to prevent babies from scratching their sensitive skin, especially during sleep or active play.
To trim a baby’s nails safely without causing injury, caregivers must combine the right specialized equipment with a calm, methodical technique. The most successful approach involves isolating each individual finger, pressing the skin pad away from the nail edge, and using a dedicated baby finger nail cutter designed specifically for delicate skin. By understanding your baby’s nail anatomy and establishing a quiet, well-lit routine, you can transform a stressful chore into a simple, tear-free habit.
Understanding Baby Nail Growth and Safety Risks
Infant nails are structurally very different from adult nails, requiring specialized care and attention. In the first few months of life, a baby’s nails are exceptionally soft, thin, and pliable. Despite their softness, they can grow surprisingly fast, often requiring trimming multiple times a week to keep them manageable.
Products mentioned in this guide
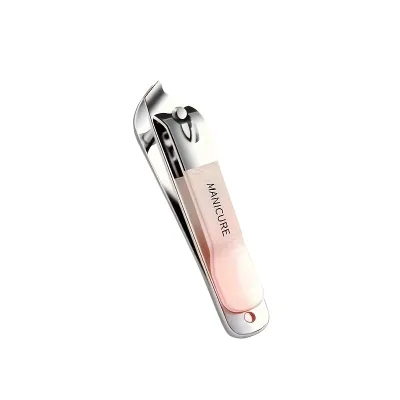
Prices are valid at publication and may change. Please refer to the product page for the latest price.
Because these nails are so thin, they can easily split or develop sharp, paper-like edges. When babies wave their hands or rub their faces—common involuntary movements driven by newborn reflexes—these sharp edges can easily scratch their delicate facial skin or even damage their eyes. Regular grooming is not merely an aesthetic concern; it is a necessary step to protect your child from self-inflicted scratches and subsequent skin irritation.
The primary challenge in trimming infant nails lies in their unique anatomy. A baby’s nail bed is highly vascular, meaning it has a rich blood supply, and it sits extremely close to the edge of the nail plate. Furthermore, the skin surrounding the nail is highly sensitive and easily pinched. Standard adult grooming tools are not designed for these micro-dimensions, making it very easy to accidentally clip the fingertip if you cannot clearly distinguish between the nail and the underlying skin.
Essential Tools: Choosing the Right Baby Nail Cutter
Selecting the appropriate tool is the first line of defense against accidental cuts. Standard adult clippers are far too large and have flat or wide-curved blades that do not align with a baby’s tiny finger contours. Instead, parents should invest in dedicated infant grooming tools, often sold as a specialized baby finger nail cutter kit, to ensure safety and precision.

Baby Nail Scissors
Baby nail scissors feature short, thin blades and rounded safety tips. The rounded ends prevent accidental puncture wounds if the baby makes a sudden, unexpected movement. Many parents prefer safety scissors because they offer superior visibility; the thin blades allow you to see exactly where you are cutting, making it easier to avoid the sensitive nail bed.
Baby Nail Clippers
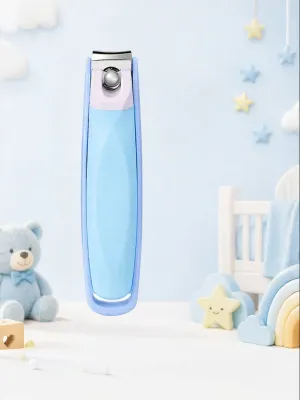
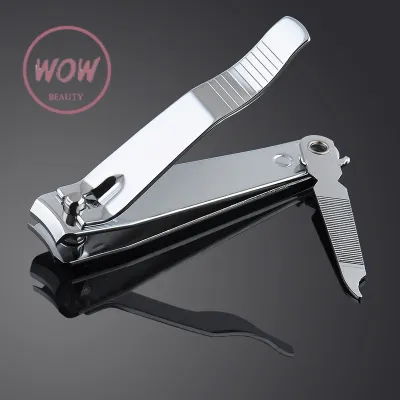
Infant-specific clippers are scaled-down versions of adult clippers, featuring a much smaller opening and a tightly curved cutting edge. This curved design matches the natural arc of a tiny fingernail, reducing the risk of catching the surrounding skin. Some models also include built-in LED lights or magnifying glasses to help caregivers see the nail boundary more clearly in dim environments.
Electric Nail Files
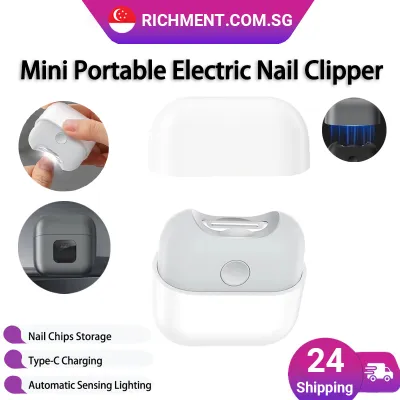
An increasingly popular alternative for anxious parents is the electric baby nail trimmer or file. These battery-operated devices use soft, rotating cushioned pads to gently sand down the nail edge rather than cutting it. They generally come with color-coded grinding pads tailored to different age groups and developmental stages, ranging from ultra-soft discs for newborns to coarser pads for toddlers. Many electric files also feature pressure-activated safety stops, which pause the rotation immediately if the pad presses too firmly against the baby’s skin.
Tools to Avoid
While it might be tempting to use whatever is nearby, certain tools and methods pose significant safety risks.
- Adult Clippers and Scissors: These lack safety guards and are sized for thicker, wider nails, making skin nicks highly likely.
- Biting the Baby's Nails: Some parents resort to biting off their baby's nails, believing it to be safer than using sharp tools. This practice is highly discouraged by medical professionals. Biting can easily tear the delicate nail too deeply into the nail bed, leading to painful infections. Additionally, it introduces harmful bacteria from the adult's mouth directly into micro-tears in the baby's skin, increasing the risk of paronychia (a localized skin infection around the nail).
- Standard Metal Files: Coarse metal files designed for adults are too abrasive for soft infant nails and can easily scrape and irritate the surrounding skin.
Before purchasing any nail care product, always verify the manufacturer’s age recommendations, weight or size guidelines, and safety warnings on the packaging. Ensure that any tool you choose is kept clean and sanitized between uses.
Preparation: Setting Up for a Safe Trimming Session
A successful nail-trimming session relies heavily on preparation, environmental control, and finding the right moment when your baby is least likely to squirm. Trying to force a nail trim when a baby is hungry, overtired, or highly active is a recipe for accidental injury.
Timing the Session
The absolute best time to trim your baby’s nails is when they are deeply asleep. During sleep, their muscles relax, and their hands open naturally, allowing you to work without resistance. Another excellent window is during feeding, when the baby is distracted and calm, though this typically requires a second caregiver to assist with holding the hand. Alternatively, you can attempt trimming immediately after a warm bath, as the warm water softens the nails even further, making them incredibly easy to clip or file.
Lighting and Positioning
Never attempt to trim a baby’s nails in a dimly lit room. Choose a spot with bright, direct light, such as near a large window during the day or directly under a focused reading lamp. If you are working alone, sit in a comfortable, stable chair and cradle your baby securely in your lap. Position them so that their arm is supported by your body, minimizing any sudden jerking movements. If you have a partner or family member available, have one person hold and gently distract the baby while the other focuses entirely on the trimming process.
Handling the Baby's Hand
To gain control over the tiny fingers, hold the baby’s hand firmly but gently. Hold the individual finger you plan to trim between your thumb and index finger. Use your thumb to gently press the fleshy pad of the baby’s fingertip downward and away from the nail edge. This simple action isolates the nail plate, creates a clear gap between the nail and the skin, and significantly reduces the risk of catching the skin in the blades of your baby finger nail cutter.
Step-by-Step Technique for Cutting Fingernails and Toenails
Once you have the proper tools, bright lighting, and a calm baby, you can proceed with the actual trimming process. Fingernails and toenails grow differently and require distinct cutting techniques to ensure safety and prevent discomfort.
Fingernails
Fingernails grow rapidly and follow a distinct curved shape. To trim them safely, follow these steps:
- Step 1: Isolate and Secure: Firmly grasp one finger at a time, pressing the finger pad down and away from the nail to expose the free edge clearly.
- Step 2: Make Small, Controlled Snips: Position your baby safety scissors or clippers at the edge of the nail. Instead of trying to clip the entire nail in one single, sweeping cut, make several small, controlled snips. Follow the natural curve of the fingertip, leaving a tiny sliver of the white nail visible to avoid cutting too close to the sensitive nail bed.
- Step 3: Smooth the Edges: Even after a clean cut, the corners of the nail can remain sharp. Use a baby-specific manual emery board to gently file away any remaining jagged edges or points. Always file in a single direction—from the side of the nail toward the center—rather than sawing back and forth, which can split the thin nail.
Toenails
Toenails grow much slower than fingernails and tend to be slightly thicker. Their care requires a different approach to prevent long-term complications:
- Step 1: Understand the Difference: Toenails do not need to be trimmed as frequently as fingernails, but they are more prone to growing into the surrounding skin if cut incorrectly.
- Step 2: Cut Straight Across: When trimming toenails, always cut straight across rather than following a curve. Avoid rounding the corners or digging into the sides of the nail bed. Cutting the corners too short can encourage the nail to grow into the surrounding flesh, leading to painful ingrown toenails.
- Step 3: Check the Corners: If the straight-cut corners feel sharp, use an emery board to very gently take off the sharpest point without rounding the entire nail shape.
Pacing and Pausing
Always prioritize patience over speed. If your baby begins to fuss, squirm, or pull their hand away, pause the session immediately. There is no rule stating that you must complete all ten fingers and toes in a single sitting. It is far safer to trim one or two nails at a time and finish the rest later when the baby is calm again, rather than rushing through the process and risking a painful nick.
First Aid: What to Do If You Accidentally Nick the Skin
Even the most careful parents will occasionally nick a baby’s sensitive skin. If this happens, it is important not to panic. Babies pick up on parental anxiety, and a calm response will help soothe your child quickly.
Immediate Steps
If you see blood, stop trimming immediately. Hold your baby close to comfort them, and rinse the tiny cut under cool, clean running water to wash away any debris. Once clean, apply gentle, continuous pressure to the nick using a sterile gauze pad or a clean, soft cloth. Keep the pressure applied firmly for a few minutes; because baby capillaries are small, the bleeding should stop relatively quickly.
What Not to Do
Never apply standard adhesive bandages or plasters to a baby’s fingers or hands. Infants constantly put their hands in their mouths, and a wet or loose bandage can easily slip off, presenting a severe choking hazard. Additionally, avoid using harsh chemical antiseptics or liquid bandages unless specifically recommended by a healthcare professional, as these can irritate sensitive infant skin or be ingested if the baby sucks on their fingers.
When to Seek Help
While most minor nicks heal quickly on their own, certain situations require professional medical attention. Consult a pediatrician or visit a medical clinic if:
- The bleeding does not stop after several minutes of continuous, firm pressure.
- The cut appears deep, gaping, or continues to ooze fluid.
- You observe signs of infection in the days following the incident, such as localized redness that spreads, swelling, warmth to the touch, or pus discharging from the wound.
- Your baby develops a fever or seems unusually irritable and inconsolable.
Frequently Asked Questions (FAQ)
How often should I cut my baby's fingernails and toenails?
Fingernails grow incredibly fast and typically require trimming once or twice a week during the first few months of life. In contrast, toenails grow much slower and generally only need attention once or twice a month. Instead of relying on a strict calendar schedule, perform a quick visual and tactile check every few days. Run your finger gently over your baby’s hands to feel for any sharp edges or long nails that extend past the fingertips.
Is it safe to file my baby's nails instead of cutting them?
Filing is an exceptionally safe and highly recommended alternative, especially during the newborn stage. In the first few weeks of life, a baby’s nails are so soft and adhered to the skin that using clippers or scissors carries a higher risk of injury. A manual baby-specific emery board or an electric nail trimmer with a soft newborn pad allows you to manage nail length safely without any risk of cutting the skin.
What should I do if my baby has an ingrown toenail?
If you notice a toenail growing into the surrounding skin, causing mild redness or swelling, do not attempt to cut, dig out, or perform home surgery on the nail. This can introduce bacteria and worsen the condition. Instead, give the foot a gentle soak in warm water a few times a day to soothe the area, keep the toe clean and dry, and consult a pediatrician or a qualified pediatric podiatrist. They can evaluate the toe and provide safe, professional treatment instructions.
Community discussion
Share your experience or ask a question. Comments are reviewed before publication.