
To properly put on and use a baby shower cap, gently stretch the cap and place it from the back of your baby’s head forward, positioning the inner rim just above the eyebrows and ears. Adjust the fit to ensure a snug but comfortable seal—verified by sliding two fingers under the band—before starting a controlled water pour from the back of the head. This simple accessory acts as a physical barrier, channeling water and shampoo away from your baby’s eyes, nose, and mouth.
The Benefits of Using a Baby Shower Cap for Tear-Free Baths
Preventing soapy runoff is crucial for building positive bath-time associations. Many infants and toddlers develop a sudden fear of bathing after a single distressing experience with burning soap or water blocking their breathing. By eliminating this trigger, you help your child feel safe and relaxed in the tub.
For parents, a reliable shower cap reduces the stress of hair washing and speeds up the entire bathing process. Instead of struggling to keep your baby’s head tilted back while managing slippery soap, you can focus on gentle cleansing. This is especially beneficial for babies who naturally resist having water poured near their faces.
Products mentioned in this guide
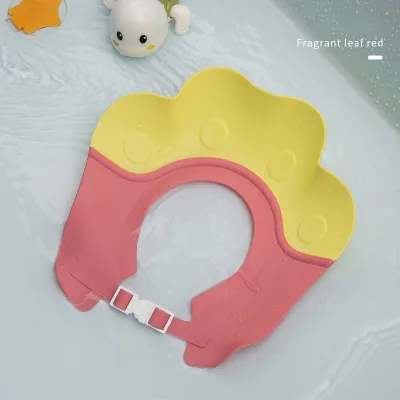
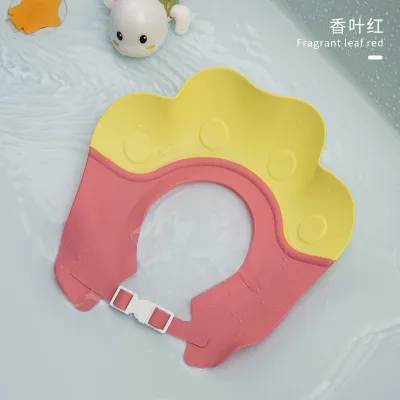
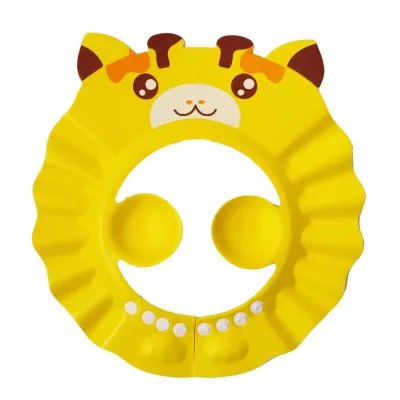
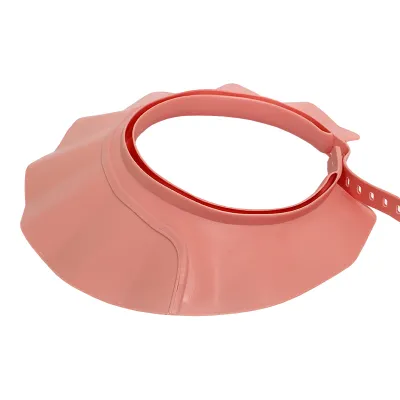
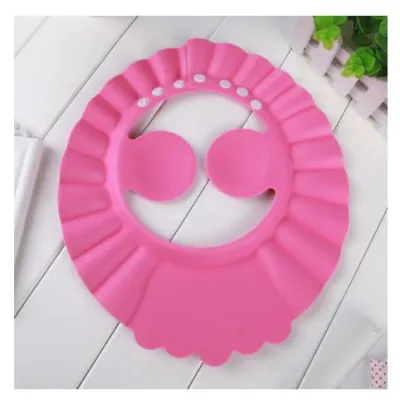

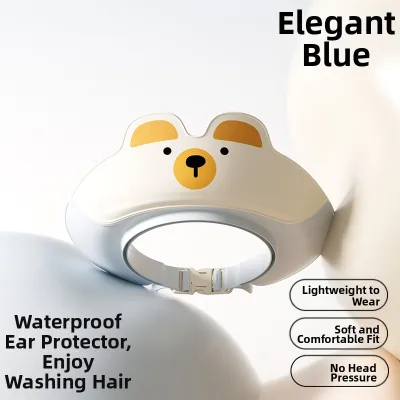
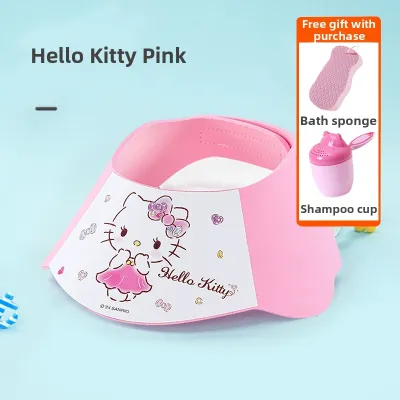
Prices are valid at publication and may change. Please refer to the product page for the latest price.
Using a cap also protects the delicate skin barrier on your baby’s face from unnecessary exposure to surfactants. Even mild, tear-free baby shampoos can cause dryness or mild irritation if repeatedly washed down the face. The cap ensures that cleansing agents are directed exactly where they are needed—on the scalp and hair—and nowhere else.
How to Choose and Check the Right Shower Cap for Your Baby
Selecting the right shower cap requires careful attention to materials and safety standards. Look for caps made from soft, flexible, and skin-friendly materials like food-grade silicone or high-quality EVA foam. Always check the manufacturer’s label to verify that the product is free from BPA, phthalates, and other harmful chemicals before purchase.

Adjustability is another critical feature to consider. Look for designs featuring adjustable snap buttons, secure velcro straps, or highly elastic bands that can expand as your baby grows. A non-adjustable cap will either slip down constantly or press too tightly against your baby’s sensitive temples. Snap buttons are particularly useful as they provide secure, incremental sizing that will not loosen when wet.
Before buying, measure your baby’s head circumference using a soft measuring tape. Compare this measurement directly with the manufacturer’s size chart rather than relying solely on age recommendations, as infant head sizes vary significantly. Most adjustable baby shower caps are highly affordable, typically ranging from S$5 to S$15, making them a cost-effective addition to your bath-time safety gear.
Perform a quick pre-bath inspection every time you use the cap. Check for worn-out elastic, cracks in the foam, sharp edges on plastic snaps, or any signs of mold growth. Because bathrooms in humid climates like Singapore are prone to moisture retention, mold can develop rapidly on damp surfaces. If you spot any degradation, structural weakness, or discoloration, discard and replace the cap immediately to protect your baby’s health.
Step-by-Step Guide to Putting On a Baby Shower Cap
Step 1: Positioning the Cap Correctly
To begin, hold the shower cap gently with both hands. If the cap is made of elastic material or flexible silicone, use your fingers to expand the inner rim slightly. This prevents the band from snapping back sharply or pinching your baby’s delicate skin as you position it.
Lower the cap onto your baby’s head using a back-to-front motion. Slide the rear portion of the band over the back of the neck first, then pull the front brim forward until it sits comfortably above the eyebrows and just over the tips of the ears. This specific angle ensures the brim slopes downward and backward, allowing gravity to carry water away from the face.
Never pull the cap down too forcefully over your baby’s face. Jerking the cap down can cause painful friction burns, pinch the skin around the temples, or cause immediate panic. A slow, gentle placement helps your baby remain calm and cooperative.
Step 2: Adjusting the Fit Safely
Once the cap is positioned, secure the fasteners to lock in the fit. If your cap features snap buttons or a buckle, choose the setting that holds the cap firmly in place without compressing your baby’s skull. For elastic caps without fasteners, ensure the band sits entirely flat against the skin and has not rolled or twisted.
Apply the “two-finger rule” to verify that the tension is safe and comfortable. You should be able to slide one or two fingers easily between the cap’s inner edge and your baby’s forehead. If you cannot fit your fingers under the band, the cap is too tight and must be loosened immediately to prevent discomfort or restricted circulation. Conversely, if the gap is wider than two fingers, the cap is too loose and water will leak through.
Take a moment to check that no hair is painfully trapped or pulled under the tight edge of the cap. Run your fingertips along the entire perimeter of the band, gently pulling out any stray hairs around the temples and the nape of the neck. Trapped hair can pinch and cause sudden distress during the bath.
Step 3: Verifying the Seal and Comfort
Run your index finger along the entire inner edge of the cap to ensure a uniform, continuous seal against the forehead and sides. Any gaps in this seal, no matter how small, will allow water and soapy suds to trickle down into your baby’s eyes during rinsing.
Observe your baby’s facial expressions and body language closely after securing the cap. Look for signs of discomfort, such as whimpering, pulling at the cap, crying, or a furrowed brow. Babies communicate their physical limits through these subtle cues, and ignoring them can lead to a fear of the shower cap itself.
If your baby fusses immediately after you place the cap, make gentle micro-adjustments to the tension or positioning. If they remain highly agitated, take a short break, remove the cap completely, and soothe them before attempting to fit it again. Forcing the cap onto a highly distressed baby will only reinforce negative associations with bath time.
How to Keep Your Baby Calm and Comfortable While Wearing the Cap
Introducing the shower cap during dry play before actual bath time is an excellent way to build familiarity. Let your baby hold the cap, explore its texture, and even wear it while playing in the living room. Seeing and touching the cap in a non-threatening environment demystifies the object and helps prevent fear when it is introduced in the tub.
During the actual bath, use distraction techniques to keep your baby’s hands and mind occupied while you fit and adjust the cap. Offer colorful bath toys, floating cups, or sing their favorite songs. Engaging their attention elsewhere makes it much easier to secure the cap quickly and smoothly without resistance.
Your water-pouring technique is just as important as the cap itself. Use a small, lightweight cup or a damp washcloth to maintain precise control over the water flow. Always pour water from the crown of the head backward, allowing gravity to carry the water down the rear slope of the cap. Avoid pouring water directly onto the front brim, as heavy splashing can still spill over the sides or startle your baby.
Always monitor your baby’s emotional state throughout the process. If they show signs of sensory overload, extreme distress, or panic, pause the hair-washing process immediately. Remove the cap, offer a comforting touch, and prioritize their emotional safety over completing the wash. Building trust and comfort in the tub is far more important than a single thorough rinse.
How to Clean and Maintain the Shower Cap for Hygiene
Proper post-bath care is essential for maintaining the material integrity of the shower cap and preventing bacterial growth. As soon as bath time is finished, rinse the shower cap thoroughly under clean, running tap water. This removes residual shampoo, body wash, and skin oils that can degrade the silicone or foam over time.
Wash the cap periodically with a mild, baby-safe cleanser or gentle dish soap. Use your hands or a soft sponge to gently clean all surfaces, paying close attention to the crevices around snap buttons or adjustable straps. Avoid using harsh chemical cleaners, bleach, or abrasive scrubbing pads, which can scratch the surface and create microscopic areas where bacteria can multiply.
Air-dry the cap completely in a well-ventilated area before storing it away. Never fold, stack, or pack away the cap while it is still damp. In humid climates like Singapore, storing damp bath accessories in closed cupboards is a primary cause of mold and mildew development. Hanging the cap on a hook in a well-ventilated space is an effective way to ensure it dries thoroughly.
Store the completely dry cap in a cool, dry place away from direct sunlight. Prolonged exposure to UV rays can cause silicone to lose its elasticity and foam to become brittle, cracked, and unusable. Proper storage ensures the cap remains sanitary and safe for your baby’s next bath.
When to Stop Using the Shower Cap and Transition to Regular Hair Washing
Transitioning away from the shower cap should be based on your child’s developmental readiness rather than a strict age limit. Look for behavioral signs that your child is ready to wash their hair without assistance. These signs include willingly tilting their head back on cue, closing their eyes when asked, or no longer reacting negatively to water splashing near their face.
Understand that every child develops at their own pace. Some children may comfortably transition to regular hair washing by toddlerhood, while others may prefer using the cap for several years. Respecting your child’s individual timeline prevents unnecessary bath-time anxiety and preserves their confidence.
To make the transition smooth, introduce a gradual approach. Start by using the shower cap for the soapy shampooing phase, but remove it for a final, gentle rinse with plain water while encouraging them to tilt their head back. Over time, as their confidence grows, you can reduce reliance on the cap until they are completely comfortable washing their hair without it.
Frequently Asked Questions (FAQ)
Can a baby shower cap completely prevent water from entering the ears?
No, a baby shower cap is designed to redirect water away from the face and eyes, but it does not create a completely hermetic, waterproof seal over the ears. If your baby is prone to ear infections or has ear tubes, consult your pediatrician. They may recommend using specialized baby earplugs or cotton balls lightly coated in petroleum jelly for reliable ear protection during baths.
What should I do if the shower cap leaves red marks on my baby's forehead?
If you notice red marks, loosen the strap or remove the cap immediately. Red marks indicate that the cap is too tight, which can cause discomfort or restrict local circulation. Verify if your baby has outgrown the current size or if the elastic has lost its flexibility. If the marks persist even on the loosest setting, discontinue use and upgrade to a larger size or a more adjustable model.
Community discussion
Share your experience or ask a question. Comments are reviewed before publication.