
Using a baby head bath cap effectively requires a combination of correct positioning, a secure but gentle seal, and controlled water pouring. When placed just above the eyebrows and ears, this simple tool acts as a protective visor, redirecting soapy water away from your baby’s sensitive eyes and ear canals. Achieving a tear-free bath time relies not just on the cap itself, but on your preparation, handling technique, and constant supervision.
Many parents struggle with water leakage or baby resistance because of minor fit adjustments or rushed pouring methods. By understanding how to check the cap’s integrity, position it without causing discomfort, and pour water strategically, you can transform hair washing from a stressful chore into a calm, bonding experience.
Preparing the Bath Environment and Checking the Cap
Before you introduce your baby to the water, a thorough inspection of the baby head bath cap is essential. Over time, exposure to moisture and bath products can degrade the materials, which are typically made of soft silicone or expandable foam. Hold the cap up to the light to inspect it for any visible tears, hairline cracks, or areas where the material has stretched out and lost its elasticity. A compromised cap will not maintain the necessary tension to seal out water, leading to unexpected leaks during the rinse.
Products mentioned in this guide
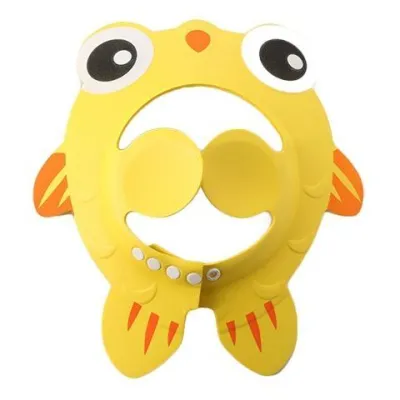


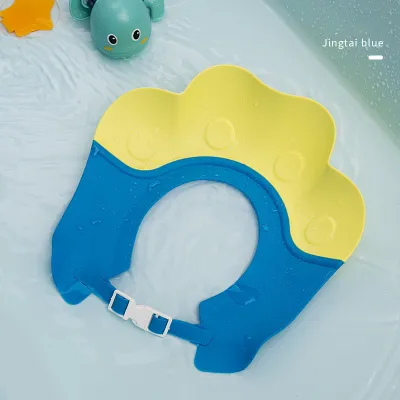
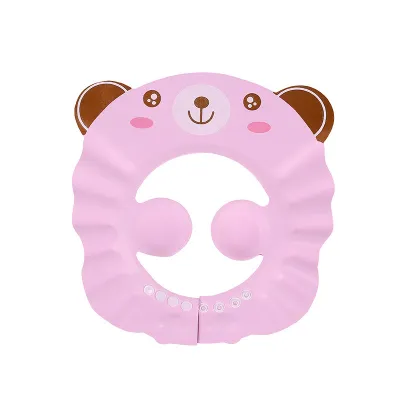

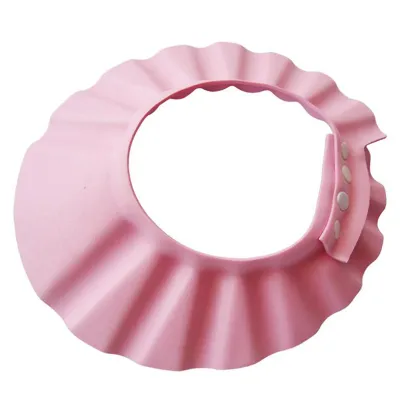
Prices are valid at publication and may change. Please refer to the product page for the latest price.
In Singapore’s warm and humid climate, bathroom accessories are highly susceptible to mold and mildew growth if they do not dry completely between uses. Carefully examine the inner folds, seams, and adjustment buttons or snaps of the cap for any dark spots or discoloration. If you detect any signs of mold or material degradation, discard the cap immediately and replace it to protect your baby’s sensitive skin.
Once the cap passes inspection, prepare the physical bathing space to ensure your baby remains calm and cooperative. A sudden chill can cause a baby to fuss or wriggle, making it incredibly difficult to position the cap correctly. Ensure the bathroom is free from drafts, and test the bath water temperature using your elbow or a reliable bath thermometer to confirm it is comfortably warm. A relaxed baby is far more likely to tolerate having an accessory placed on their head.
Gather all your essential bathing supplies before you begin, placing them within arm’s reach of the tub. This includes your baby-safe shampoo, a rinsing cup, a soft washcloth, and a dry towel. Never, under any circumstances, leave your baby unattended in or near the water, even for a split second, to retrieve a forgotten item. Maintaining constant physical supervision and keeping one hand on your baby at all times is the most critical safety rule of infant bathing.
Step-by-Step Guide to Positioning the Baby Head Bath Cap
Positioning the cap correctly requires a gentle touch and a clear understanding of your product’s specific design. Most baby head bath caps feature either an adjustable button strap, a hook-and-loop fastener, or a highly elastic inner band designed to stretch over the crown. Before attempting to place it on your baby, read the manufacturer’s instructions to identify the designated front and back of the cap, as reversing it can compromise the seal and cause discomfort.

To begin, gently stretch the inner band of the cap with both hands to widen the opening. Slide the cap slowly onto your baby’s head, starting from the forehead and working your way down to the nape of the neck. It is often helpful to distract your baby with a floating bath toy or sing a soothing song during this step to minimize any resistance or sudden head movements.
The brim of the cap must sit evenly across the forehead, positioned slightly above the eyebrows. Ensure that the side flaps or curved edges cover the tops of the ears, directing them downward rather than pinning them flat against the head or folding them uncomfortably. The cap should rest horizontally, creating a continuous, level barrier around the entire circumference of the head.
Once the cap is in place, check the tension of the seal. It should fit snugly enough to prevent water from slipping underneath, but it must never press too tightly against your baby’s delicate skin. Run your index finger gently along the inner edge of the band to verify that it is flat against the skin without any gaps or twisted sections. Monitor your baby’s face closely; if you notice deep red indentations, skin puckering, or signs of distress, loosen the adjustment immediately or remove the cap to resize it.
Washing Techniques to Maintain the Seal and Prevent Leaks
Even a perfectly fitted bath cap can leak if water is poured incorrectly. The key to maintaining the protective seal is controlling the direction and force of the water during the rinse. Always use a small rinsing cup or a very gentle, low-pressure handheld shower spray. High-pressure water streams can easily push past the flexible edges of the cap, breaking the seal and sending soapy water directly onto your baby’s face.
When you are ready to rinse the shampoo, tilt your baby’s head slightly backward. Pour the water slowly, starting from the crown or the back of the head and moving forward toward the brim of the cap. This directional flow allows the water to cascade naturally over the top of the visor and run off the front and sides, well away from the eyes, nose, and mouth.
Avoid pouring water directly onto the front seam where the cap meets the forehead. The impact of falling water concentrated on this single point can create a pocket of pressure that forces the material downward, breaking the seal. Instead, distribute the water evenly across the top of the head, letting the physical design of the brim channel the runoff away.
Throughout the washing and rinsing process, provide continuous physical support to your baby’s head and neck. Use one hand to cradle the back of their neck or upper back, keeping their position stable. Sudden, jerky movements or attempts to turn around can easily dislodge the cap or cause it to shift, which instantly compromises the waterproof barrier. Keeping your baby calm and physically supported is just as important as your pouring technique.
Safe Removal and Post-Bath Cap Care
Removing the bath cap safely is just as important as putting it on. When the bath is finished, do not yank or pull the cap straight upward, as this can pinch the skin, pull fine baby hair, or cause sudden discomfort that leaves a negative impression for future baths. Instead, gently unfasten the snaps or slowly peel the elastic band from the back of the head, lifting it forward and off the forehead.
Immediately after removing the cap, wrap your baby in a soft, dry towel. Use a clean, dry corner of the towel to gently pat down their forehead, temples, and the areas behind and around the outer ears. Even though the cap prevents direct water flow, minor condensation or stray droplets can collect near the edges, and drying these areas quickly keeps your baby warm and comfortable.
Once your baby is safe, dry, and dressed, turn your attention to maintaining the bath cap. Rinse the cap thoroughly under clean, running tap water to remove any lingering shampoo residue, bath oils, or body wash. Leftover soap film can degrade the elasticity of silicone and foam over time, making the material brittle and prone to tearing.
After rinsing, shake off the excess water and hang the cap in a well-ventilated area to air-dry completely. Avoid storing it flat on a damp surface or leaving it in a closed, humid cabinet, which invites mold growth. Refer to the manufacturer’s care instructions for specific storage guidelines, and avoid exposing the cap to direct sunlight or high heat sources, which can warp the shape and ruin the fit.
Troubleshooting Fit Issues and Water Pooling
If you notice water pooling on the brim of the cap rather than draining off, the angle of your baby’s head is likely too flat. When a baby looks straight ahead or downward, the visor can collect water, increasing the weight on the forehead and eventually causing the cap to slip. To resolve this, gently encourage your baby to look upward—perhaps by holding a toy above them—or slightly tilt their head back while you pour the water.
Persistent leaks around the temples or ears usually indicate that the cap is either too large or has lost its structural elasticity. As babies grow rapidly, their head circumference changes, meaning a cap that fit perfectly a month ago may now be too loose. Regularly check the fit against your baby’s current head size, and inspect the adjustable snaps or elastic bands to ensure they are still capable of holding a secure tension.
There are times when you must recognize that a bath cap is no longer suitable for your situation. If the cap shows any signs of material damage, such as deep creases, tears, or persistent mold that cannot be cleaned, stop using it immediately. Furthermore, if your baby experiences ongoing distress, cries excessively, or actively tries to pull the cap off despite your best efforts, it is best to pause its use.
In cases where a bath cap is not working, you can explore alternative hair-washing methods. You might try using a damp, soft washcloth to gently wipe away shampoo, or cradle your baby in a reclined position over your arm while rinsing their hair with a cup, ensuring their face remains clear of the water flow. Every baby is different, and finding the method that keeps them feeling safe and secure is the ultimate goal.
Frequently Asked Questions (FAQ)
At what age or head size should I stop using a baby head bath cap?
You should always check the manufacturer’s packaging for the specified head circumference or age limits, as designs vary widely. Generally, you should stop using a bath cap when it begins to leave deep, lasting red marks on your baby’s forehead, or when the adjustable snaps can no longer accommodate their growing head comfortably. Additionally, if your toddler develops the coordination to repeatedly pull the cap off during bath time, it may be time to transition to alternative rinsing techniques.
Can a baby head bath cap completely prevent water from entering the ears?
While a baby head bath cap is highly effective at diverting the main flow of water away from the face and ears, it does not create a completely airtight, waterproof seal inside the ear canal. Splash water or steam can still find its way near the ears. To maintain proper hygiene and comfort, always use a soft, dry towel to gently pat the outer ear dry after the bath, and avoid inserting cotton swabs or any objects into your baby’s ear canal.
Community discussion
Share your experience or ask a question. Comments are reviewed before publication.