
Maximizing milk yield with a wearable breast pump relies on a combination of correct flange sizing, optimal suction settings, and proper positioning. While the convenience of hands-free pumping allows you to multitask or move around freely, achieving the same efficiency as a traditional plug-in pump requires a precise setup. By understanding how your body interacts with the device and fine-tuning your routine, you can establish a comfortable, highly productive pumping experience.
This guide walks you through the essential steps to set up, use, and troubleshoot your Momcozy wearable pump to ensure efficient milk extraction and personal comfort. By following these practical steps, you can maintain your supply while enjoying the flexibility that wearable technology offers.
Get the Right Fit: Flange Sizing and Pump Setup
The foundation of any successful pumping session is a properly fitted flange. Using a flange that is too large or too small can lead to friction, tissue damage, and a significant reduction in milk output. To find your correct size, measure the diameter of your nipple at the base before a pumping session. Do not include the surrounding areola in this measurement. Use a physical ruler or a printable sizing tool to get an accurate measurement in millimeters.
Products mentioned in this guide
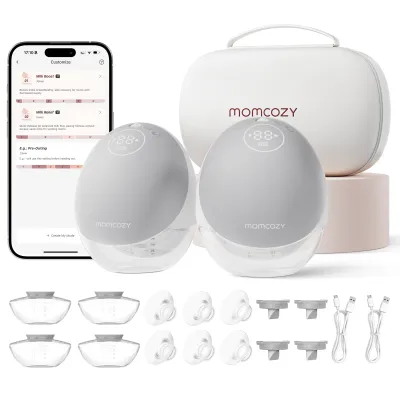
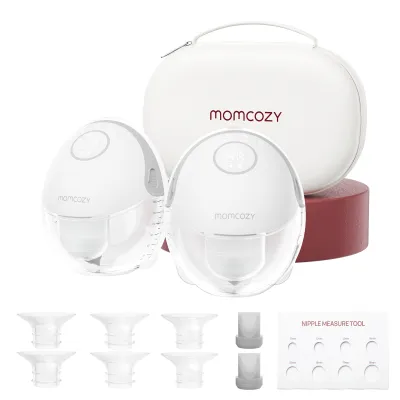
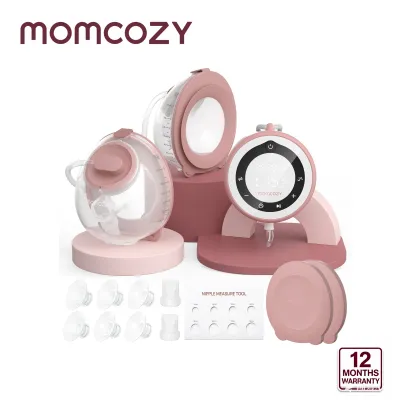
Prices are valid at publication and may change. Please refer to the product page for the latest price.
Once you have this number, refer to the manufacturer’s official sizing guide to select the appropriate flange or silicone insert. Typically, your flange size should be 1 to 3 millimeters larger than your pre-pump nipple measurement to allow room for expansion during suction. If your measurement falls between sizes, testing different insert options can help you identify the most comfortable fit.
Before assembling your pump, inspect all silicone components thoroughly. Check the silicone valves, duckbill valves, and diaphragms for any signs of wear, tears, warping, or residue. Even a tiny, microscopic tear in a duckbill valve can cause a dramatic loss of suction, leading to incomplete breast emptying and a drop in milk supply over time.
Ensure all parts are completely dry before assembly, as moisture can compromise the seal between components or damage the motor. When putting the pump together, pay close attention to the alignment of the collection cups and the silicone shield. Press firmly around the edges to ensure a secure, airtight seal. A misaligned seal is one of the most common causes of leaks and suction loss.
Additionally, make sure the pump motor is fully charged before you begin. A low battery can result in inconsistent suction strength, which can disrupt your let-down reflex and reduce the overall efficiency of your session. Always use the manufacturer-approved charging cable to protect the battery’s lifespan.
Step-by-Step Guide to Positioning and Starting Your Pump
Properly positioning the pump on your breast is crucial for both comfort and milk flow. To begin, lean forward slightly and place your nipple directly in the center of the flange tunnel. It is helpful to look down into the tunnel or use a mirror to ensure the nipple is perfectly centered before securing the pump. If the nipple is off-center, it will rub against the plastic or silicone walls during suction, causing painful friction, swelling, and restricted milk ducts.

Once the pump is positioned correctly, secure it inside your nursing bra. The choice of bra is highly important when using a wearable device. Your bra must be supportive enough to hold the weight of the pump as it fills with milk, but it should not be overly tight. Excessive compression from a tight bra can compress your milk ducts, restricting the flow of milk and potentially leading to clogged ducts.
Many wearable pumps come with bra adjusters; use these to create a snug, secure fit that keeps the pump firmly against your breast without pressing painfully into your tissue. The pump should feel stable and not shift when you move your arms or change positions slightly.
After securing the device, power it on. Always start your session in the massage or stimulation mode. This mode uses fast, light, and shallow suction cycles designed to mimic a baby’s initial quick sucks at the breast. This rapid stimulation triggers your let-down reflex, signaling your body to release the milk.
Once you observe milk starting to spray or flow steadily into the collection cup—typically after one to three minutes—transition the pump to the expression mode. Expression mode features slower, deeper suction cycles that mimic a baby’s active feeding and efficiently empty the breast. Some models transition automatically after a set time, but you should always adjust this manually if your milk begins flowing sooner.
Adjusting Suction and Modes for Optimal Milk Flow
Finding the right balance of suction and speed is a highly individualized process. Wearable pumps offer multiple modes and suction levels, often accessible directly on the motor unit or through a companion mobile application. It is a common misconception that higher suction always leads to more milk. In reality, excessive suction can cause pain, which triggers adrenaline production and inhibits the release of oxytocin, the hormone responsible for the let-down reflex.
To find your optimal setting, start at the lowest suction level in expression mode and gradually increase the intensity one level at a time. Continue increasing the suction until you feel a slight sensation of discomfort, then immediately back down one level. This is your maximum comfortable suction level, often referred to as your “sweet spot.”
Pumping at this setting ensures efficient milk extraction without causing tissue damage, nipple blanching, or pain. Pay close attention to physical cues during your session. If you notice your nipple turning white, swelling excessively, or if you experience sharp pain, the suction is too high and should be lowered immediately.
Conversely, if you feel almost no pull and see very little milk flow despite your breasts feeling full, the suction may be too low, or the pump may not have a proper seal. Remember that your body’s needs can change from day to day, so be prepared to adjust the settings during each session rather than relying on a single fixed level.
Troubleshooting Low Yield, Leaks, and Discomfort
If you experience a sudden drop in milk yield, unexpected leaks, or physical discomfort, a systematic troubleshooting approach can help identify the cause. Start by re-evaluating your flange fit. Nipple size can change throughout your breastfeeding journey, especially in the first few weeks postpartum. If your nipple is rubbing against the sides of the tunnel, you may need a larger size. If a significant portion of your areola is being pulled into the tunnel, causing swelling and blocking milk flow, your flange or insert is likely too large.
Next, check for any loss of suction. If the pump feels weaker than usual, inspect the physical assembly. Ensure the silicone cup is fully sealed against the plastic housing and that the duckbill valve is pushed firmly into place. Examine your bra fit as well; if the bra is too loose, the pump may shift away from the breast, breaking the vacuum seal.
While minor adjustments can resolve most issues, it is vital to prioritize your physical health. If you experience persistent pain, bleeding, cracked skin, or a sudden, unexplained drop in milk supply that does not improve with troubleshooting, stop using the pump and consult a certified lactation consultant or a healthcare provider. Persistent pain is a clear signal that something is wrong, and professional guidance can help protect your breast health and support your breastfeeding goals.
Cleaning and Maintaining Your Wearable Pump for Longevity
Maintaining strict hygiene and caring for your pump components is essential for your baby’s safety and the longevity of the device. Immediately after you finish pumping, disassemble all parts that come into contact with breastmilk. Rinse these parts under cold, running water to wash away loose milk proteins before they have a chance to dry and form a stubborn residue.
For thorough cleaning, wash the disassembled parts in warm, soapy water using a mild dish soap. Avoid using harsh chemical cleaners or abrasive brushes, which can scratch or degrade the silicone. If you prefer to use a dishwasher, check your specific model’s manual first; typically, only certain hard plastic parts are safe for the top rack, while delicate silicone valves and diaphragms should be hand-washed to prevent warping.
In warm and humid climates, such as Singapore, proper drying is critical to prevent the growth of mold or mildew. Place the washed parts on a clean, dedicated drying rack in a well-ventilated area, and allow them to air-dry completely before reassembly. Never submerge the pump motor in water; instead, wipe it down with a clean, damp cloth if it becomes soiled.
Regularly inspect all consumable parts for signs of wear. Over time, silicone components naturally stretch, lose their elasticity, and degrade from frequent washing and sterilization. As a general guideline, replace duckbill valves every one to two months, and diaphragms or silicone inserts every two to three months, depending on how often you pump. Keeping a spare set of replacement parts on hand ensures you are never left without a functional pump when you need it most.
Frequently Asked Questions (FAQ)
Can I Pump While Lying Down or Reclining?
Most wearable breast pumps are designed to be used while sitting upright or moving around during normal daily activities. You should check your specific model’s manual for exact angle restrictions, as most designs require you to remain within a 45-degree upright angle. Lying down flat or reclining too far back can cause milk to flow backward, potentially leaking out of the collection cup or, worse, entering the motor housing and damaging the electrical components. Keeping the collection cup upright ensures accurate volume measurement and maintains the integrity of the vacuum seal.
How Long Should a Single Pumping Session Last?
A standard pumping session typically lasts between 15 and 20 minutes per breast. Rather than relying solely on a fixed timer, it is highly beneficial to observe your personal let-down patterns and milk flow. You will know your session is complete when your breasts feel soft, light, and empty, and milk flow has ceased to a slow drip or stopped entirely for several minutes. Pumping for longer than 20 to 30 minutes is generally not recommended, as prolonged suction can cause nipple soreness and tissue irritation without yielding additional milk.

Community discussion
Share your experience or ask a question. Comments are reviewed before publication.