
Securing your home for a curious toddler is a milestone in parent childproofing, and installing Eudemon cabinet locks is a highly effective way to restrict access to kitchen cleaning supplies, heavy cookware, and fragile items. Because cabinet designs vary widely from modern handleless drawers to traditional double-door cupboards, a single installation method does not fit every scenario. Properly mounting these safety devices requires matching the correct lock mechanism to your specific cabinet type and understanding how environmental factors affect installation success.
In Singapore’s tropical climate, high relative humidity can significantly impact how well adhesive safety locks bond to household surfaces. Moisture in the air can trap microscopic water layers on cabinet doors, preventing pressure-sensitive adhesives from achieving a secure, long-term grip. To ensure your childproofing efforts hold up against determined toddlers, you must prepare the surfaces carefully, select the right lock style, and follow a precise, step-by-step mounting process.
Gather Your Tools and Prepare Cabinet Surfaces
Before opening your safety lock packaging, gather the necessary tools to ensure a precise and lasting installation. You will need high-purity rubbing alcohol (isopropyl alcohol), clean and lint-free microfiber cloths, a measuring tape, and a pencil for marking placement. If you are installing hardware-mounted or magnetic locks that utilize screws, have a hand screwdriver and a small drill with pilot bits ready. Having these items on hand prevents interruptions during the critical bonding phase of adhesive locks.
Products mentioned in this guide
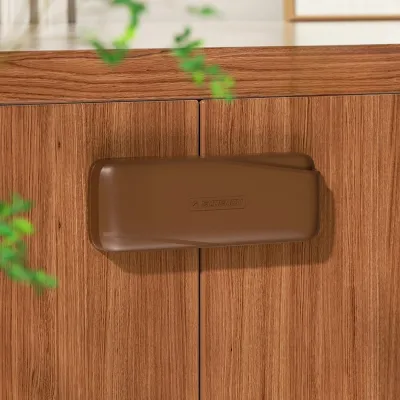
Prices are valid at publication and may change. Please refer to the product page for the latest price.
Thoroughly cleaning the cabinet surface is the most important step in the entire installation process. Kitchen cabinets naturally accumulate a thin, often invisible layer of grease, cooking oils, dust, and moisture over time. Adhesives applied directly over this residue will bond to the grease layer rather than the cabinet itself, leading to premature failure when a child pulls on the door. Wipe the target area vigorously with a microfiber cloth soaked in rubbing alcohol to strip away these contaminants.
In humid climates like Singapore, ensuring the cabinet surface is completely dry is vital for adhesive performance. After wiping the area with alcohol, use a dry, clean section of your microfiber cloth to remove any remaining moisture. Allow the surface to air-dry completely for at least five to ten minutes before proceeding. This safety boundary ensures all cleaning agents have fully evaporated, preventing moisture from being trapped beneath the adhesive pad, which would otherwise degrade the chemical bond.
Match Your Eudemon Lock to the Right Cabinet Type
Different cabinet configurations require distinct lock designs to function effectively without damaging your woodwork. Eudemon offers several lock variations, and choosing the wrong type for your furniture can result in a lock that is easily bypassed or impossible to install. Carefully evaluate your cabinet doors and drawers to determine which mechanism provides the most secure fit.

Adhesive strap locks are highly versatile and best suited for flat surfaces, standard drawers, and side-by-side cabinet doors where a flexible strap can bridge the gap. These locks feature two adhesive anchor points connected by a flexible plastic strap, making them ideal for corner cabinets, appliances like refrigerators, and non-standard angles. Because they mount on the exterior, they are highly visible but offer straightforward installation and operation.
Magnetic locks are ideal for standard hinged cabinet doors where a hidden, seamless aesthetic is preferred. These locks mount entirely inside the cabinet carcass and door, leaving no external hardware visible to disrupt your kitchen design. They rely on a powerful magnetic key held against the outside of the cabinet door to disengage the internal latch, making them exceptionally secure against toddlers who cannot figure out the mechanism.
U-shape or sliding locks are designed specifically for cabinets and drawers that feature existing adjacent handles or knobs, such as D-shaped pulls or round knobs. These locks do not require adhesives or screws; instead, they loop through or slide over the existing hardware to hold the doors closed. They are an excellent temporary option for rental homes where permanent modifications or adhesives are restricted.
Always check the manufacturer’s packaging for specific weight limits, age recommendations, and surface compatibility before installation. Avoid using adhesive locks on textured, porous, or freshly painted wood, as the adhesive may either fail to stick or strip the finish away upon removal. If you are unsure of your cabinet material or finish compatibility, consult the cabinet manufacturer before proceeding.
Step-by-Step Guide: Installing Adhesive Strap Locks
Adhesive strap locks are the most common childproofing devices due to their flexibility. Following a structured installation sequence ensures the strap is positioned correctly and the adhesive achieves its maximum holding strength.
Step 1: Positioning
Hold the lock and catch in place against the cabinet doors or drawer to determine the optimal strap length and placement. Do not pull the strap completely taut; instead, allow a tiny fraction of millimeter-scale slack so the strap remains straight but not under constant tension. Placing a strap under continuous tension forces the adhesive to pull against the cabinet constantly, which will weaken the bond over time.
Step 2: Marking
While holding the lock in its ideal position, use a pencil to lightly mark the exact outer edges of both adhesive pads on the cabinet frame and the door or drawer. These guide marks ensure that once you peel the protective backing, you can place the lock precisely on the first attempt. Avoid repositioning the lock after the adhesive has touched the surface, as peeling it off to adjust the placement severely reduces its stickiness.
Step 3: Application
Peel the protective backing off one of the adhesive pads, taking care not to touch the sticky surface with your fingers. Align the pad with your pencil marks and press it firmly against the cabinet. Apply heavy, even pressure with your palm or thumb across the entire surface of the pad for at least 30 seconds. Repeat this process for the second anchor pad, ensuring the strap remains in its designated position.
Step 4: Curing
Allow the adhesive to cure undisturbed for the duration specified on the product label, which is typically 24 hours. Do not attempt to latch, unlatch, or pull on the strap during this curing phase. In humid environments, keeping the room well-ventilated or air-conditioned during these 24 hours helps the adhesive cross-link properly, ensuring it reaches its maximum rated holding power before facing any physical strain.
Installation Steps for Magnetic and U-Shape Locks
Alternative Eudemon lock designs require different mounting techniques. Magnetic locks demand precise alignment of internal components, while U-shape locks rely on correct mechanical tension around external hardware.
Magnetic Cabinet Locks
To install hidden magnetic locks, you must align the internal latch mounted on the cabinet frame with the lock mechanism mounted on the inside of the door. Many Eudemon magnetic lock kits include an installation cradle or plastic template to simplify this alignment. Place the lock and latch into the template, peel the adhesive backing, and close the cabinet door to automatically transfer the components to their correct positions inside.
Once the components are positioned, press the adhesive backings firmly for 30 seconds. If your kit allows for hardware mounting, use a hand screwdriver to secure the provided small screws into the designated mounting holes, taking care not to drill or screw entirely through the cabinet door. Always store the magnetic key high out of your child’s reach, and consider keeping a spare key in a secure, designated location to avoid being locked out of your own cabinets.
U-Shape and Handle Locks
U-shape locks require no adhesive or drilling, making them exceptionally fast to install. Slide the lock mechanism open, slip the flexible or rigid U-shaped bar through both adjacent cabinet handles or around the knobs, and slide the locking bridge back onto the bar. Push the bridge tightly against the handles until the doors cannot be pulled open far enough for a child’s hand to fit through.
Verify that the lock mechanism does not scratch, dent, or rub harshly against your cabinet’s finish during daily use. If the lock fits loosely or slides excessively, it can mar painted or varnished wood over time. Adjust the tension or use a soft protective barrier, such as a small felt pad, if you notice any friction marks on the cabinet surface.
Test the Security and Troubleshoot Common Issues
Once the installation is complete and adhesive locks have fully cured, you must verify their structural integrity. Testing ensures that the locks will perform reliably when subjected to the sudden, sharp tugs typical of an active toddler.
To test the lock, apply a moderate, realistic pulling force to the cabinet door or drawer. Do not yank violently with full adult strength, as this can damage your cabinet hinges or wood. The lock should hold firmly without slipping, stretching excessively, or showing signs of peeling at the adhesive edges. If the door opens slightly but the lock catches, verify that the gap is not wide enough to pinch small fingers.
If your adhesive lock peels off during testing, several common installation errors may be responsible. Inadequate cleaning of kitchen grease, high ambient humidity during the curing process, or applying the lock to an incompatible surface like untreated, rough, or porous wood are the primary causes of adhesive failure. If the adhesive backing is contaminated with dust or finger oils from repositioning, you must replace the adhesive pad entirely with a fresh, high-quality double-sided mounting tape recommended by the manufacturer.
If the lock repeatedly fails to adhere or continues to damage your cabinet’s delicate surface treatment upon reapplication, stop using adhesive methods. Consult the manufacturer’s instructions for alternative hardware-mounted options that utilize secure screws, or seek professional advice from a childproofing specialist. Continuing to use a failing adhesive lock creates a false sense of security, leaving hazardous items accessible to your child.
Remove Locks Safely Without Damaging Cabinets
When your child outgrows the need for safety locks, removing them without ruining your cabinet’s paint, varnish, or laminate finish requires patience and the correct technique. Rushing the removal process can tear away wood fibers or leave unsightly, hardened residue behind.
To safely remove adhesive locks, use a handheld hairdryer on a low to medium heat setting to gently warm the adhesive pad. Direct the warm air at the edges of the plastic mount for one to two minutes to soften the acrylic foam tape. Once the adhesive is warm and pliable, slide a piece of dental floss or thin fishing line behind the plastic mount and use a gentle sawing motion to slice through the softened foam tape, separating the lock from the cabinet.
To clean off any residual glue left on the cabinet surface, apply a small amount of mild solvent, such as baby oil, vegetable oil, or a dedicated, surface-safe adhesive remover, to a clean cloth. Rub the residue gently in a circular motion until it lifts away. Always test any removal solvent or oil on a hidden, inconspicuous area of the cabinet first to ensure it does not strip, discolor, or dull the paint or protective wood finish.
Frequently Asked Questions (FAQ)
Can Eudemon adhesive locks be used on glass cabinet doors?
Before applying adhesive locks to glass, check the specific product label and manufacturer instructions, as some standard adhesives are not formulated for glass surfaces or may leave permanent, difficult-to-remove residues. If the packaging does not explicitly approve glass use, look for hardware-mounted locks or specific glass-compatible safety variants. Glass doors also pose a unique hazard if a child pulls on them with significant force, so ensuring a secure, broad-surface adhesive bond is critical to prevent localized stress on the glass pane.
How long should I wait before letting my child near the newly installed locks?
You should wait a full 24 hours to allow the mounting adhesive to cure completely before allowing your child near the cabinets. Even if the adhesive pad feels incredibly sticky immediately after application, the chemical bonds require time to cross-link and reach their maximum holding strength. Testing the lock too early, letting a child pull on it, or exposing it to heavy use before the 24-hour mark can permanently compromise the adhesive bond, leading to sudden failure later on.
Community discussion
Share your experience or ask a question. Comments are reviewed before publication.