
Securing kitchen cabinets is a fundamental step in childproofing your home as your infant transitions into a curious toddler. Around the age of six to twelve months, children begin crawling, pulling themselves up, and exploring their environment with intense curiosity. The kitchen, filled with heavy cookware, sharp utensils, and household cleaning chemicals, presents numerous hazards. Installing a high-quality child lock on your cabinets creates a reliable physical barrier that helps prevent access to these dangerous items, though it must always be paired with active caregiver supervision.
Choosing and installing the right child lock depends entirely on the design of your cabinetry. Kitchens typically feature a mix of hinged swing doors, sliding doors, and pull-out drawers, each requiring a specific locking mechanism to work effectively. By matching the lock type to the cabinet configuration and executing a precise installation, you can secure your kitchen without compromising the functionality of your cabinets.
Preparation: Essential Tools and Surface Cleaning
Before beginning the installation, gather the necessary tools to ensure a smooth and efficient process. For most child locks, you will need a measuring tape, a pencil for marking alignment, rubbing alcohol (isopropyl alcohol), and clean microfiber cloths. If you are installing screw-mounted locks rather than adhesive ones, you will also need a manual screwdriver and a power drill with drill bits sized according to the manufacturer’s instructions.
Products mentioned in this guide
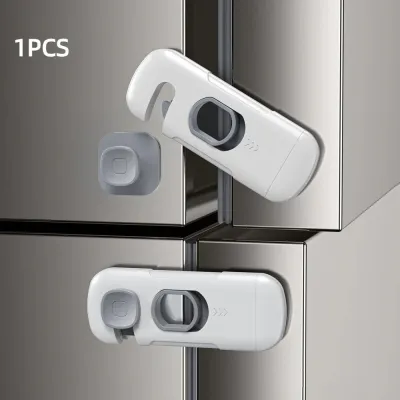
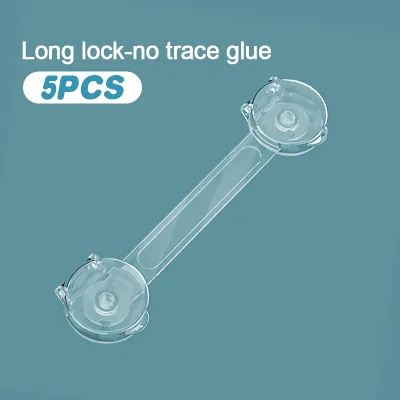
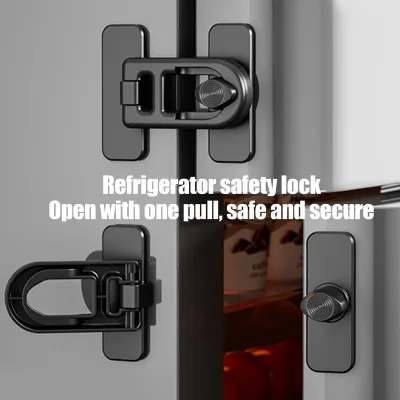
Prices are valid at publication and may change. Please refer to the product page for the latest price.
Proper surface preparation is the single most critical factor in determining whether an adhesive lock will hold over time. Kitchen cabinets naturally accumulate an invisible layer of grease, cooking oil residue, steam moisture, and dust. This is especially true in warm, humid environments like Singapore kitchens, where ambient moisture can rapidly degrade adhesive bonds if they are applied directly over contaminants.
To prep the area, wipe down the exact installation spots thoroughly with rubbing alcohol. Avoid using standard household glass cleaners, dish soaps, or multi-surface sprays, as these often leave behind a thin chemical film that prevents the adhesive from bonding fully with the cabinet material. Once cleaned, allow the surface to dry completely for at least five to ten minutes before applying any hardware.
Before you drill holes or apply high-strength adhesives, check your cabinet manufacturer’s warranty and material guidelines. Some premium wood veneers, high-gloss lacquered finishes, or delicate laminates can be permanently discoloured by chemical solvents or damaged by the strong tension of adhesive tapes. If you are renting your home, opt for damage-free adhesive solutions and verify with your landlord if minor alterations are permitted.
Step-by-Step Installation for Different Cabinet Types
Because kitchen cabinets open in different directions, a lock that works perfectly on a standard hinged cupboard will fail on a sliding pantry door or a deep pot drawer. Taking the time to understand the mechanics of each cabinet type ensures your safety devices remain secure and functional.

Before peeling off any adhesive backing or drilling guide holes, always dry-fit the lock. This means holding the locking components in place against the closed cabinet door to simulate how the latch will engage and disengage. Dry-fitting helps you verify that the mechanism clears internal shelves and does not prevent the door from closing completely.
Hinged Doors (Swing Cabinets)
Hinged doors are the most common cabinet style, swinging outward from a central frame. The optimal placement for a child lock on a hinged cabinet is near the top edge or around the handle area. This positioning keeps the device out of a toddler’s immediate line of sight and reach while remaining at an ergonomically comfortable height for adults to operate.
Adhesive strap locks are highly versatile options for hinged doors, especially double-door configurations. To install them:
- Measure and Mark: Use a measuring tape to align the two adhesive anchors horizontally across the gap between the doors, marking the outer edges lightly with a pencil.
- Apply the First Anchor: Peel the protective backing off the first anchor and press it firmly onto the face of one door for at least thirty seconds.
- Secure the Strap: Pull the flexible plastic strap taut across the opening to the second mark, ensuring there is enough slack for the lock to latch easily but not so much that the door can open wide enough for small hands to slip through.
- Apply the Second Anchor: Peel the backing off the second anchor, press it firmly in place, and leave the strap latched to maintain correct spacing.
- Cure: Allow the adhesive to cure undisturbed for 24 hours before subjecting it to regular pulling forces.
Internal magnetic locks offer a completely hidden aesthetic, mounting entirely inside the cabinet. To install them:
- Align the Template: Use the manufacturer-provided alignment cradle or template to position the lock body on the inside of the door and the matching catch on the underside of the cabinet frame.
- Mount the Catch: Secure the catch to the cabinet frame first, using either the pre-applied adhesive tape or the included wood screws.
- Mount the Lock: Place the lock body into the installation cradle, peel the adhesive backing, and close the cabinet door firmly so the lock adheres to the inside of the door in perfect alignment.
- Verify Operation: Open the door using the external magnetic key to ensure the internal latch releases cleanly and does not catch on the frame when unlocked.
Ensure the cabinet door closes completely flush after installation. If the lock mechanism is misaligned even slightly, it can prevent a tight magnetic seal or cause the door to hang unevenly, which puts unnecessary stress on both the lock and the cabinet hinges.
Sliding Doors
Sliding cabinet doors present a unique childproofing challenge because they bypass each other horizontally within a track. Standard strap locks are rarely effective here because they can interfere with the sliding motion. Instead, sliding doors require specialized track locks or overlapping door stops that physically block the movement of the panels.
Track locks work by clamping onto the metal or plastic runner track of the sliding door. To install them:
- Clean the Track: Vacuum out any dust or debris from the lower and upper tracks, then wipe the metal surface with rubbing alcohol.
- Position the Lock: Place the lock block onto the track at a point that limits the door's opening to a maximum of five centimetres. This narrow gap allows ventilation but prevents a child from opening the door wide enough to access the cabinet interior.
- Secure the Clamp: Tighten the thumb screw or hex bolt on the lock until it grips the track firmly. Ensure it does not distort or damage the track profile.
Overlapping door locks, often designed as butterfly-shaped adhesive wings, are stuck directly onto the surface of the inner sliding door. To install them:
- Locate the Overlap: Slide the doors to the fully closed position and identify the area where the front door overlaps the rear door.
- Apply the Lock: Clean the surface of the rear door just behind the edge of the front door. Peel the adhesive backing and press the flat butterfly lock onto this spot.
- Test Clearance: When the wings of the lock are pressed flat, the front door should slide smoothly over them. When you pop the wings outward, they should physically block the front door from sliding past, keeping the cabinet securely closed.
Avoid placing any lock where it might cause the sliding door to derail from its tracks. A derailed door poses a serious safety hazard, as heavy wood or glass panels can fall outward onto a child.
Drawers
Drawers require locks that can withstand vertical and horizontal pulling forces. The most reliable options are internal spring latches or magnetic drawer locks, both of which prevent the drawer from sliding out more than a fraction of an inch until an adult releases the mechanism.
Internal adhesive spring locks consist of a flexible plastic hook mounted inside the drawer and a catch mounted to the cabinet frame. To install them:
- Position the Latch: Place the hook on the inside top edge of the drawer side-wall or drawer face.
- Align the Catch: Hold the corresponding catch against the underside of the cabinet frame lip. Ensure that when the drawer is pushed closed, the hook naturally rides over the catch and snaps upward to lock.
- Secure the Hardware: Mark the positions with a pencil, peel the adhesive backing (or drill pilot holes for screws), and press the components firmly into place.
- Test the Gap: Pull the drawer open slowly. It should stop after opening about two to three centimetres, allowing just enough space for an adult finger to reach in, press the flexible hook down, and open the drawer fully.
Magnetic drawer locks use a similar mounting logic but rely on a magnetic key to pull the internal latch downward, eliminating the need to reach your fingers inside the narrow gap. When installing magnetic locks in drawers, verify that there is sufficient vertical clearance so the lock housing does not scrape against the underside of the countertop or the drawer frame above it as it glides open.
Always test the drawer’s movement slowly after installation. If you feel any resistance, scraping, or friction, adjust the alignment immediately to prevent premature wear on your cabinet slide runners.
Common Installation Mistakes and How to Avoid Them
Even high-quality child locks can fail if they are installed incorrectly. Understanding the common pitfalls of cabinet lock installation will save you time and preserve the integrity of your kitchen hardware.
- Skipping Surface Cleaning: Applying adhesive pads directly over kitchen grease, dust, or cooking residue guarantees the lock will fail under minimal pressure. Always clean the area with rubbing alcohol and let it dry completely.
- Testing the Lock Too Soon: Adhesive tapes require time to establish a permanent molecular bond with the cabinet surface. Pulling on the lock immediately after installation breaks this initial bond, reducing its ultimate holding power. Strictly observe the manufacturer's curing window, which is typically 24 to 48 hours, before allowing anyone to pull on the locked doors.
- Misaligning Magnetic or Latch Locks: If the internal latch and external catch are out of alignment by even a millimetre, the lock may fail to engage or prevent the door from closing. Use the plastic alignment templates included in the packaging, or use a pencil to mark exact intersection lines before securing the parts.
- Using Screws That Are Too Long: When installing screw-mounted locks on thin cabinet doors or modern MDF panels, long screws can easily pierce through to the finished exterior face. Measure the thickness of your cabinet doors beforehand and select short, coarse-threaded wood screws that provide a tight grip without breaching the outer surface.
Testing and Maintenance for Long-Term Safety
Once the installation is complete and the adhesives have fully cured, it is vital to verify that the locks can withstand daily use. Conduct a physical check by applying a firm, toddler-level pulling force to each secured door and drawer. The lock should remain rigidly in place without shifting, peeling, or allowing the door to open wide enough for a child’s hand or head to get trapped.
Child locks are subjected to constant stress from daily kitchen activities, meaning regular maintenance is necessary to ensure long-term reliability. Every month, inspect all adhesive bonds for signs of lifting, cracking, or peeling at the edges. For screw-mounted hardware, gently wiggle the lock body to check for loose screws, tightening them with a hand screwdriver if necessary to avoid stripping the wood threads.
Keep the locking mechanisms clean by wiping them down with a damp microfiber cloth. Avoid spraying harsh chemical degreasers, bleach, or abrasive kitchen cleaners directly onto plastic locks or adhesive pads, as these substances can degrade the plastic polymer or dissolve the adhesive backing.
Replace any child lock immediately if you observe visible signs of wear, such as cracked plastic housings, weakened internal metal springs, or lifting adhesive pads. Additionally, as children grow, their cognitive and motor skills develop rapidly; if your child figures out how to bypass or open a specific lock mechanism, discontinue its use and upgrade to a more complex locking system.
Frequently Asked Questions (FAQ)
Can I install child locks on cabinets without drilling?
Yes, adhesive-backed child locks are highly effective, widely available, and require no drilling. Modern high-bond adhesives are designed to secure strap locks, magnetic latches, and internal spring locks firmly to smooth, sealed cabinet surfaces such as varnished wood, laminate, metal, and glass. However, adhesive locks have limitations; they may not bond securely to raw, unsealed wood, heavily textured surfaces, or cabinets with peeling paint or laminate, where drilling remains the more secure option.
How do I remove adhesive child locks without damaging the cabinet finish?
To remove adhesive locks safely when they are no longer needed, use a handheld hairdryer on a low-to-medium heat setting to gently warm the adhesive pad. This softens the glue, making it pliable. Carefully slide a piece of dental floss, a thin plastic scraper, or a silicone spatula underneath the warmed pad to lift it away from the cabinet surface. Any remaining sticky residue can be wiped away using a mild adhesive remover or rubbing alcohol, but always test the solvent on a hidden area of the cabinet first to ensure it does not dull or damage the finish.
Community discussion
Share your experience or ask a question. Comments are reviewed before publication.