
Securing your kitchen is one of the most critical steps in baby-proofing your home as your child grows and begins exploring. Kitchen cabinets and drawers often house sharp utensils, heavy cookware, and potentially hazardous cleaning chemicals, making them a primary area of concern. To secure these spaces effectively, you must learn how to install a child lock properly across various cabinet configurations, including drawers, hinged doors, and sliding doors.
The right installation method depends on whether you choose external adhesive straps, internal latches, or magnetic locking systems. By understanding the mechanical requirements of each lock type and preparing your cabinet surfaces correctly, you can create a reliable barrier that keeps your curious toddler safe while maintaining convenient access for adults.
Preparing for Installation: Tools, Materials and Surface Checks
Before purchasing or installing any child safety devices, you must gather the correct tools and verify that your kitchen cabinets are suitable for the locks you have chosen. Having the right materials on hand ensures a smooth installation process and prevents accidental damage to your cabinetry.
Products mentioned in this guide
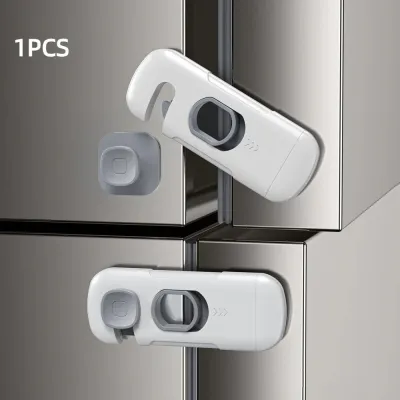
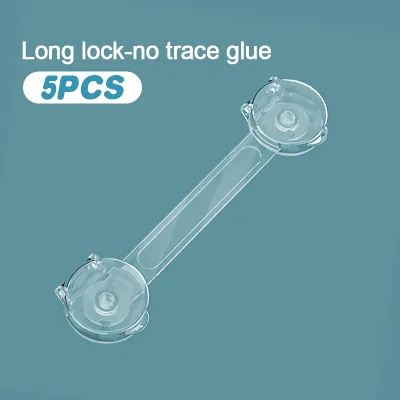
Prices are valid at publication and may change. Please refer to the product page for the latest price.
Tools and Materials Checklist
For a complete installation setup, prepare the following items:
- A flexible measuring tape or steel ruler to ensure precise alignment.
- Rubbing alcohol (isopropyl alcohol) or a mild, residue-free degreaser.
- Clean microfiber cloths for wiping down surfaces.
- A pencil or painter's tape for temporary marking.
- A power drill with small wood drill bits (only if you are installing screw-mounted magnetic or latch locks).
- A hand screwdriver to avoid over-tightening screws in soft wood or medium-density fibreboard (MDF).
Surface Preparation
Adhesive-based child locks rely heavily on a clean, chemical bond to stay secure. Kitchen cabinets naturally accumulate a microscopic layer of cooking grease, dust, and moisture over time, which will quickly ruin the stickiness of any adhesive. To prepare the surface, wipe the target area thoroughly with rubbing alcohol and a microfiber cloth. Avoid using standard household glass cleaners or soapy water, as these often leave behind a thin residue that prevents the adhesive from bonding fully. Allow the surface to dry completely for several minutes before applying any locks.
Material Compatibility Checks
It is essential to evaluate your cabinet material before choosing a lock type. Adhesive locks are highly convenient but can cause cosmetic damage to certain surfaces upon removal. They may strip paint from freshly painted cabinets, peel delicate wood veneers, or leave stubborn residue on untreated, porous wood. If you have high-value solid wood cabinets or custom painted finishes, screw-mounted internal locks may actually be a safer long-term choice, as screw holes on the inside of the frame are invisible from the outside and easy to patch later.
Safety Boundary
Always read the specific child lock manufacturer’s instructions, weight limits, and age recommendations before starting the installation. If your cabinet material is incompatible with the adhesive or screws provided in your kit, stop the installation immediately. Do not attempt to modify the lock or use alternative heavy-duty glues without consulting the manufacturer, as this can compromise the safety of the lock or permanently damage your kitchen.
Installing Child Locks on Kitchen Drawers
Kitchen drawers are highly appealing to toddlers because they are situated directly at their eye level and are easy to pull open. Securing these drawers requires hardware that can withstand repeated pulling forces while remaining simple enough for adults to operate daily.

Adhesive Strap Locks
Adhesive strap locks are highly versatile, external safety devices that work exceptionally well for drawers. Because they are flexible, they can easily bridge the gap between a moving drawer front and the static cabinet frame.
- Positioning: To position an adhesive strap lock correctly, identify a flat surface on the front of the drawer and a corresponding flat surface on the adjacent cabinet frame or the underside of the countertop. The strap should be positioned high enough to remain out of a toddler's easy line of sight, but low enough to allow comfortable adult access. Ensure the strap is pulled taut during positioning; a loose strap may allow the drawer to open slightly, creating a gap where small fingers can get pinched.
- Application Steps: Once you have marked the ideal spot with a pencil, peel the protective backing off the first adhesive pad. Press the pad firmly onto the cleaned cabinet frame for at least 30 seconds to initiate the bond. Next, peel the backing off the second pad, pull the strap taut across the drawer gap, and press the second pad firmly onto the drawer front for another 30 seconds.
- Verification: Do not pull on the strap immediately. Most adhesives require a complete curing period to reach their maximum holding strength. Once the manufacturer's recommended curing time has passed, test the lock by pulling gently on the drawer. The strap should remain secure, and the adhesive pads should show no signs of lifting or sliding along the cabinet surface.
Internal Magnetic and Latch Locks
For homeowners who prefer to keep their kitchen’s aesthetic clean and seamless, internal magnetic and latch locks are an ideal solution. These locks are completely hidden inside the drawer and are operated using an external magnetic key or a manual internal release.
- Alignment and Marking: Installing internal locks requires precise alignment between the locking unit mounted on the inside of the drawer and the catch mounted on the cabinet frame. Close the drawer slightly and use a pencil to mark the exact contact points where the lock mechanism meets the frame. Ensure there is sufficient internal clearance; if your drawers are packed tightly with kitchen utensils or organizers, these items may press against the lock mechanism and cause it to jam or fail to engage.
- Mounting: Internal locks are available in both adhesive and screw-mounted configurations. If you are using screw-mounted versions, check the thickness of your drawer front and side panels before drilling. Standard kitchen drawer fronts can be surprisingly thin, and using a screw that is too long will pierce through the exterior face of your cabinet. Always pre-drill small pilot holes to prevent the wood or MDF from splitting.
- Operation: To operate an internal magnetic lock, hold the magnetic key against the outside of the drawer front directly opposite the internal lock's location. The magnetic force will pull the internal latch downward, allowing you to pull the drawer open. For standard latch locks, open the drawer slightly until the latch catches, then reach your finger inside to press the latch down and release the drawer.
Installing Child Locks on Hinged Cabinet Doors
Hinged cabinet doors present a different physical challenge, as children can pull them open from the side, applying significant outward leverage. Securing these doors requires robust locks placed strategically to resist this pulling force.
External Adhesive and Latch Locks
External latch locks are a highly visible and effective way to secure double or single hinged doors. They physically connect the door to the cabinet frame or connect two adjacent doors to each other.
- Placement Strategy: To maximize the effectiveness of an external lock, place it near the top corner of the cabinet door, farthest away from the hinges. This placement is critical because a child's leverage is weakest at the top of the door, and placing the lock higher up keeps it further out of their immediate reach.
- Installation Steps: Clean the application areas thoroughly with rubbing alcohol. For latch-style locks, temporarily assemble the latch and catch to check the alignment. Mark the positions with a pencil, then peel and stick the components. Press firmly on each part for 30 seconds to ensure the adhesive makes full contact with the cabinet surface. Ensure the latch engages and disengages smoothly without binding or catching prematurely.
- Curing Time: It is vital to respect the adhesive curing time specified by the manufacturer before allowing any tension on the lock. This curing process typically takes 24 hours. During this period, avoid using the cabinet if possible, and do not let children pull on the doors, as any early tension can ruin the chemical bond and cause the lock to fail later.
Internal Magnetic Locks
Internal magnetic locks are highly favored for hinged doors because they leave the exterior of your cabinets completely untouched. They consist of a magnetic latch installed inside the cabinet and a catch plate installed on the cabinet frame.
- Clearance Check: Before mounting an internal magnetic lock, measure the internal gap between the closed cabinet door and the cabinet frame. The lock components must fit within this space without obstructing the door from closing completely. You must also check that the lock will not strike any internal shelves, lazy Susans, or stored items when the door is closed.
- Mounting the Catch and Lock: Mount the magnetic catch on the inside surface of the cabinet door, and install the locking mechanism on the underside of the cabinet frame or countertop support. Many high-quality kits include an installation template or alignment cradle that holds both pieces in place while you stick or screw them down, ensuring perfect alignment.
- Drilling Precautions: If you choose to secure your internal locks with screws for a stronger hold, take extreme care when drilling into the cabinet doors. Wrap a piece of colored painter's tape around your drill bit at the desired depth to act as a visual drill stop. This simple step prevents you from accidentally drilling too deep and piercing through the exterior finish of your cabinet doors.
Installing Child Locks on Sliding Cabinet Doors
Sliding cabinet doors, often found in modern minimalist kitchens or pantry areas, require specialized locking solutions. Standard strap or latch locks are designed for outward-opening doors and cannot effectively secure doors that slide horizontally along a track.
- Identifying the Right Lock: To secure sliding doors, you must use specialized hardware such as track clamps, sliding door-specific adhesive locks (often called butterfly locks), or internal track blockers. These locks work by physically blocking the path of the sliding panel or locking the overlapping panels together so they cannot slide past one another.
- Track Clamp Installation: Track clamps are mechanical devices that tighten onto the upper or lower metal track of the sliding door. Position the clamp on the track directly next to the sliding door frame when the door is fully closed. Tighten the clamp securely using the integrated thumbscrew or hex key. This physically blocks the door from sliding open. Ensure the clamp is tightened sufficiently so it does not slip when pulled, but avoid over-tightening, which can warp or damage the metal track and cause the door to derail.
- Overlapping Adhesive Locks: Adhesive butterfly locks are applied directly to the surface of the inner sliding door. When activated, the "wings" of the lock fold flat, allowing the outer door to slide freely. When locked, the wings pop up, preventing the outer door from sliding past. To install, clean the surface of the inner door thoroughly. Align the lock so that the raised wings will block the edge of the outer door when it is closed. Peel the backing, press firmly, and allow the adhesive to cure fully before testing.
- Safety and Maintenance: Sliding doors can be heavy, and a child pulling hard can exert significant force. Never use excessive force if a sliding lock becomes jammed, as this can damage the track or shatter glass inserts. Regularly inspect the sliding tracks and clean out any accumulated dust, hair, or debris, as debris can dislodge track-based clamps or interfere with the smooth operation of adhesive locks.
Common Installation Mistakes and Post-Installation Testing
Even the highest-quality child locks can fail if they are installed incorrectly. Avoiding common pitfalls and establishing a robust testing routine is essential to ensuring your kitchen remains safe for your child.
Mistake 1: Skipping Surface Preparation
Skipping the surface preparation step is the single most common cause of adhesive lock failure. Kitchens are high-humidity environments, and cabinet doors constantly collect airborne oils from cooking. If you apply an adhesive lock directly onto an uncleaned surface, the adhesive will bond to the layer of grease and dust rather than the cabinet itself, causing the lock to fall off under the slightest pull.
Mistake 2: Ignoring Curing Times
It is incredibly tempting to test a newly installed lock immediately to see if it works. However, doing so can permanently weaken the adhesive. Most pressure-sensitive adhesives require at least 24 hours to cure and reach their maximum load-bearing capacity. Keep the cabinet doors open or avoid putting any tension on the locks during this critical curing window.
Mistake 3: Incorrect Drill Depth
When installing screw-mounted locks, failing to measure the screw length against the cabinet door thickness can result in unsightly damage. Screws that are too long will pierce through the front of your beautiful cabinet doors. Additionally, failing to check the internal path of the drill can lead to hitting hidden hinges, soft-close mechanisms, or even plumbing lines running behind sink cabinets.
Post-Installation Testing Protocol
Once the installation is complete and adhesives have fully cured, perform a rigorous safety check:
- Apply firm outward pressure to the cabinet door or drawer, simulating the forceful tug of a determined toddler.
- Inspect the edges of adhesive pads closely to ensure there is no lifting, peeling, or sliding.
- Verify that the lock release mechanism (whether a strap, latch, or magnetic key) operates smoothly for adults without sticking.
- Ensure that the lock does not allow the door to open wide enough for a child's hand to fit through, which poses a severe finger-pinching hazard.
Ongoing Maintenance
In tropical, high-humidity environments like Singapore, temperature and moisture fluctuations can degrade adhesive bonds over time. Make it a habit to inspect all child locks monthly. Check that the adhesive remains firmly attached, screws have not vibrated loose, and magnetic keys still align perfectly with their internal counterparts. Replace any worn or failing locks immediately.
Frequently Asked Questions (FAQ)
Can I install child locks on glass cabinet doors?
Standard adhesive child locks are generally not recommended for glass cabinet doors. If a child pulls forcefully on a lock adhered to glass, there is a risk of cracking or shattering the glass panel, posing a severe safety hazard. Additionally, removing strong adhesives from glass can be extremely difficult and may scratch or damage the surface. If you must secure glass cabinets, look for specialized track clamps designed specifically for glass doors, or use suction-cup locks that can be removed safely. Always consult the cabinet manufacturer’s guidelines before applying any locking device to a glass surface.
How do I remove adhesive child locks without damaging the cabinet?
To remove adhesive child locks safely when they are no longer needed, use a hairdryer on a low or medium heat setting to gently warm the adhesive pad. The heat will soften the glue, making it pliable. Once warmed, slide a piece of dental floss or a thin plastic scraper underneath the pad and slowly work it through the adhesive to separate the lock from the cabinet surface. Avoid pulling the lock off forcefully, as this can rip off paint, veneer, or wood laminate. Wipe away any remaining sticky residue with a mild cleaning oil or specialized adhesive remover, checking first on an inconspicuous area to ensure it does not dull the cabinet finish.
Community discussion
Share your experience or ask a question. Comments are reviewed before publication.