
Installing a Moskito Guard crib net properly is essential for protecting your baby from insects while maintaining a secure sleep environment. In warm, humid climates like Singapore, where keeping windows open or managing indoor airflow is common, a reliable crib net acts as a physical barrier against mosquitoes. However, a poorly installed net can quickly become a safety hazard, posing risks of entanglement. To ensure full coverage and peace of mind, you must carefully mount the structural frame, secure the anchor points, drape the mesh tautly, and tuck any excess fabric safely beneath the mattress. This guide walks you through the entire process, from pre-installation checks to daily safety verifications, helping you create a secure, insect-free sanctuary for your little one.
Pre-Installation Checks and Safety Boundaries
Before you begin assembling any parts, you must verify that your specific crib structure and the net model are fully compatible. Start by measuring your crib’s exterior dimensions, including the length, width, and the height of the side rails. Compare these measurements against the manufacturer’s specifications. A net designed for a standard cot may not fit securely on an oval crib, leading to dangerous gaps. Ensure the mattress thickness allows the net to tuck deeply underneath, preventing loose edges that your baby could pull into the sleeping area.
Next, unpack all the components in a well-lit room and lay them out on a clean surface. Inspect every piece of the frame, brackets, and mesh fabric. Check the plastic or metal poles for any sharp edges, cracks, or manufacturing defects that could snag the net or scratch your baby. Examine the mesh itself under a bright light to ensure there are no pre-existing tears, loose threads, or unraveled seams. If you notice missing hardware or damaged parts, do not improvise with household substitutes; contact the manufacturer for official replacements.
Products mentioned in this guide


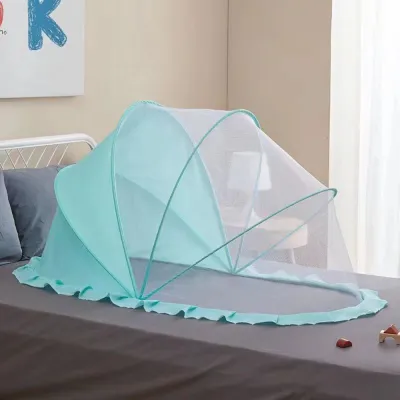
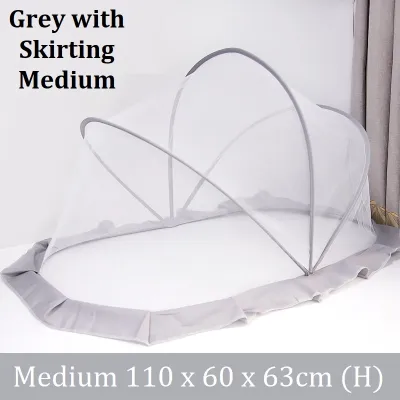
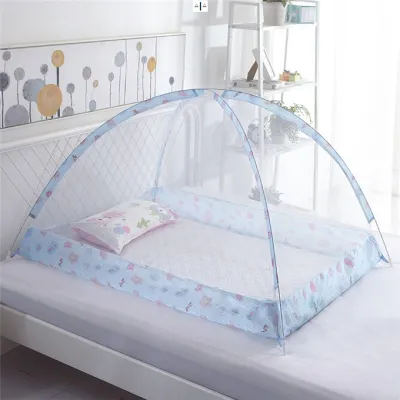

Prices are valid at publication and may change. Please refer to the product page for the latest price.
Finally, review the product manual to confirm that the net is appropriate for your baby’s current developmental stage. Most crib nets are designed for infants who cannot yet sit up, pull themselves up, or stand. If your baby is reaching these milestones, using a full-coverage net can pose a significant climbing or entanglement hazard. Always verify the manufacturer’s age, weight, and mobility limits before proceeding with the installation.
Tools and Materials Required
Having the correct tools on hand prevents interruptions. You will only need a few basic household items: a standard measuring tape to verify alignment and a manual Phillips-head screwdriver depending on the provided brackets. Avoid power drills, as high torque can strip plastic threads, crack wooden slats, or overtighten brackets.

It is critical to use only the fasteners, brackets, and mounting hardware supplied by the manufacturer. Never substitute these with generic screws, zip ties, or adhesive tapes from your toolbox. The included hardware is engineered to withstand net tension and fit the frame poles without slipping. Using unapproved fasteners can lead to structural failure, causing the frame to collapse into the crib. If your crib has unique, extra-thick rails or solid panels that do not accommodate the standard brackets, check the manufacturer’s documentation for approved alternative mounting kits rather than attempting a DIY modification.
Step-by-Step Installation Process
Installing the net requires a methodical approach to ensure the structure remains rigid and the mesh provides complete coverage without sagging. By following a systematic sequence, you can avoid common mistakes such as misaligned poles or uneven fabric tension. Ensure the crib is completely empty of toys, bedding, and the mattress before you begin, as this gives you clear access to the frame and prevents any small hardware pieces from falling into the baby’s sleeping space.
Securing the Frame and Anchor Points
The stability of the entire net depends on how securely you attach the structural frame to the crib. Begin by identifying the correct mounting locations on your crib. These anchor points are typically located on the center of the back rail, corner posts, or solid end panels. If your crib features wide, flat slats, position the mounting brackets so they clamp firmly around a sturdy slat rather than a decorative or thin element.
Align the brackets carefully so the support poles stand perfectly vertical. Tighten the clamping screws gradually to distribute pressure evenly, ensuring all screws are completely flush with the bracket surface. Protruding screw heads or sharp edges can snag the mesh fabric or present a scratch hazard during daily use.
As you tighten the hardware, pay close attention to the crib material. If you hear any cracking sounds or notice the wood or plastic of the crib bending, stop immediately. Loosen the bracket and inspect the area for damage. If the crib material cannot support the bracket without warping, or if the installed frame feels wobbly and unstable even when fully tightened, do not proceed. In such cases, consult the manufacturer to verify if your crib model is compatible with the mounting system.
Draping and Tucking the Mosquito Net
Once the frame is secure, unfold the net and locate the top center point. Gently drape the net over the frame so it falls evenly on all sides. Secure the fabric to the poles using the provided clips or ties, starting from the top and working down.
With the net draped over the frame, pull the lower edges of the mesh down toward the base of the crib. You must adjust the drop length so that there is ample excess fabric at the bottom. Lift the crib mattress slightly and tuck this excess mesh tightly and deeply underneath the mattress on all four sides. The weight of the mattress must hold the net firmly in place, creating a continuous, secure seal that prevents mosquitoes from crawling in from underneath.
While tucking, maintain a balanced tension across the entire net. The mesh should be taut enough to prevent sagging, but not stretched so tightly that it strains seams or bends the support poles. If you find yourself pulling excessively hard to make the net reach under the mattress, double-check that the frame height is adjusted correctly according to the manual, or verify that the net model is indeed the correct size for your deep mattress.
Post-Installation Safety Verification
Before placing your baby back into the crib, perform a rigorous safety inspection. Conduct a “hand sweep” test by running your hand along the inside perimeter, pressing gently against the mesh. Look for any gaps or loose folds where an insect could enter or where a baby could become wedged. The mesh must remain firmly tucked and flat against the sides.
Next, inspect the interior of the sleeping space for any loose elements. Ensure there are no dangling strings, adjustment ties, or excess fabric hanging down inside the crib. Any cord or ribbon longer than a few centimeters presents a serious strangulation risk. If the net features external adjustment drawstrings, ensure they are tied securely on the outside of the frame, completely out of your baby’s reach.
Finally, test the physical stability of the setup. Reach into the crib and gently pull on the net from the inside, simulating a baby grabbing or tugging at the fabric. The frame must remain rigid and upright, and the tucked mesh must not pull free from under the mattress under mild tension. If the frame wobbles significantly, or if the net easily slips out from beneath the mattress, disassemble the setup and re-evaluate the mounting brackets and tucking depth. If the system cannot pass these physical checks, do not use it.
Ongoing Maintenance and Removal Conditions
Establish a routine maintenance schedule to keep the net safe and clean. Dust can accumulate in the mesh, reducing airflow. Refer to the care label; most nets require gentle hand washing in cool water with mild baby-safe detergent, followed by air drying. Avoid machine washing or tumble drying unless permitted, as heat can shrink the fabric or damage the mesh.
During your daily routine, take a moment to inspect the entire setup. Check the mesh for any tiny tears or run lines that could expand or allow insects through. Examine the support poles for any signs of bending or stress whitening, and verify that the mounting brackets remain tightly clamped to the crib rails. Vibrations from daily use can loosen screws, so tighten them manually as needed.
Most importantly, you must recognize when it is time to permanently remove the net. The primary stopping condition is developmental: the moment your baby shows signs of pulling up to a kneeling position, pushing up on hands and knees, or standing, you must remove the net and its frame immediately. At this stage of mobility, a baby can easily use the frame or the mesh to pull themselves up, creating a severe risk of the structure collapsing, or they may attempt to climb the net, leading to falls or dangerous entanglement.
Frequently Asked Questions (FAQ)
Can I use a Moskito Guard net on a bassinet or playard?
Crib-specific mosquito nets are engineered for the precise dimensions and rigid structures of standard wooden or metal cribs. You should not use a crib net on a bassinet or a playard unless the manufacturer explicitly states it is compatible. Bassinets are significantly smaller, meaning a crib net will have excessive loose fabric that cannot be tucked safely, creating a serious suffocation and entanglement hazard. Playards often feature flexible, fabric-covered frames and mesh sides that may not support the clamping brackets of a crib net frame. Using an incompatible net can cause the playard sides to collapse or allow the mounting poles to tip inward. Always consult the manufacturer’s compatibility guidelines and select a net specifically designed and sized for your particular bassinet or playard model.
What should I do if the net touches the baby's face?
If the mosquito net is sagging or resting against your baby’s face, you must address this immediately, as it presents an urgent suffocation risk. First, remove your baby from the crib to ensure their safety. Inspect the frame to see if the support poles have slipped, bent, or been installed at the incorrect height. Adjust the mounting brackets to raise the frame, or tighten the mesh tension to pull the fabric taut and away from the sleeping area. If your net model relies on suspension points, ensure the overhead ties are secure and adjusted to lift the canopy fully. If you cannot achieve a safe clearance of several inches between the net and the sleeping surface, or if the frame cannot hold the mesh taut, stop using the net immediately. You may need to replace it with a model that is fully compatible with your crib’s design.
Community discussion
Share your experience or ask a question. Comments are reviewed before publication.