
Installing a mesh crib bumper correctly is essential for maintaining a secure sleep environment for your baby. While traditional padded bumpers are widely discouraged due to suffocation risks, many parents turn to breathable mesh alternatives to prevent their little ones from bumping their heads or getting their limbs caught between crib slats. However, a mesh bumper is only as safe as its installation. If it is loose, poorly fitted, or improperly secured, it can introduce new hazards such as entanglement or entrapment.
To ensure the highest level of safety, you must approach the installation process with precision, focusing on a taut fit, secure fastening, and regular maintenance checks. This guide walks you through the essential steps to prepare, install, verify, and eventually transition away from a mesh crib bumper, helping you create a comfortable and secure space for your infant. By taking the time to double-check every tie and seam, you can significantly reduce risks and gain peace of mind.
Pre-Installation Safety Checks and Preparation
Before you begin attaching any fabric to your baby’s crib, you must verify that your equipment is fully compatible and safe to use. Start by measuring the spacing of your crib slats and checking the mattress fit. Standard crib safety guidelines generally require slats to be spaced no more than 6 centimeters apart to prevent a baby’s head from becoming trapped. Ensure your mattress fits snugly within the crib frame with no significant gaps along the edges where a bumper could slip down or get wedged.
Products mentioned in this guide
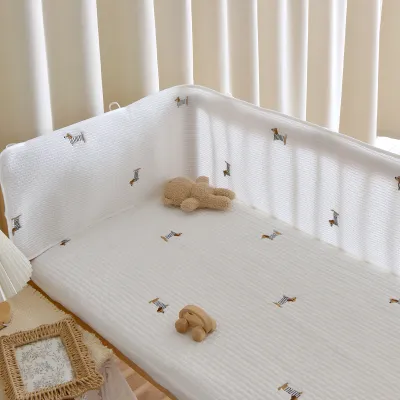
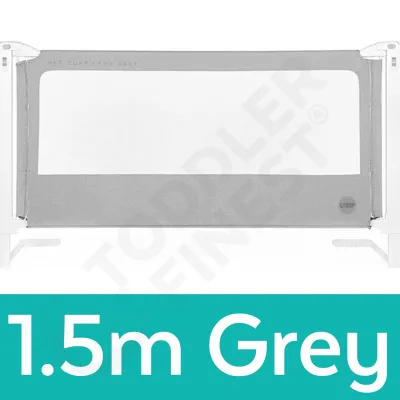

Prices are valid at publication and may change. Please refer to the product page for the latest price.
Next, compare the dimensions of your mesh bumper with the interior perimeter of your crib. Mesh bumpers are designed to wrap tightly around the inside of the crib, and any excess fabric can bunch up, creating dangerous folds or pockets. If the bumper is too long, do not attempt to fold it over or force it to fit; instead, verify if the manufacturer offers a different size or model designed specifically for your crib type, such as a mini-crib or a standard full-size crib.
Always read the specific manufacturer’s instruction manual thoroughly before starting. Different brands utilize unique tie configurations, hook-and-loop fasteners, or specific routing paths that must be followed precisely. Pay close attention to any weight limits, age recommendations, or explicit warnings provided by the manufacturer, as these guidelines are tailored to the specific structural design of the product.
Finally, conduct a meticulous physical inspection of the mesh bumper before bringing it near the nursery. Check the entire length of the fabric for factory defects, such as tears in the mesh, loose threads, or compromised stitching on the straps. If you notice any damaged fasteners or fraying material, do not attempt to repair them yourself or use the product; return it immediately or contact the manufacturer for a replacement.
Step-by-Step Installation for a Secure Fit
Achieving a secure fit requires a systematic approach that eliminates gaps and prevents the fabric from sagging. Begin by positioning the mesh panels along the inner perimeter of the crib. The bottom edge of the mesh bumper must sit completely flush against the top of the mattress. It should not overlap the mattress in a way that creates a ledge or a pocket where a baby’s face could press against it, nor should it sit too high, leaving a gap where a small limb could slide underneath.

Once the panels are positioned, begin securing the ties or fasteners to the crib slats. Work your way systematically from one end of the panel to the other, pulling the fabric taut as you go. When tying the straps, follow the manufacturer’s instructions precisely. Use secure, double-knotted ties that cannot be easily undone by a curious baby or loosened by the natural movement of the crib. Avoid using simple bows that can unravel under tension or when pulled.
After securing all the fasteners, address any excess strap length. Long, dangling ties present a serious strangulation or entanglement hazard inside the sleep area. If the manufacturer’s instructions permit, trim the excess length of the straps, leaving just enough fabric to maintain a secure knot. If you trim the straps, ensure you seal or tuck the cut ends safely behind the bumper, completely out of your baby’s reach. Alternatively, wrap and tuck the excess strap length securely behind the outer side of the crib slats so they are inaccessible from inside the crib.
The final step in the physical installation is to smooth out the mesh fabric across the entire perimeter. Run your hands along the top and bottom edges of the bumper to ensure the material is highly taut and does not sag inward. A sagging bumper can easily drape over a sleeping baby, posing a suffocation risk. The fabric should feel firm and springy to the touch, resembling a tight drum skin rather than a loose curtain.
Post-Installation Safety Verification and Testing
Once the installation is complete, you must perform a series of rigorous safety checks before placing your baby in the crib. Start with a physical pull test on every single fastened point. Grasp the mesh bumper near each tie or fastener and pull firmly in multiple directions. The fasteners should hold securely without slipping down the crib slats or sliding out of alignment. If any part of the bumper shifts easily, untie and re-secure that section, ensuring the knots are tighter and positioned correctly against the slats.
Next, inspect the entire boundary where the bumper meets the mattress. Look closely for any gaps, particularly in the corners of the crib. A baby’s head, hand, or foot can easily become wedged in even a small opening between the mattress and the bumper. If you find any gaps, adjust the height of the bumper or tighten the lower fasteners to pull the mesh flush against the mattress surface.
Carefully examine the interior of the crib from your baby’s perspective. Ensure there are no loose strings, hanging tags, exposed hardware, or trimmed strap ends within reach. Even small plastic tags or loose threads can become choking hazards if detached. Everything must be tucked away neatly behind the mesh panels, away from the sleeping area.
Keep in mind that fabric naturally stretches and fasteners can loosen over time due to daily use, crib movement, or your baby pulling on the mesh. Establish a strict routine to re-check the tightness and overall integrity of the bumper weekly. Make this check a standard part of your nursery cleaning routine, ensuring that any slack is immediately taken up and any loose knots are retied securely.
When to Stop Using and Remove the Bumper
A mesh crib bumper is not a permanent fixture and must be removed as your baby reaches specific developmental milestones. The most critical milestone to watch for is when your baby begins to pull themselves up to a standing position. Once a baby can stand, they may attempt to use the bumper as a step or climbing aid to hoist themselves over the crib railing, which significantly increases the risk of a dangerous fall.
You must also inspect the bumper regularly for signs of material degradation. Over months of use and washing, the mesh fabric may begin to fray, the stitching on the ties may weaken, or the hook-and-loop fasteners may lose their grip. If you observe any broken ties, detached fasteners, or compromised mesh, remove the bumper immediately and do not attempt to reuse it.
Always adhere strictly to the manufacturer’s stated age, weight, or developmental limits. Many manufacturers specify a maximum age or a particular developmental stage—such as when the baby can sit up unassisted—at which the product must be removed. Stop using the bumper immediately once your baby reaches any of these thresholds, regardless of how secure the installation still appears.
When it is time to remove the bumper, transition your baby to a completely bare sleep environment. A safe sleep space for an older infant consists of a firm mattress, a tight-fitting sheet, and no extra bedding, bumpers, or soft toys. Removing the bumper entirely ensures that your growing, active baby remains safe from climbing hazards and falls as they explore their crib.
Frequently Asked Questions (FAQ)
Can I use a mesh bumper on a crib with solid sides?
Traditional tie-on mesh bumpers are designed specifically for cribs with open slats, as they rely on the vertical bars to anchor the ties and keep the fabric taut. Attempting to use a standard mesh bumper on a solid-sided crib is highly unsafe, as there are no designated attachment points to secure the panels. Without proper anchoring, the bumper will sag, slide down, or bunch up, creating a serious entrapment or suffocation hazard. If you have a solid-sided crib, consult the manufacturer’s guidelines to see if they offer specialized, compatible models, or maintain a bare crib setup without any bumpers.
What should I do if the bumper ties are too short for my crib slats?
If you find that the bumper ties are too short to wrap securely around your crib slats, do not attempt to extend them using household strings, ribbons, yarn, or makeshift ties. Adding unauthorized extensions introduces a severe strangulation hazard into the sleep environment, as these materials can easily unravel or wrap around a baby’s neck or limbs. Instead, stop using the product immediately. Return or exchange the bumper for a model that is explicitly sized and designed to fit your specific crib’s dimensions and slat thickness.
Community discussion
Share your experience or ask a question. Comments are reviewed before publication.