
Securing your kitchen cabinets is one of the most critical steps in childproofing your home. As toddlers grow, their natural curiosity drives them to explore low-lying storage spaces, which often house heavy cookware, sharp utensils, or chemical cleaning agents. The cubble magnetic lock offers an effective, invisible safety solution that keeps cabinet doors securely shut without altering the exterior aesthetic of your kitchen. Unlike traditional strap locks or latch locks that remain visible on the outside of your furniture, magnetic locks are mounted entirely on the inside of the cabinets, preserving your home’s interior design while keeping curious hands out.
Installing these locks properly requires careful preparation, precise alignment, and an understanding of how adhesive bonds under different environmental conditions. In Singapore’s warm and highly humid climate, ensuring a long-lasting adhesive bond is particularly challenging, as moisture and airborne cooking grease can easily compromise the stickiness of the tape. By following a systematic installation process, you can ensure that your magnetic locks remain firmly in place, providing reliable protection for your child and peace of mind for your family.
What You Need Before Installing the Cubble Magnetic Lock
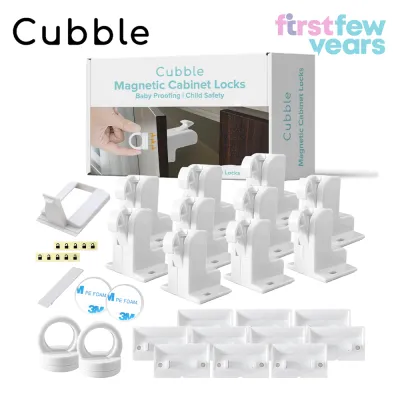
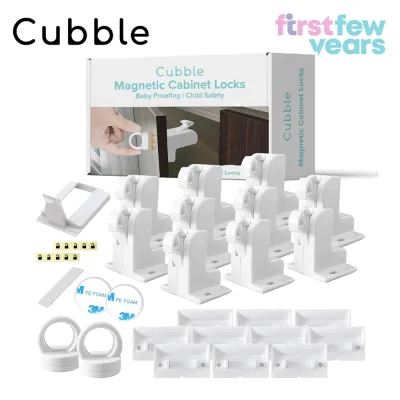
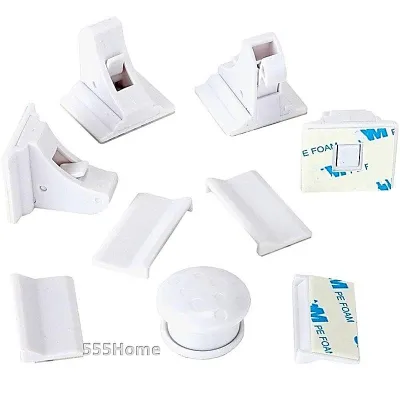
Before beginning the installation process, gather all the necessary tools and materials to ensure a smooth, uninterrupted workflow. The standard Cubble magnetic lock kit typically includes the lock bodies, catch plates, an installation cradle or locator template, magnetic keys, and optional mounting screws. In addition to the kit, you will need a few household items to prepare the surfaces and mark the alignments accurately. Keep a bottle of isopropyl alcohol (rubbing alcohol) or a mild degreasing cleaner, a clean microfiber cloth, a measuring tape, a pencil, and a flashlight on hand to illuminate the dark corners of your cabinets.
Products mentioned in this guide
Prices are valid at publication and may change. Please refer to the product page for the latest price.
Proper surface preparation is the single most important factor in preventing adhesive failure. Kitchen cabinets, especially those located near the stove, oven, or sink, naturally accumulate a thin layer of grease, cooking oil residue, and moisture over time. If you apply the adhesive backing directly onto this residue, the bond will fail within a few days, or even hours, under the force of a child pulling on the door. Thoroughly scrub the interior frame of the cabinet and the inner surface of the cabinet door where the lock components will be mounted, then wipe the areas dry with a clean cloth and allow them to air-dry completely.
Before peeling off any adhesive backing, take a moment to inspect the internal layout of your cabinets. Check the clearance between the cabinet frame, the closed door, and any internal shelving, pull-out baskets, or drawer runners. The lock body and catch plate require a small amount of physical space to sit flush against each other when the door is closed. If your cabinet shelves extend all the way to the front edge of the frame, you may need to adjust the shelves backward or position the lock slightly higher or lower to avoid any physical obstruction that could prevent the door from closing completely.
Finally, always read the manufacturer instructions included in your specific Cubble kit before proceeding. While the general principles of magnetic lock installation are consistent, physical dimensions, adhesive curing times, and the design of the installation cradle can vary slightly between product batches. Understanding the specific components and their names beforehand will prevent confusion during the mounting process.
Step-by-Step Installation Process for Kitchen Cabinets
Mounting the lock components accurately ensures that the latch mechanism catches smoothly every time the door is closed. The installation process is divided into two primary phases: securing the main lock body inside the cabinet frame, and then aligning and attaching the catch plate to the inner face of the cabinet door.

Mounting the Lock Body on the Cabinet Frame
To begin, identify the optimal location for the lock body on the inside of the cabinet frame. For standard single-door cabinets, the top corner opposite the hinges is the most secure and convenient spot. For double-door cabinets without a center stile (the vertical wooden bar between doors), you will install the locks near the top edge where the two doors meet, ensuring each door has its own independent lock and catch mechanism.
If your Cubble kit includes an installation cradle, place the lock body into the designated slot of the cradle first. The cradle acts as a physical alignment guide, holding the lock body and the catch plate in the perfect relative position during the installation process. If you are installing the lock manually without a template, hold the lock body against the inside of the cabinet frame, ensuring the latch hook is positioned roughly 2 to 3 millimeters back from the front edge of the frame to allow the cabinet door to close completely flush.
Once you have verified the placement, peel the protective paper off the adhesive backing on the lock body. Carefully position the lock body (or the installation cradle holding the lock body) against the cleaned, dry surface of the cabinet frame. Press the component firmly against the wood or laminate surface for at least 30 seconds. Applying firm, continuous pressure activates the pressure-sensitive adhesive, ensuring a deep and even bond with the cabinet substrate.
After pressing the lock body into place, it is absolutely vital to let the adhesive cure undisturbed. Do not attempt to test the lock or pull on the cabinet door immediately. Most high-quality acrylic adhesives require a full 24 hours to cure completely and reach their maximum holding strength. During this curing period, slide the manual switch on the lock body to the “unlocked” or “disabled” position so that the cabinet door can be opened and closed freely without putting any physical tension or stress on the newly applied adhesive.
Attaching the Catch Plate to the Cabinet Door
With the lock body secured to the cabinet frame, the next step is to align and attach the catch plate to the inside of the cabinet door. The catch plate is the flat plastic piece that the lock’s spring-loaded hook grabs onto when the door is closed. Perfect alignment between these two parts is essential; if the catch plate is off by even a few millimeters, the lock hook will fail to engage, leaving the cabinet unsecured.
If you are using the installation cradle, insert the catch plate into the upper slot of the cradle, which should still be temporarily attached to the already mounted lock body. Peel the adhesive backing off the catch plate. Slowly and gently close the cabinet door until it is fully shut and flush with the cabinet frame. Press firmly on the outside of the cabinet door directly over the area where the lock is located. This action transfers the catch plate from the cradle onto the inside of the cabinet door in perfect alignment.
If you are installing the components manually without a cradle, you will need to measure and mark the placement. Close the cabinet door slightly, look through the gap with a flashlight, and use a pencil to mark the exact height and depth of the lock body’s hook on the inside of the door. Open the door, align the catch plate with your pencil marks, peel the adhesive backing, and press the plate firmly against the door for 30 seconds.
Once the catch plate is stuck to the door, open the cabinet door carefully and remove the plastic installation cradle if you used one. Apply firm pressure directly to the catch plate for another 30 seconds to reinforce the adhesive bond. Check that the cabinet door closes smoothly and sits completely flush with the surrounding cabinetry. If the door stands slightly open or bounces back, the catch plate may be positioned too far forward, requiring a slight adjustment.
Before finalizing the installation, verify the thickness of your cabinet doors. Most magnetic child safety locks are designed to operate through standard cabinet doors with a thickness of up to 30 or 35 millimeters. If your kitchen cabinets are made of exceptionally thick solid timber, or if they feature heavy decorative face moldings, test the magnetic key against the outside of the door to ensure the magnetic field can penetrate the wood and successfully retract the internal latch hook.
How to Use and Test the Magnetic Key
Understanding the mechanical operation of the magnetic key is essential for daily convenience and safety. The key contains a powerful neodymium magnet that, when placed against the exterior of the cabinet door, attracts the internal metal spring-loaded latch of the lock body, pulling it downward and releasing it from the catch plate.
To test the functionality of your newly installed lock, first ensure that the adhesive has cured for the recommended 24 hours. Slide the manual switch on the lock body to the “active” or “locked” position, then close the cabinet door. Gently pull on the cabinet door handle; the door should open only a fraction of a millimeter before the internal latch catches securely, preventing the door from opening further. Next, take the magnetic key and place it flat against the outside of the cabinet door, directly opposite where the internal lock body is mounted. You should hear a distinct mechanical “click” indicating that the latch has retracted. While keeping the key in place, pull the door open smoothly.
Because toddlers are highly observant, they will watch your movements closely and quickly learn that placing a specific plastic disc against the cabinet door opens it. To prevent children from mimicking this behavior or finding the key, always store the magnetic key safely out of their reach and sight. Many parents find it convenient to store the key high up on the side of the refrigerator, on a high metallic shelf, or on a dedicated magnetic wall mount installed well above adult shoulder height. It is also wise to keep a spare magnetic key in a separate, secure location in case the primary key is misplaced.
Most Cubble magnetic locks feature a convenient temporary disengage mode. This is highly useful during periods of high kitchen activity, such as when you are cooking a large meal or putting away groceries, and need constant, unrestricted access to your cabinets. To activate this mode, open the cabinet door and slide the small plastic switch on the lock body to the “off” or “unlocked” position. This keeps the latch hook permanently retracted. Once you are finished in the kitchen, remember to slide the switch back to the “on” position to re-engage the childproofing system.
Troubleshooting Common Installation Issues
Even with careful planning, you may encounter minor issues during or after the installation of your magnetic locks. Understanding how to diagnose and resolve these common problems will help maintain the security of your kitchen cabinets.
- Lock Not Catching: If the cabinet door opens freely without locking, the lock body and the catch plate are likely misaligned. Open the door and inspect the components to see if they are crooked or offset. If necessary, carefully peel off the catch plate, clean the surface to remove any adhesive residue, apply a fresh piece of double-sided mounting tape, and reposition the plate using the alignment cradle or precise pencil measurements.
- Adhesive Failure: If a lock component detaches from the cabinet surface, it is usually due to incomplete surface cleaning, high ambient humidity, or insufficient curing time. To resolve this, scrape away all remaining adhesive residue from both the cabinet surface and the plastic component. Wipe the area thoroughly with isopropyl alcohol and let it dry. Apply a high-quality, heavy-duty double-sided acrylic foam tape (such as 3M VHB tape) to the component and reinstall it, ensuring you allow a full 24-hour curing period. If your cabinets are made of solid wood or thick plywood and you prefer a permanent, mechanical connection, you can use the small wood screws provided in the Cubble kit to screw the components directly into the woodwork. Always check your rental agreement before drilling into cabinets if you do not own the property.
- Weak Magnetic Unlocking: If the magnetic key fails to release the latch, check if the cabinet door material is too thick or if there is metal interference. If your doors have decorative metal trim, foil laminates, or internal metal brackets, these materials can block or redirect the magnetic field. Ensure you are placing the key flat against the exact spot where the lock is mounted. If the door thickness exceeds the maximum limit specified by the manufacturer, you may need to look for an alternative childproofing lock designed for extra-thick doors.
- Door Not Closing Flush: If a cabinet door remains slightly ajar after installation, the lock body or catch plate is likely mounted too close to the front edge of the cabinet opening, causing the physical plastic bodies to collide before the door can close fully. To fix this, adjust the depth of the lock body by moving it a few millimeters deeper into the cabinet interior.
Ongoing Safety Checks and Maintenance
Childproofing is not a one-time task; it requires ongoing vigilance to ensure that the safety measures remain effective as your child grows and becomes stronger. Establish a routine to perform periodic safety checks on all the cabinet locks in your home.
Once a month, perform a gentle “pull test” on every locked cabinet door. Pull on the door with moderate force to simulate the actions of a determined toddler. Inspect the adhesive backing of both the lock body and the catch plate to ensure there are no signs of peeling, lifting, or cracking. In humid kitchen environments, the constant exposure to steam from cooking and dishwashers can slowly degrade adhesives over time, making regular physical inspections essential.
Examine the plastic components of the locks for physical wear, stress fractures, or weakened internal springs. If a lock latch feels sluggish or fails to spring back into the locked position immediately when the magnetic key is removed, replace the lock body right away. A malfunctioning latch compromises the safety of the entire cabinet.
Always remember that child safety locks are a secondary line of defense and should never replace active adult supervision. Children develop physical strength and problem-solving skills rapidly; a lock that successfully kept them out at twelve months old might be bypassed or broken by a persistent two-year-old. For absolute safety, always store high-risk household items—such as toxic cleaning chemicals, aerosol sprays, dishwasher pods, sharp knives, and heavy glassware—in high wall-mounted cabinets that are completely out of reach of children, rather than relying solely on locked lower cabinets.
Community discussion
Share your experience or ask a question. Comments are reviewed before publication.